REVIEW · KAMIGATA UKIYOE MUSEUM
Kamigata Ukiyoe Museum:Ukiyo-e Woodblock Printing Experience
Book on GetYourGuide →Operated by LINKTIVITY Inc. · Bookable on GetYourGuide
Woodblocks turn art into a hands-on puzzle. At the Kamigata Ukiyo-e Museum, you print an ukiyo-e yourself using original museum woodblocks, with an instructor guiding you through multi-color technique. You choose a beginner, intermediate, or advanced course, and the result is something you can actually hold.
Two things I really like: the hands-on printing is the focus (not just watching), and you leave with a finished piece in a clear file, ready to pack. One thing to consider is that you’ll need a separate museum admission ticket for access to the space, so the workshop fee isn’t the whole cost.
In This Review
- Key things to know before you go
- Where this workshop fits in Osaka’s old-part vibe
- Price and value: the $5 printing fee plus museum admission
- Choosing your course level: beginner, intermediate, advanced
- What the workshop feels like once you’re in the room
- The real magic: printing as the making of ukiyo-e
- Multi-color technique: what you do with the tools
- Timing and pacing: 30 minutes to 1 hour that actually works
- Taking your print home: a souvenir you’ll keep
- Pair it with a museum walk-through for best impact
- Who should book this woodblock session, and who might not love it
- Should you book Kamigata Ukiyo-e Museum’s printing experience?
- FAQ
- Do I need the museum admission ticket to join the printing course?
- How long does the ukiyo-e woodblock printing experience take?
- What will I print and how many colors will I use?
- Are there different course levels?
- What languages are available with the instructor?
- What happens if I arrive late for my reservation?
Key things to know before you go
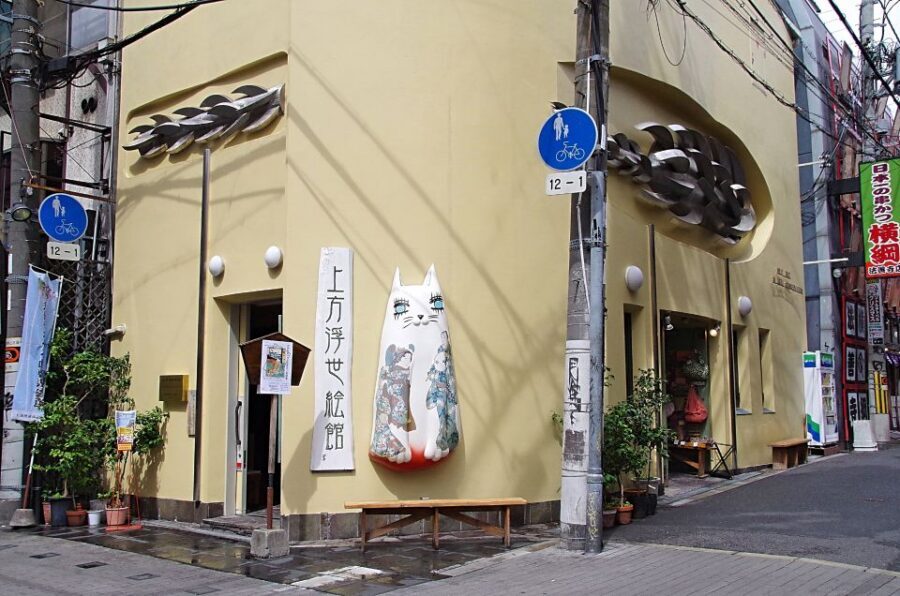
- Original woodblocks: you print from the museum’s real blocks, not replicas.
- 3–4 colors on quality Japanese paper: the session is designed to produce a finished-looking result.
- Beginner-friendly techniques: you’ll practice baren rubbing, pressure, and simple painting methods.
- You learn what printing changes: the workshop explains why printing is central to how ukiyo-e gets made.
- Tatami-room seating: you’ll sit on zabuton cushions in a Japanese-style room (small stools are limited).
- Short and focused: plan on 30 minutes to 1 hour, not a half-day of activities.
Where this workshop fits in Osaka’s old-part vibe
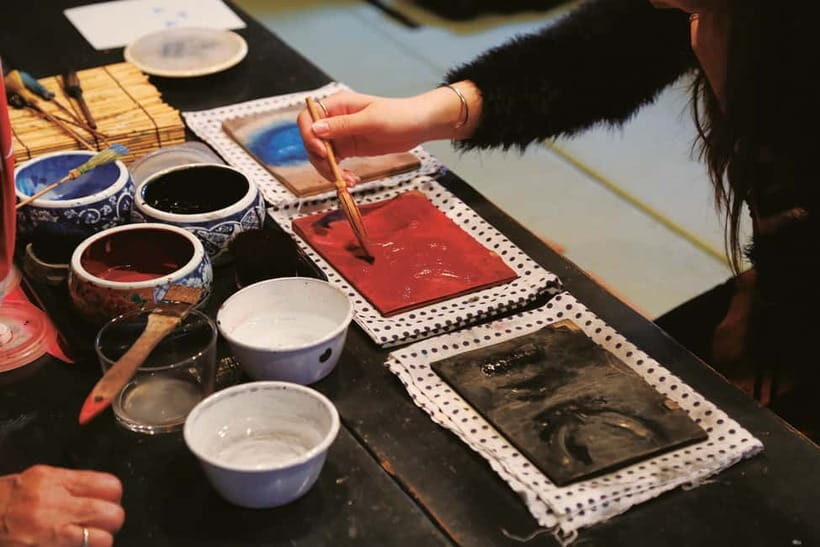
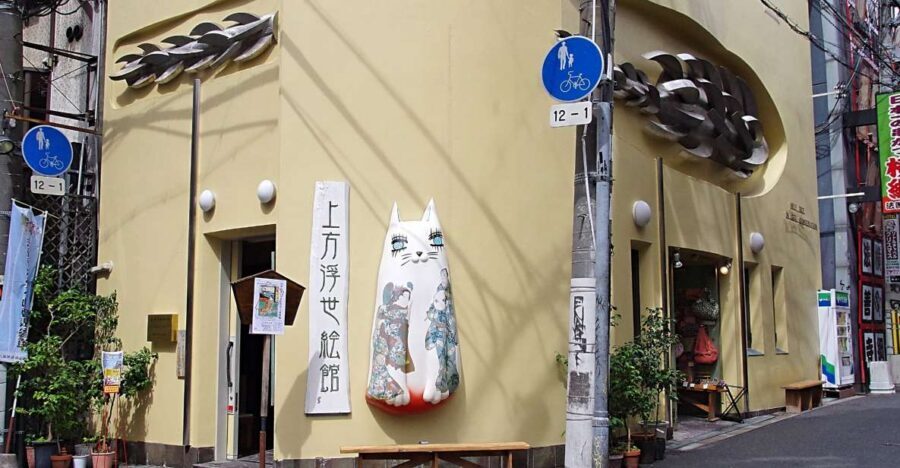
This experience is at the Kamigata Ukiyo-e Museum, on Honshu, in Osaka’s older area just behind Dotonbori. That matters because you can make it part of a very walkable day: you do the printing class, then you can keep wandering through the museum galleries after.
The pace is intentionally compact. You’re not sent on a scavenger hunt across town. Instead, you’re guided right into the Japanese-style exhibition room on the 4th floor, where the workshop happens. In practice, that means less transit stress and more time focused on the craft.
One small “culture by default” detail: the room setup is traditional. You’ll be seated on zabuton cushions in a tatami room. If you prefer something firmer, small stools exist, but they’re limited, so it’s worth arriving on time and being ready to sit comfortably.
You can also read our reviews of more museum experiences in Kamigata Ukiyoe Museum
Price and value: the $5 printing fee plus museum admission
The workshop printing experience is listed at $5 per person, and it includes the instructor-led course. That’s a strong value for the craft: you get guided instruction, you use multi-color technique, and you end with a take-home artwork.
But the price isn’t just the $5. You’ll also need the museum admission ticket to participate in the course, because the printing happens inside the museum building. So think of the $5 as the craft fee and the admission ticket as your entry into the full experience.
Here’s the practical way to judge value: if you like making art, even at a beginner level, this is one of the cheapest ways to produce a real, personalized ukiyo-e souvenir in Japan. If you only want photos and a quick peek, you might find it too hands-on for your taste. But if you enjoy doing, not just looking, it’s a good deal.
Choosing your course level: beginner, intermediate, advanced
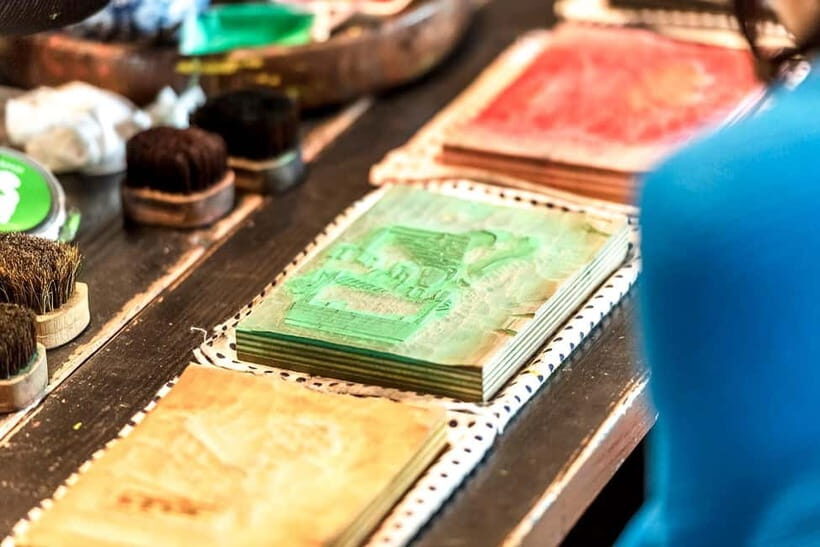
You’ll pick from three courses: beginner, intermediate, and advanced. The key idea is that the printing process is the heart of ukiyo-e, and each level nudges you toward more skill and control.
- Beginner course: designed so you can create something unique even without experience. You’ll still practice core methods like applying pressure and using a baren (the tool used for burnishing/rubbing during printing). You’ll also experiment with painting techniques that affect how the colors land.
- Intermediate course: for people who want more challenge and more refinement. The structure remains the same, but you’ll likely need better technique and patience as you manage multiple steps and colors.
- Advanced course: this is the toughest option in the set. It can involve more colors and steps, meaning the timing and pressure need to be more consistent.
A useful mindset: don’t treat the “advanced” level like a test you must ace. Think of it like choosing a different challenge level of a craft you’ll learn in real time. If you’re comfortable learning by doing, advanced can be great. If you’re worried about getting it wrong, beginner is still a legitimate way to get a satisfying result.
What the workshop feels like once you’re in the room
After you check in, you’ll go to the Japanese-style exhibition room on the 4th floor. You’ll sit on tatami with zabuton cushions, with optional small stools available but limited. This setup isn’t just for aesthetics. It signals that this is a craft workshop, not a classroom with chairs and worksheets.
The instructor leads you through the process step by step. English is available, and Japanese support is also provided. Many people find that having an instructor who can be patient and hands-on makes the difference between a confusing “try your luck” activity and a real skill-building session.
One name that comes up in the experience is Mrs. Saya, described as warm, encouraging, and attentive to detail. Even if your instructor isn’t Mrs. Saya, the workshop style is clearly meant to be supportive: you’re meant to succeed with what you’re given, not worry that you’re “not artistic enough.”
Also note the group format: it’s a private group setup where only one group is available in a class. That tends to keep the pace manageable, because the instructor isn’t juggling multiple groups at once.
The real magic: printing as the making of ukiyo-e
Ukiyo-e isn’t just drawing. The printing stage is what turns carved intentions into repeatable, crisp art. This workshop leans hard on that idea.
You’ll use the museum’s original woodblocks to print your own ukiyo-e. The session emphasizes:
- how the carved blocks transfer color,
- how the layering of colors works,
- and why “printing” is a separate skill from drawing.
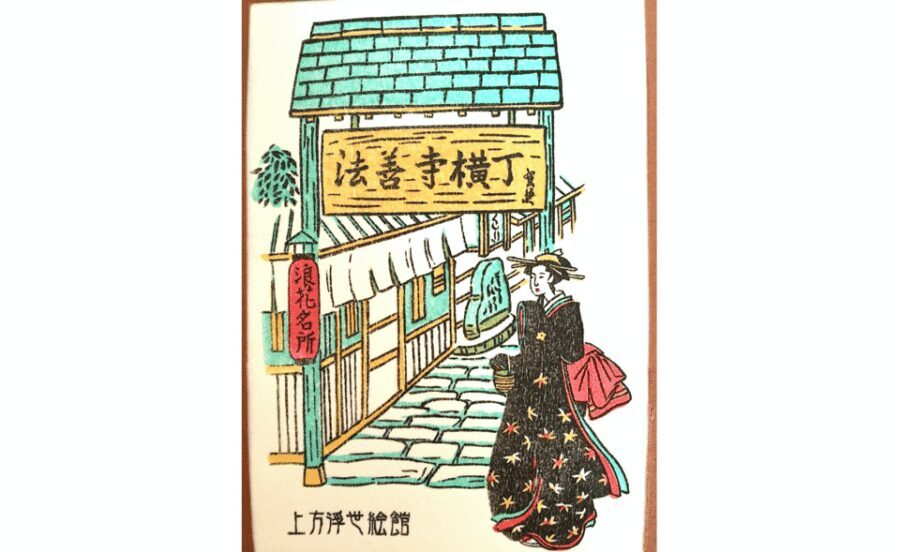
You’ll print 3 to 4 colors onto high-quality Japanese paper. That number matters. It’s enough to see how layering creates depth and character, without stretching the class so long that beginners get rushed. You’re not just stamping a single shade and calling it a day. You get a multi-color print that looks like ukiyo-e should look.
During the class, you’ll practice techniques that affect the result:
- baren rubbing
- applying the right pressure
- experimenting with brush/painterly touches that work with the block printing process
The practical takeaway: by the end, you understand why ukiyo-e looks the way it does. When you return to the museum displays afterward, you can almost see the steps behind the final image.
Multi-color technique: what you do with the tools
Here’s the hands-on part, in plain terms.
First, you’ll work with the woodblock prints process under instruction. The block is already carved—your job is to guide the color application and make sure the transfer is clean. Then you’ll layer colors, printing each one in sequence.
The baren part is a big deal. It’s the tool you use to rub/burnish the paper against the block so the ink transfers properly. Pressure isn’t abstract here. If you press too lightly, results can look patchy. If you press too hard or too unevenly, you can muddy the lines. The instructor’s job is to help you find that sweet spot.
You’ll also learn how painting technique and printing technique interact. Beginners often focus only on what color they’re using. This workshop shifts attention to how the color and the paper behave together during printing. That’s why the session is so rewarding even if you’re not an artist.
And yes, you’ll end up with a finished piece. That’s part of why people rate this activity so highly: it’s short, but it’s not empty.
Timing and pacing: 30 minutes to 1 hour that actually works
This is not a long workshop. It’s 30 minutes to 1 hour, depending on your course and the flow of the class. That’s a benefit for many people because you can slot it into a normal sightseeing day.
But the short time also means you should arrive ready to focus. If you show up late, it can cut into your session time. The experience is structured around producing a finished multi-color print, so the instructor can’t pause for half an hour while you catch up.
If you’re the kind of traveler who loves to wander in every direction with no plan, this activity will still work, but build a buffer. Japan is great, yet timing still matters when you’re doing a hands-on craft.
Taking your print home: a souvenir you’ll keep
You don’t just get a certificate or a photo. When you finish, you take your artwork home in an original clear file (and some people also note decorative plastic sleeves, depending on how your session is handled).
That’s a smart souvenir choice for two reasons:
- Your print is personal. It’s made by you using the same woodblock technique behind the museum pieces.
- It’s easy to pack. Clear files/sleeves help protect it from bending in your bag.
If you’re traveling with limited space, this is the kind of souvenir that avoids the “how do I carry this home?” stress. It’s also something you can display later, which turns the experience into a lasting memory instead of a ticket stub in a drawer.
Pair it with a museum walk-through for best impact
One of the best ways to get value from this activity is to do it alongside museum time. Many people find that printing first makes the gallery more meaningful, because you understand the role of the printing stage and why so many blocks and layers are involved in ukiyo-e.
After your class, look at the museum displays with new eyes:
- Try to identify layered color effects.
- Notice edges and how different tones land.
- Appreciate the difference between what’s carved and what’s transferred through printing.
Even if you’re not an ukiyo-e expert, this makes the museum feel less like a static gallery and more like a living process. You’ll also get the satisfaction of knowing your hands participated in the same fundamental craft.
Who should book this woodblock session, and who might not love it
This is a great fit if you:
- want a hands-on art activity in Japan that doesn’t require previous experience,
- like making a souvenir you’ll actually keep,
- enjoy learning how traditional techniques work (not just reading about them),
- prefer a short, focused workshop over a half-day course.
It’s less ideal if you:
- hate sitting on tatami-style seating for any period,
- want only casual, low-involvement sightseeing,
- expect lots of lecture time and history talk. This workshop is built around doing.
If you’re traveling as a pair, it’s also a strong option. The private group setup and limited class grouping means you’re more likely to get real attention from your instructor during the printing steps.
Should you book Kamigata Ukiyo-e Museum’s printing experience?
If you enjoy creating things with your own hands, yes. The combination of original woodblocks, multi-color printing, and a take-home finished print for a low craft fee makes this one of the best value art experiences in the Osaka area.
Book it if you want to understand ukiyo-e in a practical way. You’ll leave with a stronger appreciation for the craft and a souvenir that feels earned, not bought.
Skip it only if you’re looking for a passive activity, or if you know you can’t comfortably do tatami seating and focused instruction for up to an hour. Otherwise, this is exactly the kind of small, skill-based experience that makes Japan feel close-up and real.
FAQ
Do I need the museum admission ticket to join the printing course?
Yes. The printing experience fee does not include the Kamigata Ukiyo-e Museum admission ticket.
How long does the ukiyo-e woodblock printing experience take?
Plan on about 30 minutes to 1 hour, depending on the course and starting time availability.
What will I print and how many colors will I use?
You’ll use the museum’s original woodblocks to print 3 to 4 colors on high-quality Japanese paper.
Are there different course levels?
Yes. You can choose from beginner, intermediate, or advanced courses.
What languages are available with the instructor?
The instructor support is available in English and Japanese.
What happens if I arrive late for my reservation?
If you do not arrive within 30 minutes of your reservation time, your reservation is considered cancelled, and no refunds are provided.