REVIEW · KOCHI PREFECTURE
Make traditional Tosa washi paper using a recycling technique
Book on Viator →Operated by Attractive JAPAN · Bookable on Viator
Paper-making can be surprisingly soothing. I like that you see almost every step of traditional Tosa washi production up close, explained by Mrs Inoue, a 4th generation craftsperson, and I especially love the twist of recycling old Tosa washi into something new you help create. The main thing to plan for is that you may get a bit wet—apron is provided, but splashes happen when you’re working with water and fibers.
What you get feels practical, not just scenic: you’ll learn about kozo (paper mulberry) bark, watch the boiling and cleaning process, see how the tororoaoi (sunset hibiscus) root paste is made, and then try the hand work yourself. The pace stays calm in a quiet rural area near one of Japan’s clearest water basins, the Niyodo River, and you finish with local tea and sweets.
In This Review
- Key highlights before you go
- A Kochi washi workshop where the full process is the point
- Getting started at the atelier with kozo and the Tosa washi basics
- The rare part: watching boiling, cleaning, beating, and paste-making
- Your hands-on time: recycling old Tosa washi into something new
- Choosing your project: tapestry, lamp shade, or a paper bag
- Quiet rural timing, tea, and a small reset at the end
- Price and value: what $104.05 gets you in real learning time
- Who this workshop is for (and who might want a different option)
- Practical tips to help you enjoy it more
- Should you book the Tosa Washi Inoue recycling workshop?
- FAQ
- How long is the Tosa washi paper-making experience?
- Where does the workshop meet?
- Is it private for just my group?
- What do I make during the workshop?
- What steps will I see during the demonstrations?
- Will I need special clothing?
- Is it safe to participate if there’s a tool involved?
- Is confirmation provided after booking?
Key highlights before you go
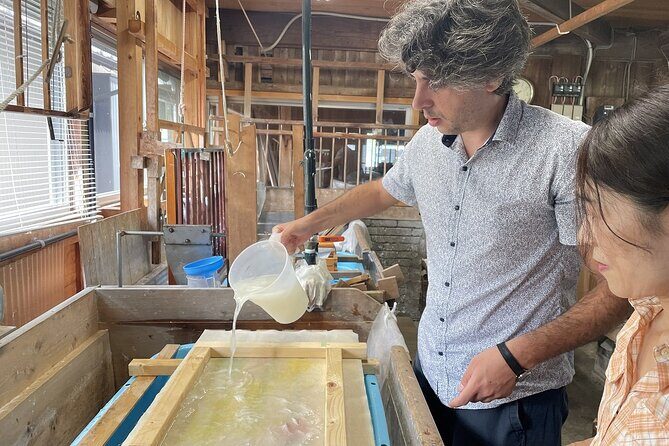
- 4th generation instruction from Mrs Inoue in a studio with over 120 years of Tosa washi tradition
- Nearly the full process shown: kozo prep, paste-making, beating, and sheet formation
- Recycling old Tosa washi into new paper art rather than starting from scratch
- Choose your project: tapestry, lamp shade, or paper bag
- Handwork with a beating stick, so follow the safety guidance closely
- Tea and sweets to end the session on a gentle note
A Kochi washi workshop where the full process is the point
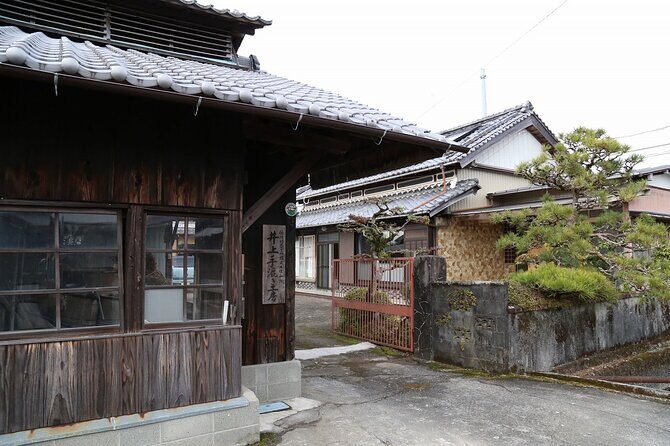
Tosa washi is often sold as a finished product—paper you hold, admire, maybe frame. This workshop is different because the focus is the process itself. You start by getting oriented to Tosa washi in the studio, meet Mrs Inoue (the current 4th generation washi maker), and get a real sense of what makes this paper type distinct.
One big reason to pick this class: it’s not a short highlight reel. You’re shown almost all steps involved in making washi paper, including parts that many studios skip because they take time, need explanation, or are harder to translate for visitors. If you care about craft details—why certain materials are used and what each step accomplishes—you’ll enjoy how methodical and hands-on it is.
The setting also matters. This takes place in a quiet rural area near the Niyodo River, one of Japan’s clearest water basins. It gives the workshop a slower rhythm, and that helps when you’re learning techniques that are physical and repetitive in the best way.
You can also read our reviews of more tours and experiences in Kochi Prefecture.


Getting started at the atelier with kozo and the Tosa washi basics
You meet at Tosa Washi Inoue Paper Workshop at 2776 Takaokachōotsu, Tosa, Kochi 781-1102, Japan, and the experience begins with a warm welcome from Mrs Inoue. She walks you through the history and characteristics of Tosa washi, then points you to the raw materials that make the whole system work.
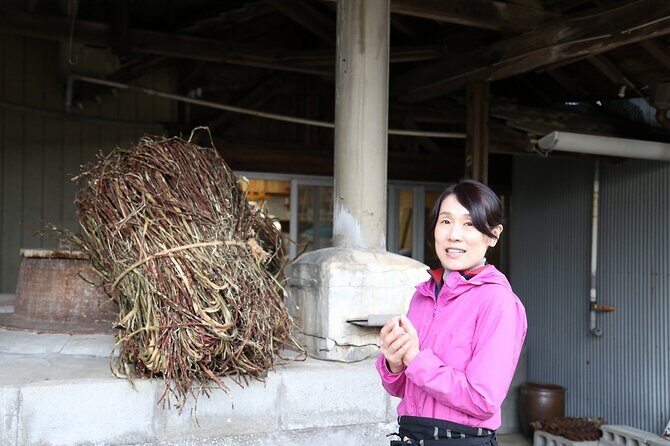
The first material you’ll encounter is kozo, the paper mulberry. This matters because washi isn’t made from wood pulp the way many modern papers are. Kozo bark is the source fiber, and seeing the bark and hearing how it’s processed helps you understand why the finished sheets feel and behave the way they do.
You’ll get a guided look at how kozo is treated—boiled, cleaned, and beaten—so when you later work with the fibers in your own project, it doesn’t feel mysterious. It’s like getting the blueprint before you pick up the tools.
The rare part: watching boiling, cleaning, beating, and paste-making
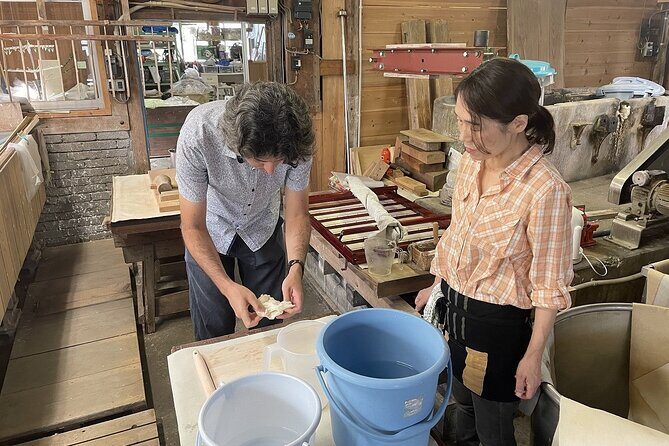
Most washi experiences give you the fun finale and a few quick steps. Here, Mrs Inoue shows you almost everything, and that changes how you remember the class. You’ll see multiple stages explained in detail:
- Kozo bark is boiled, then impurities are addressed and removed
- The cleaned material is beaten with a stick so the fibers loosen and become workable
- The gluing paste is made from roots of tororoaoi (sunset hibiscus)
That last piece is a detail worth appreciating. People sometimes think washi is just “paper fibers plus water.” In reality, the paste is a key ingredient that helps the sheet form and hold together. Even if you don’t memorize every ingredient, you’ll come away with the practical logic: fibers need the right prep, and formation needs the right bonding material.
If you like crafts where the technique is the magic, this is where the workshop earns its reputation. The instruction stays grounded in real steps, not vague storytelling.
Your hands-on time: recycling old Tosa washi into something new
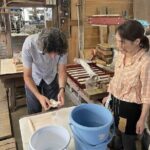
After the demonstrations, you get to do the signature part: making new washi art from recycling old Tosa washi. You’ll work with a process that includes dissolving the old paper in water so it can be re-formed into your chosen creation.
Then comes the beating work—yes, with the beating stick. This is where you learn that washi-making isn’t just pouring and waiting. Your hands help shape how the fibers spread and how the sheet develops. You’ll be guided through what to do and what to avoid, and you should follow the safety instructions provided by the host. (The studio will give you an apron, but water splashes are part of the job.)
At this stage, the workshop feels very satisfying because it’s not only educational. You’re producing something you’ll actually use or keep: a finished item made during the session, not just a sample sheet.
Choosing your project: tapestry, lamp shade, or a paper bag
The workshop lets you pick between three end products: a colorful tapestry, a paper lamp shade, or a paper bag. That choice is more than a souvenir decision—it changes what the crafting process is for and how your final piece behaves.
Here’s how to think about each option:
- Colorful tapestry: If you like visual pattern and want something that reads clearly at a glance, this is often the easiest to appreciate as soon as it’s done.
- Lamp shade: This leans toward the “functional art” side. You’re making paper intended to work as a light-filtering surface, so you’ll likely pay more attention to how the fibers settle and how the texture will look when light passes through.
- Paper bag: This is the most everyday item of the three. If your goal is a practical craft result, it’s a good pick.
Because the workshop is only about two hours, your project choice also determines how focused the hands-on steps need to be. All three options stay manageable in that time frame, but the vibe shifts depending on whether you want decorative impact, light effects, or usefulness.

Quiet rural timing, tea, and a small reset at the end
After your making session, you finish with local tea and sweets. This ending matters more than it sounds. When you’ve been working with water, fibers, and tools, you want a chance to slow down and let your brain file everything you learned into real memory.
The studio’s calm rural location also helps. You’re not doing this between train platforms and crowds. You’re in a workshop setting tied to local craft life near the Niyodo River, so the whole day feels less like an activity and more like a cultural appointment.
And if you end up there on a rainy day, you’ll still get the same warm welcome. One of the nicest touches mentioned by people who went there is how the host keeps the mood comfortable even when the weather is gloomy.
Price and value: what $104.05 gets you in real learning time
At $104.05 per person for about two hours, this isn’t a “cheap hands-on craft.” But for washi, it’s the kind of pricing that makes sense when you look at what’s included.
Here’s the value logic I’d use when deciding:
- You’re paying for instruction by Mrs Inoue, not just a video and a kit
- You get demonstrations of almost all key steps (kozo prep, boiling/cleaning, beating, tororoaoi paste, and sheet formation)
- You do a hands-on recycling process, dissolving old Tosa washi to make new paper art
- You get a choice of finished items: tapestry, lamp shade, or paper bag
- You also get local tea and sweets to close out the experience
Another practical point: it tends to book far ahead (on average 179 days in advance). That’s a good sign for quality and a reminder to plan. If you’re visiting Kochi and you want this specific workshop, don’t treat it as a last-minute option.
Also, this is private for your group only, which makes the instruction feel easier to follow. For families or mixed skill levels, that matters because you can ask questions without feeling rushed.
Who this workshop is for (and who might want a different option)
This is ideal if you want something more meaningful than a basic craft class. If you care about how materials work—kozo fibers, tororoaoi paste, the reason beating matters—this experience will make you see washi differently.
It’s also a good fit for people traveling with kids who can handle a hands-on activity, because it’s structured and interactive. One family that went included kids from elementary to teen age range, and they found the explanations and hands-on nature a good match.
You might want to consider a different option if:
- you dislike working with water (even with an apron)
- you’re uncomfortable following safety directions around tools like a beating stick
- you want a very light, low-effort souvenir (this one asks you to participate)
But if you’re the type who enjoys learning craft details and making something with your own hands, this workshop is a strong choice.
Practical tips to help you enjoy it more
A few things will make your visit smoother.
Wear gear you don’t mind getting damp. An apron is provided, but water splashes happen when you’re working with fibers and dissolving paper.
Follow the beating stick instructions closely. This isn’t about intimidation; it’s about keeping everyone safe and helping you get the technique right.
Ask questions about the steps as you go. Mrs Inoue’s explanations cover history and characteristics, but the real value comes when you ask why each process is done—boiling, cleaning, beating, and paste-making all have a reason.
Choose your project based on how you want to use the result. If you want decorative color, pick the tapestry. If you want functional art, choose the lamp shade or bag. The choice helps your brain focus during the two hours.
Plan around a calm visit. Two hours can feel short, but the workshop includes both detailed viewing and hands-on making. Don’t stack it right before something that will stress you out.
Should you book the Tosa Washi Inoue recycling workshop?
If you want a washi experience where you actually understand the craft—not just make a quick souvenir—this one is worth booking. The strongest reasons are the two things you can’t fake: you see almost the full process, and you make new paper from recycled Tosa washi.
Book it if you:
- like detailed demonstrations and hands-on learning
- want to make a real finished item: tapestry, lamp shade, or paper bag
- appreciate quiet, rural craft settings near the Niyodo River
- are comfortable with a bit of mess and tool safety
Skip it if you want minimal participation or you’re not comfortable working with wet materials and a beating stick.
Given the mix of expert-led steps, private-group feel, and a recycling-based project, I’d call it a smart value for people who take craft seriously and want something authentic from Kochi that lasts.
FAQ
How long is the Tosa washi paper-making experience?
It runs for about 2 hours.
Where does the workshop meet?
The meeting point is Tosa Washi Inoue Paper Workshop at 2776 Takaokachōotsu, Tosa, Kochi 781-1102, Japan.
Is it private for just my group?
Yes, it’s listed as a private tour/activity where only your group participates.
What do I make during the workshop?
You’ll create new washi paper art using recycled Tosa washi, choosing between a colorful tapestry, a paper lamp shade, or a paper bag.
What steps will I see during the demonstrations?
You’ll see most steps in making Tosa washi paper, including kozo preparation, boiling/cleaning, beating, and how tororoaoi (sunset hibiscus) root paste is made.
Will I need special clothing?
You’ll be given an apron, but your clothes might get a little wet.
Is it safe to participate if there’s a tool involved?
You will use a beating stick, so you should carefully follow the safety instructions provided by the host.
Is confirmation provided after booking?
You receive confirmation within 48 hours of booking, subject to availability.