REVIEW · ASO
Private E-MTB guided cycling around Mt. Aso volcano & grasslands
Book on Viator →Operated by Aso Caldera Tour · Bookable on Viator
Aso by e-bike is the rare combo of big geology and low effort, and that’s exactly why this private ride feels so different. You start at Aso Station, cruise through Aso’s grasslands in a way that normally stays out of reach, and then work your way up toward the smoking Nakadake crater for payoff views over the caldera. It’s guided, beginner-friendly, and built for getting close to Aso without exhaust fumes or constant road noise.
I love two things right away: the electric assist that makes an 800m elevation change feel doable, and the way the guide ties the scenery to Aso’s human story and geothermal reality. Joe-san and Fuji-san stand out for being friendly and helpful, explaining what you’re seeing along the route, and taking plenty of photos during the ride to share afterward.
One consideration: you do need to pedal and stay balanced, even with assistance, so if your stamina is very limited or you’re worried about wet surfaces, you’ll want to go in with realistic expectations and listen to your guide’s pacing.
In This Review
- Key highlights you’ll care about
- Why this private Aso e-MTB ride feels worth it
- Getting started at Aso Station: gear, test ride, and first views
- Stop 1: Aso Geopark and why early context helps
- Stop 2: Aso town-side sections and the rhythm of the ride
- The climb to Nakadake: Kusa no Michi (weeds road) and 800m of payoff
- How electric assist changes the experience
- If the weather turns
- Stop 3 and the crater moment: getting up close to the smoke
- Coming back down: the caldera opens and grasslands take over
- Stop 4 and beyond: Aso Station ending, luggage options, and hot spring follow-up
- Who this tour fits best (and who should think twice)
- Guides you’ll remember: Joe-san and Fuji-san
- Price and value: what $203.63 gets you in the real world
- What to pack and how to ride comfortably
- Final verdict: should you book this Mount Aso e-MTB tour?
- FAQ
- How long is the private e-MTB guided tour around Mt. Aso?
- Where do we meet for the tour?
- What time does the tour start?
- Is pickup offered?
- Is this tour beginner-friendly?
- How much climbing is involved?
- What’s included in the price?
- Do I need to bring water or snacks?
- Where does the tour end?
- What if the weather is bad?
Key highlights you’ll care about
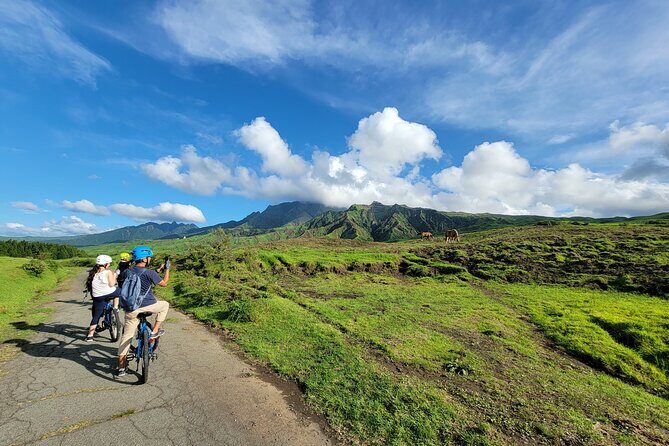
- Private, guided route through Aso’s areas that are normally hard to access on your own
- Nakadake crater approach via the Kusa no Michi road, with close-up views of active smoke
- Beginner-friendly e-MTB setup, including a gear test and hands-on explanations before you roll
- Conservation angle: a portion of your fee supports the Millennium Grassland
- Flexible energy level: electric power helps you climb the caldera without heroics
- Photo help and local history from guides like Joe-san and Fuji-san
Why this private Aso e-MTB ride feels worth it
If you’ve only seen Mount Aso from viewpoints, this tour changes the scale. You get motion—wind in your face, open grassland air, and then the shift from wide plains to volcanic drama. The best part is that you’re not just “passing by.” You’re traveling through the Aso Geopark and grasslands under quiet, electric power, which makes the whole caldera feel more intimate and less like a drive-by photo stop.
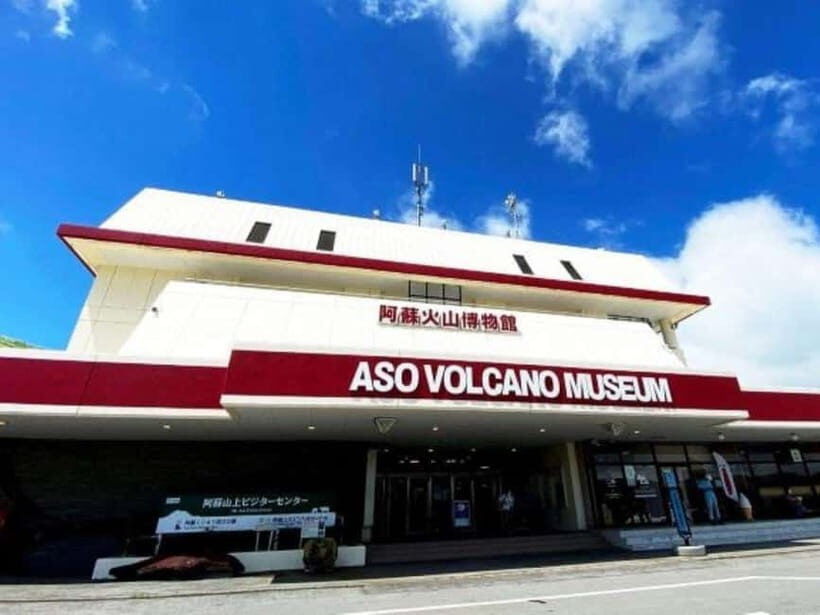
At 1:00 pm, you meet at the entrance of Aso Station (Kurokawa side). From the first ride, the experience is set up to be simple: a quick introduction to Mt. Aso and the grasslands, a gear check, and a test ride. The guide doesn’t treat this like an athletic challenge. It’s more like guided field travel, except you’re moving on an e-MTB.
And yes, the “wow” moment is real. There’s an elevation difference of about 800m between the start area near Aso Station (around 500m above sea level) and the Nakadake crater area (about 1,300m). Even with climbs like that, the electric motor keeps the ride comfortable for people who don’t want to grind uphill for hours.
You can also read our reviews of more tours and experiences in Aso.
Getting started at Aso Station: gear, test ride, and first views
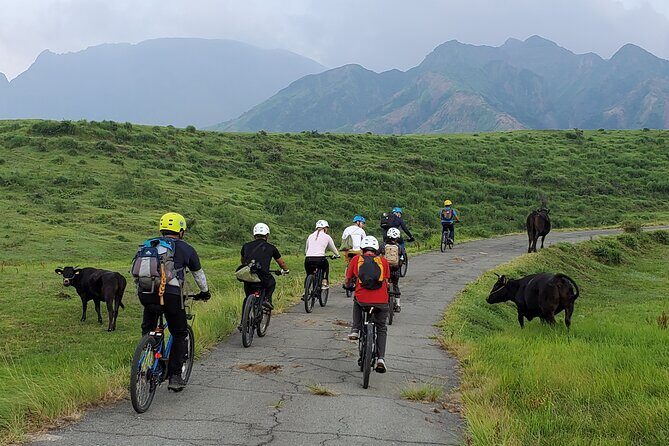
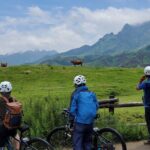
The meeting point is at Aso Station entrance, and the timing matters. Arrive a few minutes early so the group can get everyone fitted and ready without rushing. The tour starts with an introduction to Mt. Aso and the grasslands, so you’re not pedaling in a fog of uncertainty.
Next comes the practical part: you test the bicycle and learn how to use it. Beginners are welcome, and the guide explains everything. That means you can focus on steering and breathing rather than figuring out the bike settings with your heart pounding. Helmets and gloves are included, so you don’t need to pack cycling basics.
One nice detail is that the tour is private. You’re not sharing the guide’s attention with strangers or waiting for other people to catch up. That usually makes the pacing feel calmer, especially when you’re stopping for views or learning how grasslands tie into volcanic terrain.
Stop 1: Aso Geopark and why early context helps
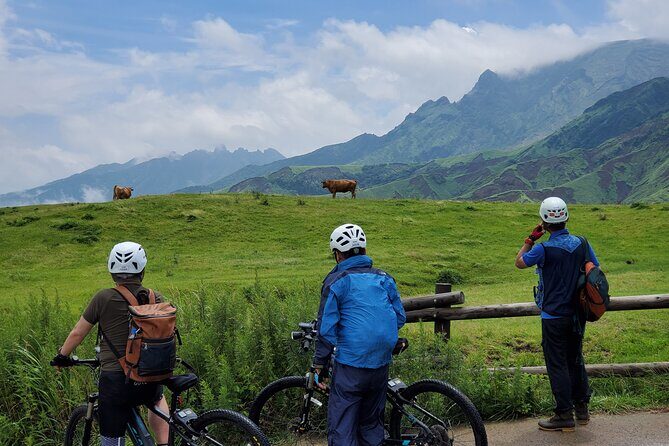
The ride moves to the Aso Geopark area early on. This is where the guide’s explanations make the later crater moments land harder. When you understand what you’re looking at—geological structure, the logic behind the caldera, and why grasslands matter—the tour becomes more than a scenic loop.
You’ll also get a feel for the “sound” of Aso. Since the tour is on e-bikes and in open nature areas, you’re not dealing with the constant noise of traffic. That matters on a place like this, because the whole point is hearing the wind and noticing how the terrain changes as you climb.
Stop 2: Aso town-side sections and the rhythm of the ride
After the geopark introduction, you keep moving through the Aso area (the tour lists a stop at Aso). This part is less about one single monument and more about rhythm: riding, pausing, listening, and adjusting your effort as the terrain trends upward.
The guide will choose breaks at key points. In practice, that means you’re not constantly “stopping every 50 meters,” but you also won’t feel like you’re missing information while you’re catching your breath. For people who are a little unsure about physical strength, this pacing is a big deal. The motor assist is there, but the guide’s stop rhythm is what keeps you from overworking too early.
The climb to Nakadake: Kusa no Michi (weeds road) and 800m of payoff
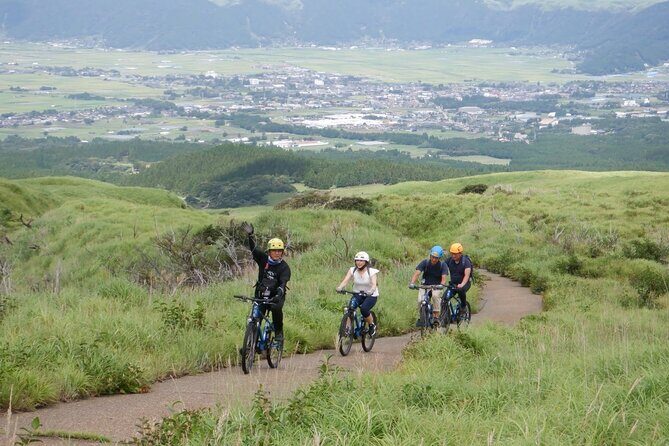
Now we get to the headline: you climb toward Mt. Aso Nakadake Crater at about 1,260–1,300m elevation, following the road called Kusa no Michi, also described as the weeds’ road. Historically, it was used as a path for mountain ascetics. That adds a layer beyond “we rode up a hill.”
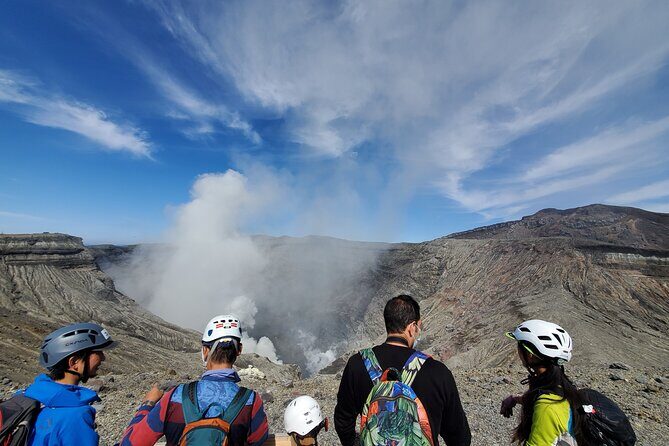
The route is built for getting close to the active volcanic area. You’re not just looking from far away. You reach viewpoints where you can see the crater emitting smoke. Standing there—geared up, guided, and not rushed—changes the way Aso feels. It’s less like watching a spectacle from a bus, and more like you’re standing near a living geological system.
How electric assist changes the experience
This is where the e-MTB really earns its keep. With electric assistance, you can participate without needing extreme bicycling skills. The climb is still a climb—you’ll still feel the effort—but the motor reduces the “I’m going to lose control or blow up halfway” stress.
If you’re someone who usually avoids steep rides, this tour is designed for you. You’ll still want moderate fitness, but you don’t need athletic endurance to enjoy the crater stop.
If the weather turns
Volcanic areas mean weather can shift fast, and the tour operates with a good-weather requirement. If conditions are poor, you’ll be offered another date or a full refund. On a rainy day, the route can still work—one group experienced sudden rain but still reached the smoking crater area, and then the weather cleared for panoramic riding afterward. The takeaway for you: bring a plan for changing conditions and trust the guide’s call on timing.
Stop 3 and the crater moment: getting up close to the smoke
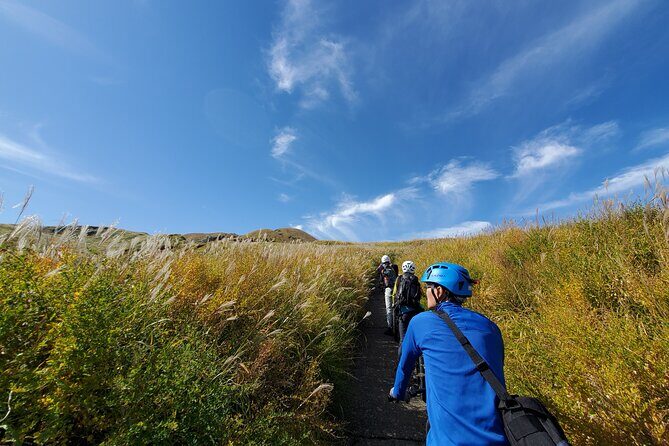
When you reach the Nakadake area, you get the view that most people come to Aso for. The tour’s promise is proximity: smoke, active geology, and a crater feel that’s hard to replicate from a distant overlook.
A practical note: stay aware of your footing and your bike handling around stops. The guide’s explanations and pacing help, but you still ride a bicycle near uneven ground and viewpoint areas. If you’re unsure, ask for guidance on where to slow down and how to park safely while everyone is taking in the scene.
Coming back down: the caldera opens and grasslands take over
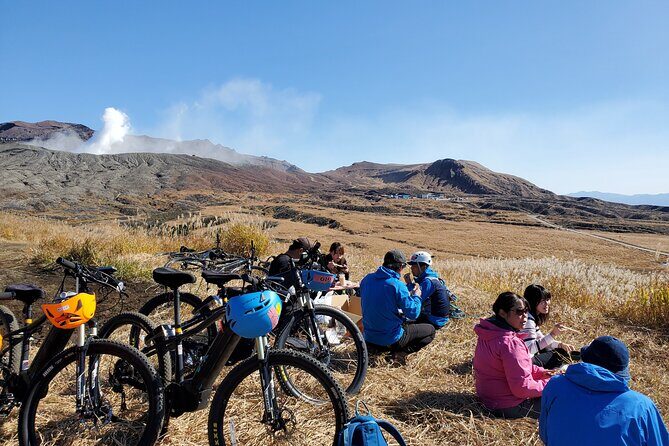
After the crater experience, you ride back down. The tour description highlights a key visual shift: the caldera opens up in front of you, and the massive nature of Aso comes back into view. This is when the ride often feels lighter. You can breathe more, look farther, and enjoy the open grasslands.
This part matters because Aso is not only volcano. The grasslands are part of the same system—wind, elevation, and terrain all interact here. That’s why the tour’s conservation connection feels more than a marketing line.
Stop 4 and beyond: Aso Station ending, luggage options, and hot spring follow-up
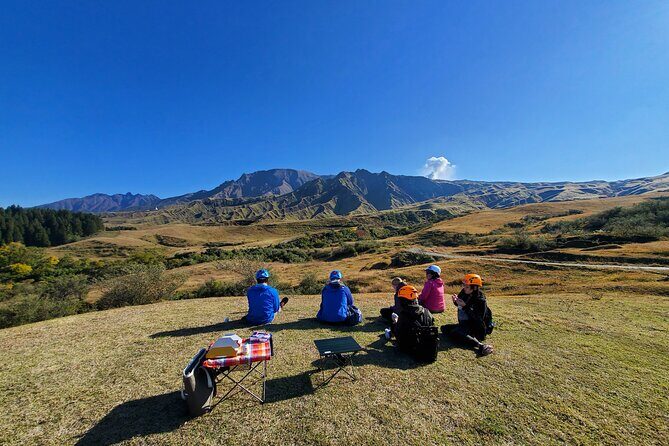
The tour ends back at the entrance of JR Aso Station. If you booked a ride to your accommodation, the handoff can be arranged, but the default is returning to the station entrance.
One useful perk: you can leave your luggage with the tour team. That makes the whole ride smoother, especially if you’re traveling without a lot of cycling gear or if you want to explore the area afterward without carrying bags around.
There’s also an optional idea: your guide can help you get to a hot spring after the tour so you can relax in the caldera area. The tour doesn’t require this, but if you’re doing active biking, it’s a smart pairing. Wet-weather grips, brake heat, and all that uphill effort usually call for a soak.
Who this tour fits best (and who should think twice)
This tour is built for a wide range of riders: beginners are welcome, and electric power supports people who aren’t confident about physical strength. The tour asks for moderate physical fitness, not athlete-level conditioning.
It’s especially good if you want:
- a guided path through areas that feel hard to reach on your own
- crater views without long, exhausting hikes
- a private group experience with photo support and history explanations
Think twice if:
- you’re very uncomfortable with hills or balancing near viewpoint areas
- you can’t handle weather changes and might get discouraged if conditions aren’t perfect
- you don’t want any pedaling at all (the motor helps, but it’s still a bike ride)
Guides you’ll remember: Joe-san and Fuji-san
The human factor matters in a tour like this. In the feedback you shared, Joe-san and Fuji-san are described as friendly and helpful, with a real talent for explaining what you’re seeing. They also took lots of pictures and sent them afterward, which is a practical win: you get your view shots without needing to fumble with a phone mid-ride.
That kind of guidance is also how a private tour feels “worth it.” You’re not just buying access to a route. You’re buying interpretation, safer pacing, and smoother logistics while you ride.
Price and value: what $203.63 gets you in the real world
At $203.63 per person for about 4 hours, you’re paying for a guided, private e-bike experience in a volcanic caldera region. That includes the e-MTB, helmet, and gloves, plus an air-conditioned vehicle (listed as included). Pickup is offered, and the tour uses a mobile ticket system.
What makes the value feel strong:
- You don’t have to manage bike logistics yourself (gear test and explanations are included).
- You get guided access and stopping strategy—important near a volcano.
- The conservation piece means part of your fee supports the Millennium Grassland. That’s not just scenery; it’s an effort to protect the ecosystem.
One small downside to keep in mind: bottled water and food aren’t included. The tour runs about 4 hours, so you should plan to bring a drink if you know you get thirsty, or plan to buy something before/after.
What to pack and how to ride comfortably
The tour includes key gear, but you should still prep like you’re going outdoors in active volcano country. A few practical ideas based on what’s stated and what usually matters for this kind of riding:
- Bring a way to carry a water bottle since water isn’t included
- Wear shoes that grip well for short walks and viewpoint areas
- Be ready for weather shifts (the tour requires good weather, and changes can affect how you experience the crater area)
- If you’re traveling with luggage, use the luggage storage option so you can ride light
If you’re new to cycling on e-MTBs, ask the guide to show you how to use assistance before you start pedaling hard. The point is comfort and control, not proving you can muscle a hill.
Final verdict: should you book this Mount Aso e-MTB tour?
I think this is a strong choice if you want Aso in motion: grasslands, caldera views, and a close-up crater moment—without needing hiking stamina or serious biking skills. The electric assistance is the difference-maker, and the private guide support makes the experience feel smoother and more meaningful.
I’d skip it only if you’re worried about basic pedaling and balance, or if weather is a big stress for you and you’d rather stay flexible. Otherwise, this tour is a smart blend of access, comfort, and a conservation tie-in that makes the grassland stop feel purposeful.
FAQ
How long is the private e-MTB guided tour around Mt. Aso?
The tour runs about 4 hours (approx.).
Where do we meet for the tour?
You meet at the entrance of Aso Station (Kurokawa, Aso, Kumamoto).
What time does the tour start?
Start time is 1:00 pm.
Is pickup offered?
Yes, pickup is offered.
Is this tour beginner-friendly?
Yes. Beginners are welcome, and the guide will explain how to use the bicycle. An electric motor provides assistance, so you don’t need extreme biking skills.
How much climbing is involved?
The route goes from around 500m above sea level at Aso Station up to the Nakadake crater area around 1,300m, an elevation difference of about 800m.
What’s included in the price?
Included: E-MTB, air-conditioned vehicle, helmet, and glove.
Do I need to bring water or snacks?
Bottled water and any food or drink are not included.
Where does the tour end?
It ends back at the entrance of JR Aso Station, unless you booked a ride to your accommodation.
What if the weather is bad?
This experience requires good weather. If it’s canceled due to poor weather, you’ll be offered a different date or a full refund.