REVIEW · AOMORI
Half-day JOMON World Cultural Heritage Sites Tour in Aomori City
Book on Viator →Operated by Tomio Yokouchi · Bookable on Viator
Two Jomon sites, four hours of focus. This half-day Jomon World Cultural Heritage tour in Aomori City pairs two UNESCO-listed prehistoric stops with English guidance and a private ride, so you get the key excavated areas and museums without wasting time. I love the hands-on feel of the sites—especially the Komakino style stone arrangement and the restored elements at Sannai-Maruyama. I also like that Tomio Yokouchi builds the visit around what you want to see, not a rigid script. One thing to plan for: Sannai-Maruyama has an admission fee you pay separately, and the tour requires decent weather.
For logistics, the format is simple: pickup is offered, you’ll use a mobile ticket, and it’s private for just your group. The schedule keeps things moving—2 hours at Komakino and 2 hours at Sannai-Maruyama—so it’s ideal if you want concentrated Jomon culture rather than a long slow wander.
In This Review
- Key highlights you’ll feel right away
- Why the Komakino + Sannai-Maruyama combo makes sense
- Getting picked up in Aomori City (and what “private” changes)
- Stop 1: Komakino Site Preservation Museum and the Komakino stone circle
- What you’ll do here
- Why this stop feels special
- One practical note
- Stop 2: Sannai-Maruyama village remains and the six-log chestnut tower
- What you’ll do here
- The value for your time
- The cost check (important)
- Transportation and timing: what a 4-hour half day really means
- Cost and value: what $214.62 includes (and what’s separate)
- Extra options in Aomori: when time allows
- Who should book this Jomon World Heritage half-day
- Should you book it?
- FAQ
- How long is the Jomon World Cultural Heritage tour in Aomori City?
- What does the tour price cover, and how many people is it for?
- Is pickup offered?
- Are admission fees included?
- What transportation is used for groups larger than 3?
- What happens if weather is poor?
Key highlights you’ll feel right away
- Komakino style stone circle: an original Jomon-period stone circle arrangement made famous by its distinctive stone line
- Found by local high school students: a cool modern connection to the older world
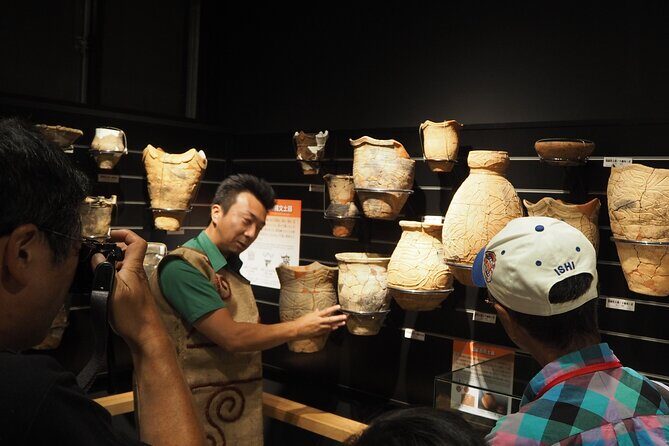
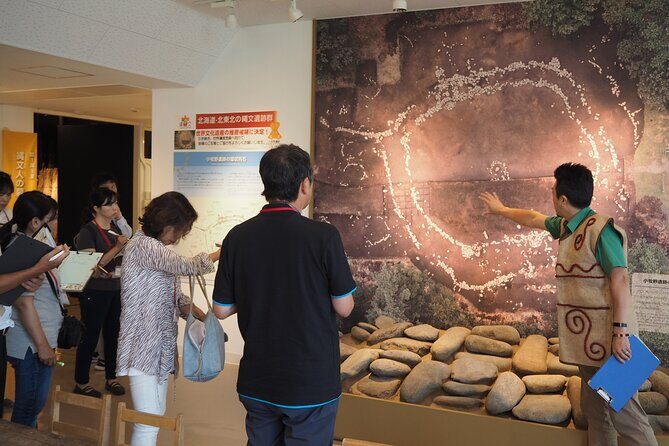
- Jomon-no Manabiya Komakinokan museum: an on-site way to see excavated artifacts linked to what you’re walking around
- Sannai-Maruyama village scale: a large Jomon community with evidence of daily life, including domestication clues like chestnut trees
- The restored chestnut-log tower: the site’s big visual landmark made from six large chestnut tree logs
- Tomio Yokouchi’s flexible pacing: he listens to your requests and can adjust the plan when possible
Why the Komakino + Sannai-Maruyama combo makes sense
Jomon sites can take time. Not because they’re far apart, but because they’re easy to underestimate. A couple hours at the right place lets you get your bearings: what was found, what it means, and how it fits together as one human story from long ago.
That’s exactly what this tour is built for. You don’t just pass by two names on a map. You spend real time at each UNESCO-listed site, with access to excavated areas and artifact museums. The result is a more complete feeling of Jomon life than you’d get from a quick stop photo.
Also, the private setup changes the tone. Instead of doing a rushed version of “see and go,” you can ask questions at the moment something clicks—like why a stone circle layout matters, or why a specific restored structure is treated as symbolic.
You can also read our reviews of more tours and experiences in Aomori.


Getting picked up in Aomori City (and what “private” changes)
This is a private activity, so it’s only your group. That matters more than it sounds, especially with prehistoric sites where details really reward attention.
You also get English guidance. Even if you’re not a deep-history person, English interpretation helps you connect artifacts and excavated remains to everyday meaning—how people lived, what they found useful, and why a restoration is shown the way it is.
Transportation is handled two ways:
- For up to 3 people, Tomio uses his private car (and you cover 3,000 JPY cash for gas and other costs).
- For a group of 4 to 6, you’ll need a taxi, with cost starting at 14,050 JPY for visiting Komakino.
That flexibility is useful. It means you can keep the tour efficient even if your group is small and you want a quieter, custom pace.
Stop 1: Komakino Site Preservation Museum and the Komakino stone circle
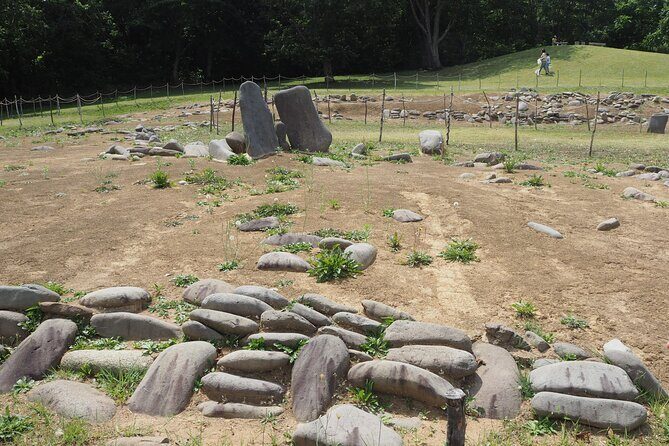
This first stop is where the tour snaps into focus. You’re looking at the Komakino site’s Jomon-era stone circle, plus the famous Komakino-style stone arrangement—the distinctive stone line that people recognize nationwide.
Here’s what I’d pay attention to: the site is not just a field with rocks. You’re shown the relationship between the stone arrangement and the discoveries tied to it. The Komakino style is famous because the layout is part of the story, not random clutter.
What you’ll do here
- Visit the Komakino Site Preservation Museum area
- See the Jomon stone circle and the Komakino site features
- Check out the museum named Jomon-no Manabiya Komakinokan, where excavated artifacts are displayed
Why this stop feels special
Two reasons. First, it’s an original stone circle from the Jomon period, so you can connect the arrangement directly to what’s physically there. Second, the site has a strong “then and now” link: it was found by local high school students. That modern discovery story gives the prehistoric setting more human context.
You can also read our reviews of more historical tours in Aomori

One practical note
Time is tight: this stop is about 2 hours. Use that time to ask questions about what you’re seeing, because the stone arrangement can be hard to interpret if you’re trying to do it alone.
Stop 2: Sannai-Maruyama village remains and the six-log chestnut tower
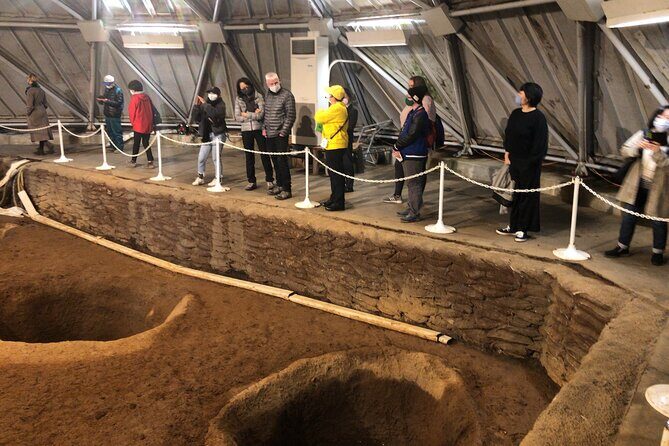
If Komakino is about stones and layout, Sannai-Maruyama is about community and daily life. This is the big village site: a large Jomon settlement where more than 500 people are said to have lived.
The site also connects prehistoric survival to how people interacted with plants and resources. You’ll hear about hunting and gatherings, and you’ll also see evidence of domestication, specifically including chestnut trees.
Then there’s the visual anchor. Sannai-Maruyama’s symbol is a huge restored tower built from six large chestnut tree logs. Even if you don’t remember every detail, you’ll remember the structure.
What you’ll do here
- Walk through the remains of the large village area
- Take in how the site has been presented through excavated remains and site interpretation
The value for your time
This stop gives you the “so what” of Jomon. Instead of only thinking about artifacts, you can picture a settled community: people living, gathering, hunting, and managing plant resources like chestnuts.
That’s why pairing it with Komakino works. Stones tell one part of the story. A large village tells the other part.
The cost check (important)
Admission for Sannai-Maruyama is not included. You’ll need to pay 500 JPY per person. If you’re budgeting, factor that in early so there’s no surprise when you arrive.
Transportation and timing: what a 4-hour half day really means
This tour runs about 4 hours total. You’re allocated roughly 2 hours at each site, so the plan is built for momentum.
That’s a plus if you:
- Want UNESCO-listed Jomon sites in a single, efficient block
- Prefer a guided visit over self-guided guesswork
- Like having enough time to actually read labels and connect ideas
It can be a drawback if you:
- Want long, slow wandering with no schedule pressure
- Plan to spend extra time in museums beyond the guided pacing
- Need lots of breaks beyond what a half day typically allows
The good news is the private format helps you manage that. Tomio Yokouchi is described as listening to requests and modifying the plan accordingly. If your interests lean more toward artifacts at one site or structures at the other, that flexibility can make the most of the limited time.
Cost and value: what $214.62 includes (and what’s separate)
The price is listed as $214.62 per group (up to 3). That sounds high at first glance until you look at what’s bundled: English guidance plus the guide’s private car for the group.
But two costs can affect your true total:
- Gas and other costs for the private car: 3,000 JPY cash per booking (not included)
- Sannai-Maruyama admission: 500 JPY per person (not included)
So the real value depends on how many people you bring:
- With up to 3 people, you split the group price, making the per-person cost much easier to swallow.
- With fewer people, the per-person share is less friendly, but you still get a private car and English guidance, which often costs extra in Japan.
If you’re a group of 4 to 6, you’ll likely deal with taxi costs starting at 14,050 JPY to visit Komakino. That changes the math quickly, so it’s worth checking expected taxi arrangements when you book.
My practical take: if you’re the kind of person who likes understanding what you’re seeing, the guided interpretation helps justify the price. If you only want quick photos and zero explanation, you might feel the cost more than the learning.
Extra options in Aomori: when time allows
One of the most appealing touches is flexibility at the end of the experience. In at least one case, the guide added a stop option for Nebuta floats displays at Wrasse Nebuta museum.
That’s not guaranteed as a permanent part of the standard plan, but it’s a good example of how the tour can adapt to your interests—especially if you want a bridge from Jomon prehistoric culture to something more modern in Aomori.
If you’re interested in adding something like that, ask early. With only 4 hours total, the only way additions work is with careful timing.
Who should book this Jomon World Heritage half-day
This tour is a strong fit for you if:
- You want UNESCO Jomon sites near Aomori without handling transport hassles
- You care about excavated remains and artifact museums, not just general sightseeing
- You want English interpretation, especially for understanding what you’re looking at
- You like the idea of visiting both Komakino and Sannai-Maruyama in one controlled schedule
It’s less ideal if:
- You’re on a strict budget and don’t want to pay separate admissions (Sannai-Maruyama’s 500 JPY per person)
- You prefer full-day flexibility or you want more than two hours at a site
- Weather is a major concern for you—this experience depends on good weather, and poor weather may shift dates or result in a refund
Should you book it?
Book it if you want a guided, efficient way to understand Jomon culture through two UNESCO sites that complement each other—stone arrangements at Komakino and village-life scale at Sannai-Maruyama. The private group setup and English guidance are the real value drivers, especially when you only have half a day.
Skip it only if you’re planning to treat the visit as a quick photo stop, or if your schedule can’t handle a weather-dependent outdoor component. Otherwise, this is the kind of tour that helps the Jomon past feel concrete, not abstract—fast.
FAQ
How long is the Jomon World Cultural Heritage tour in Aomori City?
It runs about 4 hours total, with about 2 hours at each site.
What does the tour price cover, and how many people is it for?
The price is listed as $214.62 per group, up to 3 people. English guidance and the guide’s private car are included for that group size.
Is pickup offered?
Yes, pickup is offered.
Are admission fees included?
Admission for Komakino Site Preservation Museum is free, but Sannai-Maruyama admission is not included (500 JPY per person).
What transportation is used for groups larger than 3?
For groups of 4 to 6, you need to hire a taxi to visit Komakino Site, with cost starting at 14,050 JPY.
What happens if weather is poor?
This experience requires good weather. If it’s canceled due to poor weather, you’ll be offered a different date or a full refund.