REVIEW · OSAKA
Osaka-Nara: 2-Day Discovery Pass
Book on GetYourGuide →Operated by LINKTIVITY Inc. · Bookable on GetYourGuide
One QR code, two cities. The Osaka-Nara 2-Day Discovery Pass is a simple way to string together attractions across Osaka and Nara without juggling separate tickets all day. It’s designed around one digital ticket you show at participating places, so you can move faster and spend more time actually seeing stuff.
I especially like how the pass gives you two clear paths to choose from. The Northern Route leans Osaka-first (skyline and icons) then adds major Nara stops, while the Southern Route is a more countryside-flavored day with temples, tumuli, caves, and multiple onsen options.
One big consideration: some entries have strict timing windows, and the pass rules can make you pay more if you hit them at the wrong time. The clearest example is the Umeda Sky Building’s Floating Garden Observatory, where free entry only applies before 5:00 PM, and re-entry rules can cause headaches if you plan to linger.
In This Review
- Key things to know before you go
- Osaka-Nara Discovery Pass: what the one QR code really buys you
- Starting at HEP FIVE and Umeda: your Northern Route anchor
- Umeda Sky timing trap: the 5:00 PM free-entry cutoff
- Osaka-to-Nara shift on the Northern Route: temples and world-heritage sights
- The pass rules that affect real life: 30 minutes, no re-entry, and dark mode
- Southern Route by rental car: when you really want onsen and caves
- What value you really get for $24
- Who this pass suits best (and who should skip it)
- Should you book the Osaka-Nara 2-Day Discovery Pass?
- FAQ
- How much does the Osaka-Nara 2-Day Discovery Pass cost?
- What does the pass include?
- Are train and bus fares included in the price?
- Is Floating Garden Observatory at Umeda Sky free for the whole day?
- Can I visit the same facility more than once?
- How long is the pass valid?
Key things to know before you go
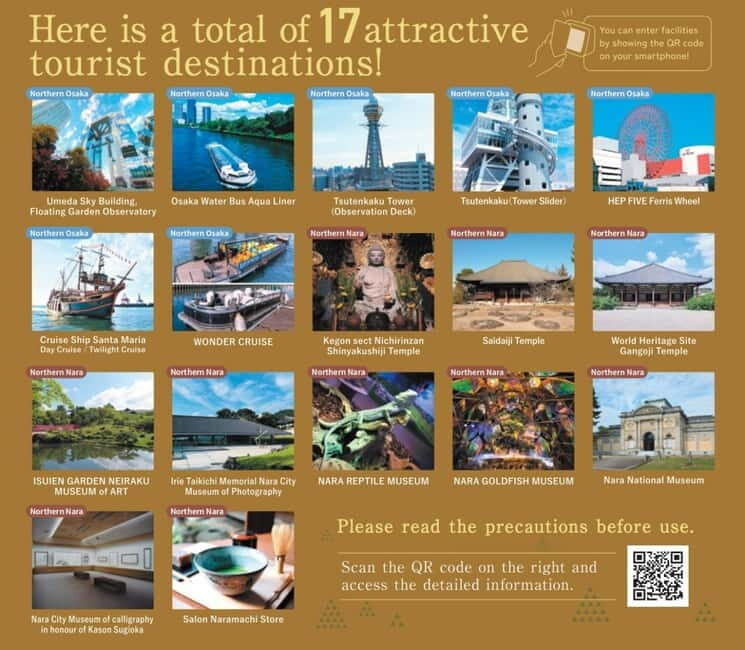
- One QR code covers many attractions: you get one free entry per participating facility during the two-day window.
- Two route styles: the Northern Route is easier to mix into a normal Osaka/Nara itinerary; the Southern Route pushes you toward a rental car plan.
- Umeda Sky is time-sensitive: Floating Garden Observatory is free only before 5:00 PM.
- Strict pacing rules apply: you must wait at least 30 minutes between entering different facilities, and you can’t re-enter the same place.
- Not all travel costs are included: trains and buses aren’t covered unless you selected the combo version that adds rail/metro options.
- HEP FIVE Ferris Wheel may be shut: it’s scheduled out of service on Thursday, August 7th for inspection, with no set reopen time.
Osaka-Nara Discovery Pass: what the one QR code really buys you

This pass is basically a ticket-simplifier. You’re paying $24 per person for one digital special ticket that unlocks free admission at lots of Osaka and Nara attractions, each using the same QR code. Instead of buying multiple admissions on the spot, you can focus on timing, transit, and the order that makes sense.
The value comes from how many stops are included on paper—17 attractions on the Northern Route and 19 on the Southern Route—plus the fact that you get one free entry per facility. That one-per-place rule matters: you’re not stacking repeat visits to the same museum or tower. You’re using the pass like a menu where each item is a single bite.
The other big “what you’re really buying” detail: this pass doesn’t cover getting yourself around. Public transportation costs, like trains and buses, are not included in the price (unless you chose a combo option that bundles transit passes). So you still need to plan your routes in the real world, with real rides.
A few more Osaka tours and experiences worth a look
Starting at HEP FIVE and Umeda: your Northern Route anchor
Most Northern Route plans start with Osaka’s HEP FIVE area, because the pass is located there and the whole mall is right in the middle of the action. HEP FIVE is surrounded by food and entertainment, which is handy when you want breaks between attractions without taking a detour.
From there, the Northern Route’s headliners are the skyline-and-icons type stops:
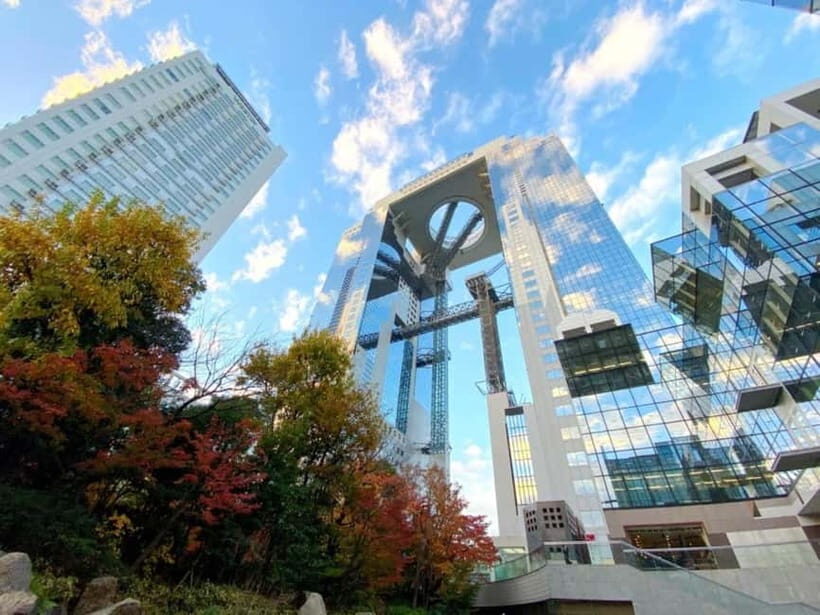
- Umeda Sky Building / Floating Garden Observatory: the pass gives free admission, but only before 5:00 PM.
- Tsutenkaku Tower and Tsutenkaku Tower Slider: classic Osaka tower energy, plus the slider add-on experience.
- HEP FIVE Ferris Wheel: a short ride that’s described as about 15 minutes, with views that fit perfectly between other city stops.
There are also fun “movement” options that help you break up a day:
- Osaka Water Bus Aqua Liner
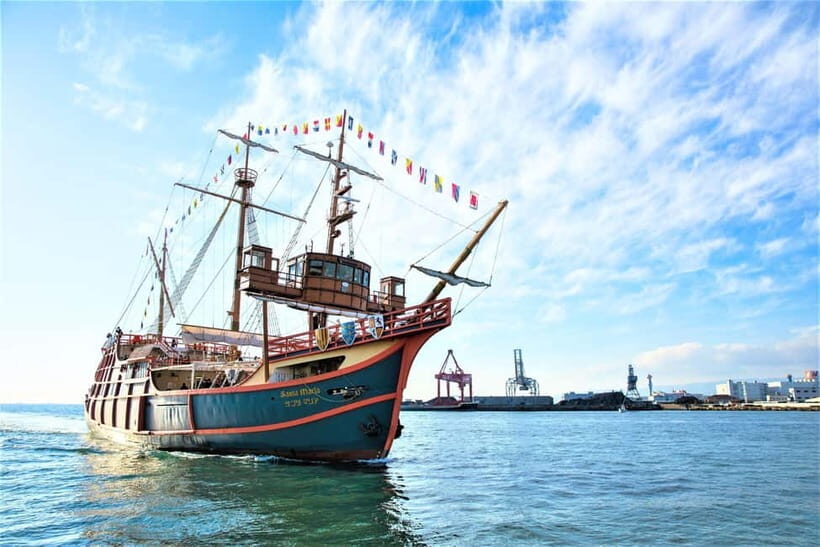
- Cruise Ship Santa Maria Day Cruise / Twilight Cruise
- WONDER CRUISE
These are especially useful if you’re the type who gets bored pacing in a single neighborhood. They add variety and give you a different angle on the city. The drawback is that cruises and water-bus options usually depend on schedule and weather—so you’ll want to pick one early and not treat them like a last-minute gamble.
One more operational note that can affect your day: the HEP FIVE Ferris Wheel is scheduled to be out of service on Thursday, August 7th due to inspection. It should resume once the inspection finishes, but the reopen time isn’t set—so treat that date like a planning wildcard.
Umeda Sky timing trap: the 5:00 PM free-entry cutoff
This is the part that can make or break your budget. The pass includes free entry to Floating Garden Observatory, but only valid before 5:00 PM. After that cutoff, the pass stops being fully generous, and you may end up paying a large portion of the admission.
Also pay attention to re-entry. Some people reported that you can’t re-enter after the cutoff once you leave. Translation for your planning: don’t treat the Umeda Sky stop like a casual wander. Treat it like a timed mission:
- Go there early enough that you can complete your visit comfortably before 5:00 PM.
- If you want a long look or photos, plan that time before the cutoff.
- Don’t assume you can pop out and return later.
If you want the best odds of getting your money’s worth, I’d schedule Umeda Sky as one of your first major stops in Osaka. That keeps your day flexible for Tsutenkaku and any water/boat activity afterward.
Osaka-to-Nara shift on the Northern Route: temples and world-heritage sights
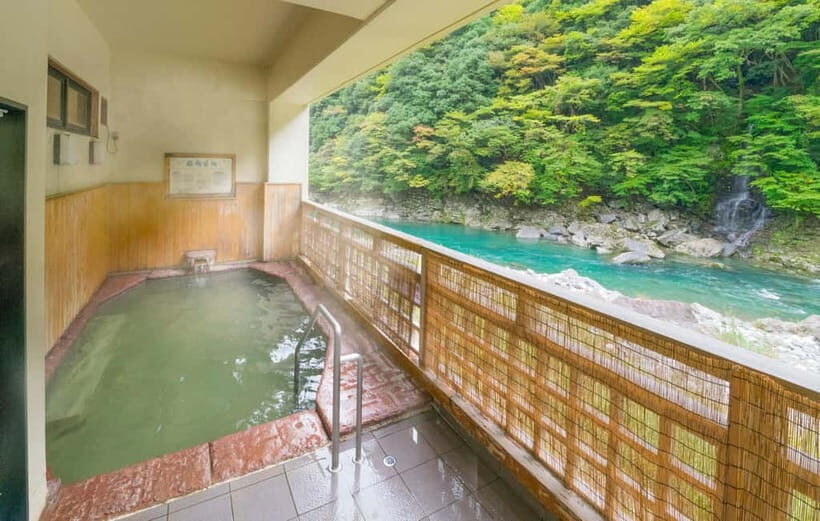
Once you’re done with Osaka icons, the Northern Route pushes into Nara with a mix of spiritual sites and museum-type stops. This is where the pass starts feeling “useful” rather than just “cheap.” Instead of paying one-off tickets, you can stack admissions into a single plan.
On the temple-and-heritage side, keep an eye out for:
- World Heritage Site Gangoji Temple
- Kegon sect Nichirinzan Shinyakushiji Temple
- Saidaiji Temple
- A Nara classic museum lineup, depending on your interests
Gangoji is the obvious draw. A World Heritage Site is a good anchor point because it gives your day a clear “why this matters” center. It’s also the kind of stop where you’ll enjoy slowing down a bit, even if you’re working around pass timing rules.
On the more hands-on side, Nara’s included museum options are refreshingly varied:
- NARA Reptile Museum
- NARA Goldfish Museum
- Nara National Museum
- Nara City Museum of calligraphy in honour of Kason Sugioka
- Irie Taikichi Memorial Nara City Museum of Photography
- ISUIEN Garden NEIRAKU Museum of Art
- Salon Naramachi Store
I like this mix because it gives you options on days when you don’t want to move nonstop. If you feel museum fatigue, swap in one of the smaller, themed places like the reptile or goldfish museum. If you want calmer pacing, an art museum or the calligraphy museum can slow your day down in a good way.
The pass rules that affect real life: 30 minutes, no re-entry, and dark mode
This is where people lose value. The pass isn’t just a “scan and go.” It includes rules you have to respect:
First, there’s the 30-minute wait rule. After you enter one facility, you must wait at least 30 minutes before entering another. That means you can’t “tour-shop” multiple sites back-to-back like they’re across the street from each other. If you do, you risk wasted time waiting anyway, so it’s better to build in natural gaps: a nearby snack, a short walk, or a transit pause.
Second, there’s no re-entry to the same facility. One free admission per facility is it. If you leave Umeda Sky for a coffee and the cutoff has passed, you can’t assume you’ll scan again for another free entry.
Third, validity isn’t just a simple two days from the moment you start. The pass is valid from the facility’s opening time to that day’s final entry time, and then it covers the following day’s similar window. It is not valid as a full 48 hours from the first scan. So if you start late in the day, you may lose part of Day 2’s useful time.
Fourth, you need to use facilities collectively. Individual use isn’t allowed. The practical takeaway is to confirm how you’ll pair this with your travel style (especially if you’re moving in pairs or a larger group). If the pass is meant to be used as a group ticket flow, plan so everyone’s on the same rhythm.
Fifth, there’s a small tech instruction: disable dark mode. It sounds minor, but if the QR display doesn’t scan cleanly, you’ll lose time at the entry gate.




Southern Route by rental car: when you really want onsen and caves
The Southern Route is a different kind of day. It includes 19 attractions, but you have to book a rental car separately from your ticket. That’s a major deal for budgeting and planning, because it adds cost and coordination you can’t ignore.
Why do it anyway? Because the included stops lean into places that are harder to reach quickly without a car. You get a lineup that includes:
- Kishiwada Castle
- Inunakiyama Onsen Fudoguchikan
- Abe Monju-in Temple
- Nara Hasedera
- Ishibutai Tumulus
- Murouji Temple
- Kinpusenji Temple
- Yoshimizu Shrine
- Multiple hot spring centers: Kigi-no-Yu, Mizuha-no-Yu, and Dorogawa Onsen Hot Spring Visitor Center
- Menfudo Limestone Cave / Monorail, the Dorokko
- Plus more specific stops like Katsuragi City Sumo Museum Kehayaza and the Shimano Bicycle Museum
The onsen cluster is the big lifestyle win. If you want a day where you see sights and then unwind, multiple hot spring stops give you built-in recovery time. Just remember the pass timing rules still apply: you can’t cram many separate entries back-to-back, so you’ll need to treat each stop as its own block of time.
Menfudo Limestone Cave (with the Dorokko monorail) also fits a “short adventure, big payoff” style. It’s the kind of stop that can feel like a separate excursion within your day, even while it’s still part of the pass.
If you don’t want to rent a car, the Northern Route is usually the more natural fit. But if you’re willing to add logistics for the reward of onsen and less-frequented sites, the Southern Route can feel like a smarter use of your limited vacation days.
What value you really get for $24
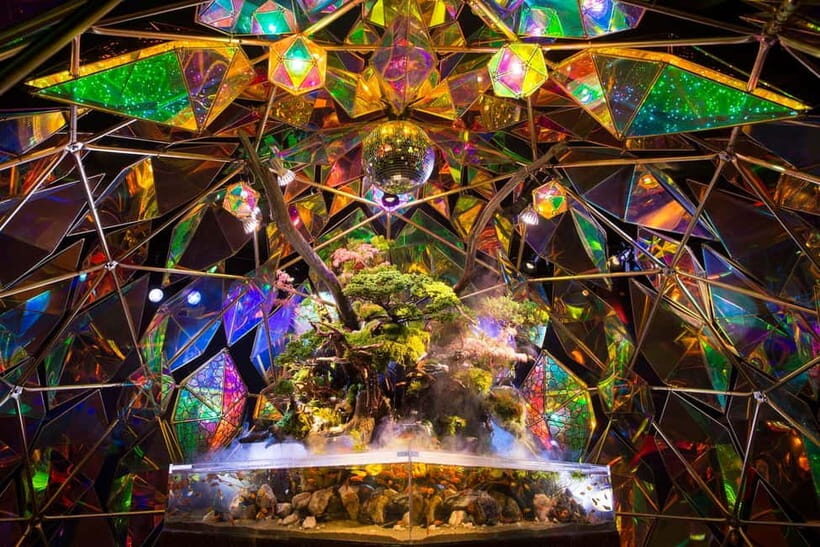
The headline price is $24, which is low enough that you should expect it to be strict, not free-for-all. And that’s exactly what you get: a bundle of free entries across a lot of attractions, but with timing cutoffs and pacing rules.
Here’s how I’d judge whether it’s worth it for you:
- It’s a good deal if you plan to visit several included places and you like mixing big sights (like towers/observatories) with smaller museum stops.
- It’s less of a deal if your schedule is loose or you usually arrive late. The Umeda Sky 5:00 PM rule is the clearest example of where timing failure can cost you.
- It’s risky if you’re counting on re-entry or flexible revisit plans, because re-entry isn’t allowed.
Also, consider whether you’re using the combo options. The pass can include additional transit value only if you select the combo:
- Osaka Metro & Osaka City Bus Pass (1-Day Ticket) included when selecting the Osaka-Nara Discovery Pass & Railway Ticket combo
- Kintetsu Rail Pass (2-Day Ticket between Osaka-Namba and Kintetsu-Nara) included when selecting the combo
If you don’t select the combo, trains and buses are not covered, and that can change the value math depending on your daily plan.
Finally, the pass has a stated expiration date: April 30, 2026. You’ll want to confirm you’re using it within its validity window so you’re not making decisions based on a ticket that has a hard stop.
Who this pass suits best (and who should skip it)
This pass is best for you if:
- You want to reduce ticket-hunting and speed up entry at multiple Osaka and Nara stops.
- You can plan around a few clear timing rules, especially the Umeda Sky cutoff.
- You’re okay making your day blocks fit the 30-minute between-entry rule.
This pass might not be ideal if:
- You prefer slow, spontaneous pacing with no attention to deadlines.
- You hate the idea that a single entry window (like 5:00 PM at Umeda Sky) can affect what you pay at the door.
- You don’t want car logistics. The Southern Route requires a rental car booked separately.
Should you book the Osaka-Nara 2-Day Discovery Pass?
I’d book it if you’re the type who can plan your first Osaka stop around Umeda Sky, then build outward to Tsutenkaku, the boat options, and a solid Nara mix of temples and museums. For the price, stacking admissions with one QR code is the main win.
But if you’re likely to arrive late, want lots of re-entry, or you don’t want to follow the pass pacing rules, the risk of paying extra (especially around Floating Garden Observatory before 5:00 PM) is real enough that you should double-check your schedule first.
If you like clear systems and want more time sightseeing with fewer transactions, this pass can be a smart, budget-friendly way to experience Osaka and Nara in two days.
FAQ
How much does the Osaka-Nara 2-Day Discovery Pass cost?
It costs $24 per person.
What does the pass include?
You get one free entry per participating facility, using a digital special ticket with a QR code.
Are train and bus fares included in the price?
Public transportation costs (trains and buses) are not included in the price. Transit passes are only included if you select the Osaka-Nara Discovery Pass & Railway Ticket combo options.
Is Floating Garden Observatory at Umeda Sky free for the whole day?
No. The pass covers free admission to Floating Garden Observatory only before 5:00 PM.
Can I visit the same facility more than once?
No. Re-entry to the same facility is not allowed, and you’re allowed free entry to each facility only once within the two-day period.
How long is the pass valid?
It’s valid from each facility’s opening time to the final entry time on the day you use it, and then it continues coverage for the following day. It is not valid as a full 48 hours from when you start.