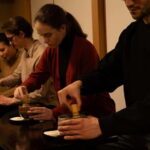
Gold repairs turn breakage into art. In Kanazawa, this private workshop gives you a Kintsugi step-by-step walkthrough, and you practice the stages before finishing with gold decoration on a sake cup you can take home; the trade-off is you cannot bring your own broken pottery to repair or take a finished repaired piece from the studio.
Because the method uses Urushi (poison ivy), you’ll want to think twice if you have very sensitive skin or if anyone in your group is younger than 15. I also like the human touch: the studio welcomes you with tea and cookies, then the host explains the history and purpose behind the repair in a way that feels clear and personal.
You’ll spend about 2 hours 30 minutes on the key steps, even though a true Kintsugi repair typically needs at least a month for drying with natural materials. You don’t just watch. You handle the work and see how each phase supports the next.
In This Review
- Key Highlights You’ll Feel Right Away
- A Kanazawa Kintsugi Class That Teaches the Thinking, Not Just the Steps
- Your Timing: Starting at 4:00 pm in Kanazawa
- Studio Reality Check: Urushi Safety and What That Means for Your Group
- The Kintsugi Lesson Plan: From Glue to Paste to Sanding
- Step 1: Learning the history and purpose
- Step 2: Materials and preparation
- Step 3: Glue preparation and application
- Step 4: Paste preparation and application
- Step 5: Sanding
- Waterproof Coverage: Where the Repair Becomes Practical
- Gold Decoration with Gold Powder: Your Take-Home Moment
- Sustainability, Longevity, and the Realistic Expectations You Should Hold
- Price and Value: Is $106 Reasonable for a 2.5-Hour Private Workshop?
- Who This Workshop Suits Best (And Who Might Want to Skip)
- Should You Book Traditional Kintsugi in Kanazawa?
- FAQ
- What happens during the 2.5-hour Kintsugi workshop?
- Do I get to repair my own broken pottery?
- What can I take home?
- Is the workshop safe for everyone?
- Where is the meeting point?
- What time does the workshop start?
- What is included in the $106 price?
Key Highlights You’ll Feel Right Away
- Private, studio-based class designed for only your group
- Hands-on practice across multiple stages of Kintsugi, not just a quick demo
- Urushi-based method with a clear safety note for sensitive skin and kids under 15
- Gold decoration practice using gold powder on a sake cup you take home
- Included materials and tools, plus a small souvenir using the gold you applied
A Kanazawa Kintsugi Class That Teaches the Thinking, Not Just the Steps
Kintsugi has a reputation for being beautiful, but what makes this workshop worth your time is the practical mindset behind it. You’re learning how a broken ceramic repair can become something you keep, use, and even display—without hiding the damage like it never happened.
What I like most is that the class doesn’t treat Kintsugi as a single magic trick. You work through the flow: glue preparation and application, paste preparation and application, sanding, waterproof coverage, and then the gold decoration part. By the time you reach the gold, you’re not just making a pretty finish. You understand why the earlier steps matter for stability and appearance.
Another strong point is the payoff. This isn’t a hands-off lecture. You practice with studio pieces, and for the highlight step you work directly with gold powder on a sake cup that you can take home. That gives you a small, tangible reminder you can actually look at later, instead of only remembering the concept.
One important consideration before you book: you won’t be able to repair and bring home your own broken item. This is a studio practice class, and the pieces you work on stay there. If you’re hoping to fix a family heirloom in person, you’ll need to find another option.
You can also read our reviews of more private tours in Kanazawa



Your Timing: Starting at 4:00 pm in Kanazawa
The session starts at 4:00 pm and runs about 2 hours 30 minutes. That timing is nice if you want something hands-on in the late afternoon without eating up your whole day. Kanazawa is a place where you can easily fill time with neighborhoods and food, so a workshop that ends back at the meeting point helps you stay flexible.
You’ll meet in Hyōtanmachi at a Kintsugi studio location listed as 17 kintsugian, and it’s about a 10-minute walk from Kanazawa Station. If you’re arriving by train, you can usually get there with an easy walk and a quick breather before class.
Because it’s private, you’re not stuck with a big mixed schedule where everyone follows different instructions. Your group can move at the pace the host sets, which matters when you’re handling sticky materials and doing fine finishing steps.
Studio Reality Check: Urushi Safety and What That Means for Your Group
This workshop uses Urushi, and the info explicitly calls it out as poison ivy. That’s not a scare tactic. It’s a practical safety note, and you should take it seriously.
You should not join if you have very sensitive skin, and the workshop is not recommended for children younger than 15. If you’re not sure about sensitivity, it’s worth being cautious. Urushi work can be perfectly fine for many people, but when the organizer flags sensitivity as a concern, treat it as an important filter, not a formality.
The good news is that the class is designed to be accessible for most travelers. The host guides you through the process, and you’re not expected to already know Kintsugi techniques before arriving. Still, the Urushi point is the main “read this twice” detail for choosing this experience.
Also note what the class is and isn’t. You’re working with pieces that belong to the studio. That keeps expectations clear and helps you focus on learning the process rather than worrying about taking your own materials into a workshop setting.
The Kintsugi Lesson Plan: From Glue to Paste to Sanding
This is the part that makes the workshop genuinely educational. You’ll see the procedure in about 2 hours step by step, but you’re also practicing with materials so your hands learn the rhythm, not just your eyes.
Step 1: Learning the history and purpose
You start with an introduction to what Kintsugi is and why it exists. The method is traditionally described as having been invented more than 500 years ago, with a goal of repairing and reusing broken pottery instead of discarding it. That idea is the backbone of the experience.
The tone you’re looking for is a mix of craft and philosophy: repair becomes part of the object’s life story. If you like learning how traditions solve everyday problems, you’ll probably enjoy this part a lot.
A few more Kanazawa tours and experiences worth a look


Step 2: Materials and preparation
Next comes the “what exactly are we using” portion. The workshop description highlights natural materials and mentions that the materials used are safe for body. That’s a helpful framing, especially when you realize Kintsugi isn’t made with industrial-looking products.
You also learn what each material does in the sequence. In Kintsugi, each layer supports the next: adhesive for joining, paste for filling, sanding for smoothing, and waterproof coverage to protect the repair.
Step 3: Glue preparation and application
You’ll practice preparing and applying the glue. This is one of those steps where technique matters more than speed. Too much can spread where you don’t want it. Too little won’t hold. You’re learning how to align the pieces and apply with intention.
This stage is also where you start appreciating why Kintsugi takes time. A full repair typically requires at least a month because of drying with natural materials. In the workshop, you don’t wait for a finished long cure—you watch the process and practice the phases so you understand how it would unfold in real life.
Step 4: Paste preparation and application
After joining, you move into the paste stage. Paste helps fill gaps and shape the repair area so the surface becomes workable. Practicing here gives you a feel for texture and control.
Step 5: Sanding
Sanding comes next, and it’s more than surface cleanup. It’s the step that shapes the repair line so it looks intentional rather than messy. You’re learning how to smooth without destroying the work you just built.
This is a big moment for anyone who expects Kintsugi to be all gold and glam. In reality, the “real craft” is in the careful finishing before the decoration ever arrives.
Waterproof Coverage: Where the Repair Becomes Practical
After sanding, the next step is waterproof coverage. This is the practical side of Kintsugi that makes it more than symbolic art.
You’ll learn and practice the idea that the repaired area needs protection. That’s the difference between a decorative fix and a functional repair that can survive real use. The workshop specifically calls out waterproof coverage, and that tells you the goal is not just a look—it’s usability.
This part also helps you understand the long drying time. Natural materials behave differently over time, and layers need to set properly. When you’re shown the steps in a shorter format, the lesson is still about the logic of the full process.
Gold Decoration with Gold Powder: Your Take-Home Moment
Then comes the step many people picture first: the gold decoration.
You’ll practice the gold decoration part using gold powder on a sake cup, and you take the result home. This is the moment where the whole sequence clicks. The earlier steps shape the surface and the repair line; the gold turns that line into something you choose to highlight.
Gold powder decoration is also the part that tends to stick in your memory because it’s hands-on, visual, and immediate. Even if your first attempt isn’t perfect, you’re still creating something that looks like Kintsugi rather than an approximation.
The workshop also includes a souvenir with gold that you used for your practice. So you get both: a functional little reminder in the form of the sake cup, and a smaller token tied to the gold step.
A nice bonus from the human side: the host is interactive and makes the whole thing feel like craft time, not a stiff class. In past experiences with this workshop style, hosts often also suggest a dinner spot after you’re done, and you’ll likely get that same kind of helpful local guidance during your wrap-up.
Sustainability, Longevity, and the Realistic Expectations You Should Hold
Kintsugi is often framed as sustainable, and this workshop supports that idea with a clear pitch: repair and reuse rather than discard. Here, the emphasis is on using natural and safe-for-body materials, and on repairs that are said to last decades.
Now, a practical note: the workshop format is a learning experience. Even though the method is meant to produce repairs that endure, you’re not producing a fully cured, month-long finished repair during the 2.5-hour class. Instead, you get to see how the process works, practice the steps, and understand what makes it durable in real time.
Think of it like this: you’re learning the recipe and the method. The patience part belongs to the natural drying time that happens after each stage.
Price and Value: Is $106 Reasonable for a 2.5-Hour Private Workshop?
At $106 for roughly 2 hours 30 minutes, the value depends on what you want from a workshop.
If your goal is a quick photo and a generic overview, this will feel too hands-on and too specific. But if you want real instruction across the main Kintsugi stages and you want a take-home outcome from the gold step, the price makes sense.
Here’s why:
- You get practice across multiple technical stages: glue, paste, sanding, waterproof coverage, and gold decoration.
- Materials and tools for the practice are included, including gold powder and the souvenir tied to the gold you used.
- It’s private, meaning only your group participates, which often makes instructions feel more personal and tailored.
- You also get context: history and how the repair philosophy works, not just “do this, then that.”
You should also factor in the studio experience style. Tea and cookies were part of what previous participants described, and that kind of thoughtful welcome turns the class from a transaction into an actual cultural afternoon.
For some people, the main value limiter is the restriction that you can’t repair your own pottery or take home a finished repaired piece beyond what the class provides. But if you’re okay with practicing on studio pieces and leaving with the gold outcome, you’re likely to feel the price is fair.
Who This Workshop Suits Best (And Who Might Want to Skip)
This is a great fit if you:
- Like hands-on craft where you learn steps you can repeat
- Want a sustainability angle that’s practical, not just “feel-good recycling”
- Enjoy Japanese traditions where art and everyday function overlap
- Want a small take-home result, specifically from the gold decoration step on a sake cup
You might want to skip it (or at least reconsider) if you:
- Have very sensitive skin or concerns about Urushi
- Are traveling with kids under 15
- Came specifically to repair your own broken pottery and take it home afterward
Also keep in mind the timeline. The class shows the process quickly, but a full repair uses natural drying and usually takes at least a month. If you expect your personal piece to be finished immediately, this format won’t match that expectation.
Should You Book Traditional Kintsugi in Kanazawa?
Book this workshop if you want more than a story about Kintsugi. You’re getting guided practice through the main stages and a gold decoration finish you can take home. It’s also a smart afternoon plan if you’re in Kanazawa around the 4:00 pm window and you’d rather spend time learning a craft than only walking through sights.
Skip it if you’re worried about Urushi sensitivity or you’re hoping to repair and take home your own broken pottery. In that case, you’ll want a different kind of service.
If you do book it, go in with a simple mindset: focus on the process, not perfection. The value is in understanding how repaired objects can become beautiful again—and in leaving with a small piece of that idea in your hands.
FAQ
What happens during the 2.5-hour Kintsugi workshop?
You’ll learn the history of Kintsugi, then practice key steps including glue preparation and application, paste preparation and application, sanding, waterproof coverage, and gold decoration. The gold decoration part is practiced on a sake cup.
Do I get to repair my own broken pottery?
No. You won’t be able to bring and repair your own piece, and you won’t be able to take a Kintsugi pottery with you from the studio.
What can I take home?
You practice gold decoration on a sake cup and take it home. You also receive an included souvenir with gold that you used during your practice.
Is the workshop safe for everyone?
The workshop uses Urushi (poison ivy), so it is not recommended for people with very sensitive skin or for children younger than 15.
Where is the meeting point?
The meeting point is in Kanazawa, at Hyōtanmachi 17 kintsugian. It’s near public transportation and about a 10-minute walk from Kanazawa Station.
What time does the workshop start?
The start time is 4:00 pm, and the activity ends back at the meeting point.
What is included in the $106 price?
Included are the gold powder, materials and tools, and a souvenir with gold that you used for your practice. A Kintsugi pottery is not included.
You Might Also Enjoy
 Walking around town in a kimono, you can choose your favorite kimono from the traditional Okinawan costumes “Ryuso”, “Kimono”, “Yukata” 《Hairset & Lipstick & Kimono & Rental Fee》All Comic Book
 Private departure transfer from central Osaka city to Itami airport (ITM)
 Kyoto Sword Experience – includes Museum Ticket/Ninja Experience
 Awesome Private Tour: Tsukiji, Asakusa, Shinjuku, Shibuya