REVIEW · KYOTO
Let’s make only one original onigawara in the world!!
Book on GetYourGuide →Operated by Kawarakoubouyouya · Bookable on GetYourGuide
A demon face tile in two hours? This is a hands-on onigawara workshop at KAWARAKOUBOUYOUYA where you shape an ogre-style roof tile from soil, then Yuya fires it after class. What I love most is the step-by-step guidance that helps you build all the parts correctly, and the fact that you end up with a true one-of-a-kind tile that will change to the traditional silver tone later.
There is one catch to plan around: you do the creative work in about 2 hours, but you’ll wait 1–2 months for the color change and shipping. Also, since the process is clay-and-soil based, wear clothes you don’t mind getting dirty.
In This Review
- Key things to know before you go
- Honoring Kawara: Why This Demon-Face Tile Tradition Matters
- Inside KAWARAKOUBOUYOUYA: How the Workshop Really Feels
- The Two-Hour Onigawara Build: From Soil to a Demon Face
- After Class: How the Kiln-Fired Part Works
- The Waiting Game: Silver Color Change and Home Delivery
- Price and Value: Is $90 Fair for a Kiln-Fired Keepsake?
- Practical Tips: What to Wear, What to Expect, and Where GPS Might Betray You
- Who This Workshop Fits Best (and Who Might Find It Tricky)
- Should You Book the One-Of-A-Kind Onigawara Workshop?
- FAQ
- How long is the onigawara workshop?
- What does the price include, and what costs extra?
- What will I make during the class?
- How long does it take for the tile to change color and arrive?
- What should I wear?
- Is the class wheelchair accessible, and is it a small group?
Key things to know before you go
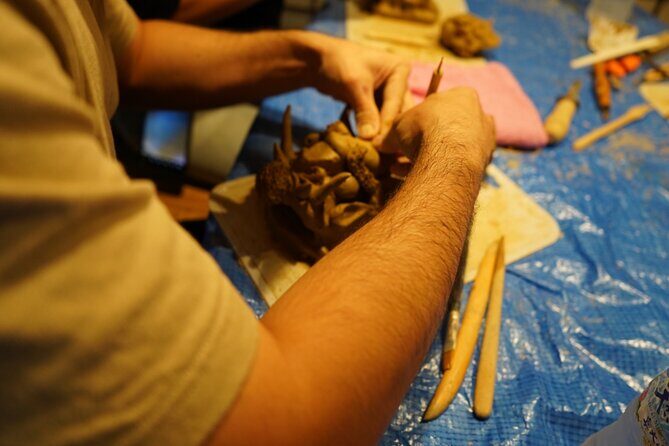
- Handmade onigawara with a demon-face design you’ll assemble piece by piece
- A 1400-year tradition behind kawara roof tiles, meant to help protect buildings
- A kiln-fired result handled after your class, so you don’t worry about the firing step
- A silver color transformation after 1–2 months, then the tile ships to your home
- Small group limit of 5, plus English and Japanese support from Yuya and his team
- Soil-based crafting, meaning you should dress for mess
Honoring Kawara: Why This Demon-Face Tile Tradition Matters
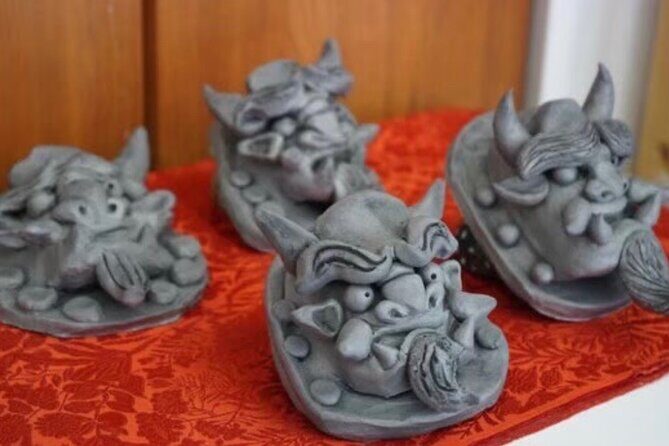
Onigawara are the carved end tiles on Japanese roofs, traditionally showing fierce faces meant to guard against evil and help deal with rain. The tradition connects to the history of about 1400 years, so you’re not just making a cool souvenir. You’re making something that belongs to a purpose-built craft tradition that helped protect buildings long before modern weatherproofing existed.
When you’re in Japan, it’s easy to spot rooflines and admire the details without thinking about what the details were for. This workshop slows that down. It makes the meaning feel practical, because the tile you shape is the same type of protective design people used over and over on real structures.
The experience also frames your work as a kind of collaboration with the past. Yuya teaches you a small, simple onigawara tile design, based on the ogre and gargoyle faces you’d see along the ridge.
You can also read our reviews of more tours and experiences in Kyoto.



Inside KAWARAKOUBOUYOUYA: How the Workshop Really Feels
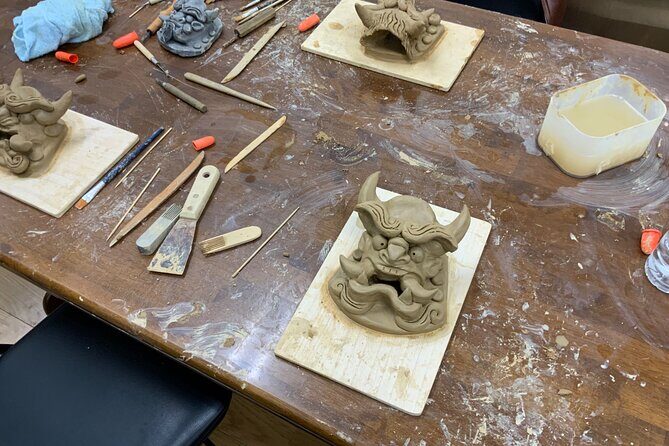
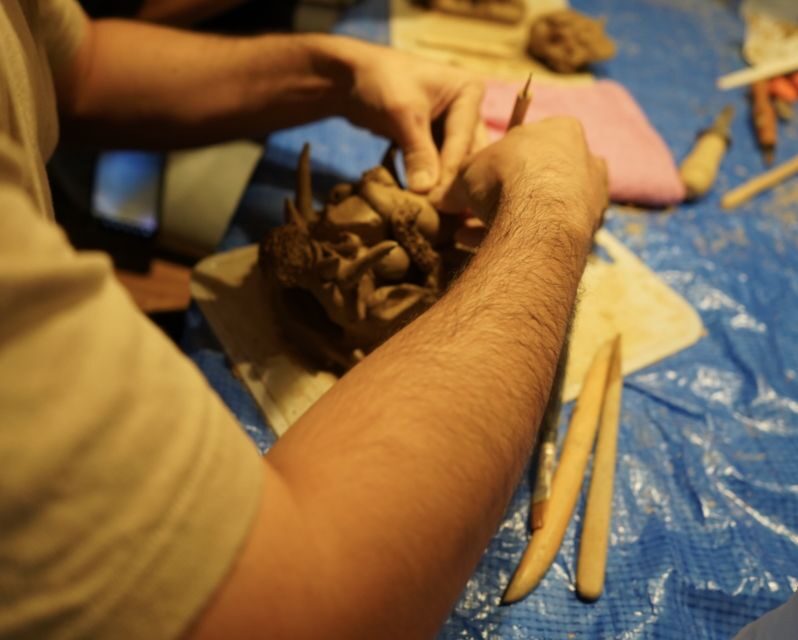
You meet at KAWARAKOUBOUYOUYA, Yuya’s shop. The setup is geared for active making, not watching. You’ll have a station with clay materials laid out so you can start shaping right away.
The group stays small, with a limit of 5 participants, which matters more than it sounds. With fewer people, Yuya can correct details as you go and help you stay on track with the assembly steps. That’s the difference between a hands-on class that feels like school versus one that feels like you’re actually doing the craft.
Languages are English and Japanese, so you’re not stuck playing charades with tools. Even if your Japanese is basic, you can follow along clearly and ask questions while you work.
One more practical point: the workshop uses soil, so you should show up expecting mess. That is not a “dress nice and take photos” activity. It’s a hands-on craft where your clothes are part of the price of admission.
The Two-Hour Onigawara Build: From Soil to a Demon Face
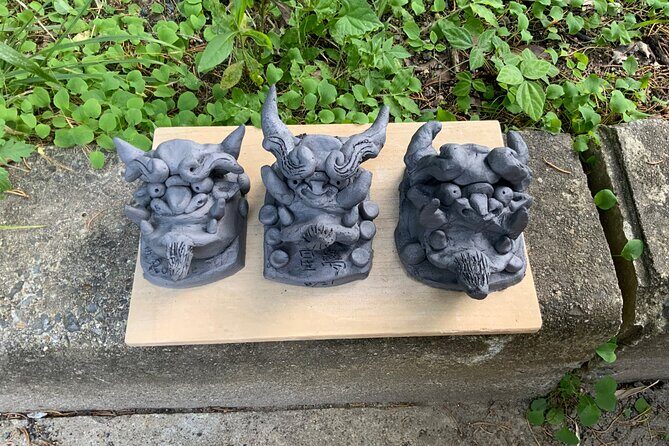
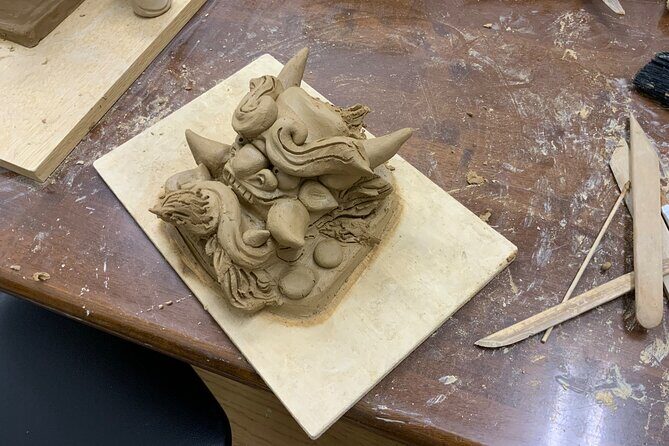
The main work is making a small, handmade onigawara tile with a demon-face motif. You start with a lump of soil and shape it into the tile base and the facial features. Then comes the careful part: building the face in a way that matches the traditional look.
Yuya’s approach is built around a procedure he developed. That matters because onigawara are traditionally described as difficult, especially if you’ve never worked with clay or you’re impatient with fine, awkward shaping. Here, the steps are broken down so anyone can participate, even if your hands are more used to travel photos than crafts.
The experience also leans into a poetic idea that’s actually part of the craft logic. The instructions describe how a kind of “soul” is gradually imbued into the soil lump, and then you create the monster that protects. It’s a story, yes, but it also acts like focus training. You slow down and treat the form carefully instead of rushing through it.
What you’re building is a small protective tile, not a big sculpture. That’s good news for your time and comfort. A ridge tile face has clear shapes and functions, so once you understand how the pieces relate, the project starts to click.
Even with that simplification, expect concentration. This is a “do the steps right” workshop. The fun comes from the moment you realize the design is assembling correctly, not just that you made something.
After Class: How the Kiln-Fired Part Works
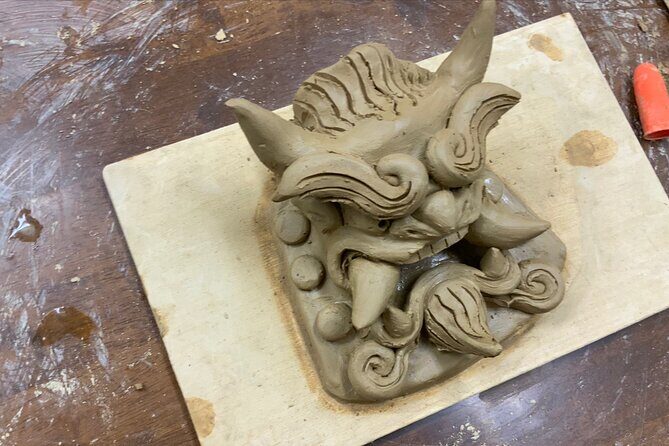
When you finish your tile in the workshop, Yuya fires it in a kiln at the factory. That’s a huge value point, because firing is the part that can turn a fun craft attempt into a stressful craft failure.
You do not handle the firing yourself. You’re building and assembling during the class window, then the workshop takes the next step. This matters if you’re visiting and don’t want to worry about the technical side—temperature, timing, and the right kiln process.
You also don’t have to pack your fragile, newly handled clay like a museum curator. The tile gets processed after class and then shipped to your home later.
The experience design is basically: you do the creative labor, then the specialists do the technical finishing.
The Waiting Game: Silver Color Change and Home Delivery
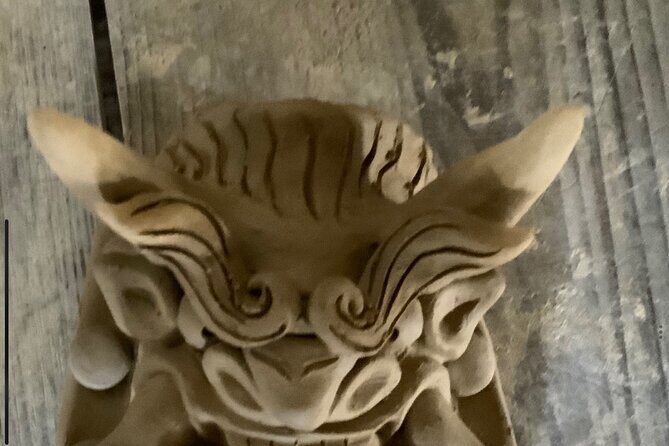
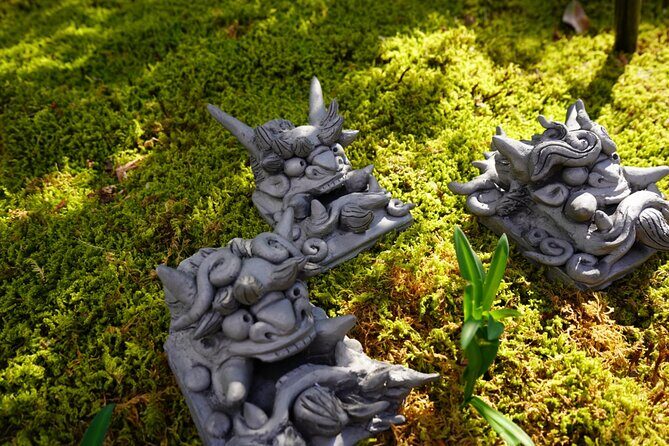
Here’s the part you need to mentally budget for: the tile changes to the traditional silver color after 1–2 months, and it arrives afterward. So this isn’t a take-it-home-now souvenir.
Instead, it’s more like sending yourself a delayed gift from Japan. When it arrives, you’ll see the result of both your hands and the kiln’s work, with the traditional finish you’re aiming for.
Shipping is handled after firing. You should also plan on extra cost: shipping is not included in the workshop price, and only the shipping fee is charged separately on the day. After firing, the workshop sends the tile to your home.
That’s also why the $90 price tag can make sense if you think in terms of outcomes. You’re paying for the full craft process: instruction, making, kiln firing done by the workshop, and a shipped end result (with shipping paid separately).






Price and Value: Is $90 Fair for a Kiln-Fired Keepsake?
At $90 per person for a 2-hour workshop, you might wonder if you’re paying for “time with clay.” But the real value is the full chain of work that follows.
You’re paying for:
- a guided process to shape and assemble a traditional-style tile
- kiln firing handled by the workshop
- the final delivered result with the silver color transformation you’re specifically aiming for
In other words, your time is part of the product, not the whole product. If you were to do something similar on your own, you’d need access to proper materials and firing capability, plus the know-how to avoid brittle results.
Add in the small group size (max 5) and bilingual support, and $90 starts to look like a fair “craft + specialist finish” fee rather than a flat beginner craft rate.
Also, you’re making something unusually local. A roof-tile demon face is not a generic craft souvenir. It’s tied to a specific Japanese architectural element you can actually recognize in Kyoto-area sightseeing and beyond.
Practical Tips: What to Wear, What to Expect, and Where GPS Might Betray You
Wear clothes that can handle soil. You’ll be working with clay/soil textures, and you’ll likely get stains on sleeves, knees, or shoes. Comfortable, washable footwear is smart.
Bring basic patience too. This is a process where small corrections matter. If you try to force a form too fast, you’ll feel it in the steps. The class is structured to help you slow down and do it correctly.
One logistics note that can save you time: the Google Maps GPS for the meeting point may be off by about 40 meters to the west, so if you don’t see the shop quickly, walk a bit in the right direction rather than giving up.
If you’re planning your day, treat the class as a creative appointment, not a quick stop. You need your energy for careful shaping, especially during the assembly steps.
Who This Workshop Fits Best (and Who Might Find It Tricky)
This workshop is ideal if you want something hands-on tied to Japanese architectural tradition. If you like crafts that have a story—roofing details, protective designs, functional art—you’ll get a lot out of it.
It’s also a strong fit for mixed groups. The small group size helps conversation, and the workshop is designed so people of different skill levels can make an onigawara. Reviews also reflect that it works well for children and for adults who simply want a calm break from sightseeing.
It may be less ideal if you want an immediate take-home item. You won’t get the finished, silvered tile right away. You’ll wait for the kiln process and delivery, so plan around that.
Also, if you’re traveling light and hate the idea of any mess, remember: you’ll handle soil during the class. You can still do it, but you’ll want to dress for it.
Should You Book the One-Of-A-Kind Onigawara Workshop?
If you want a Japan souvenir with real craft logic behind it, I’d book it. The main reasons are straightforward: you make the tile by hand, Yuya handles the specialist kiln work, and your result becomes a traditional-style silver onigawara that gets shipped home.
Book this especially if you’re already drawn to Japanese roof details and want to understand the tradition by doing it, not just reading about it. You’ll leave with a tangible link to the idea of protection-by-design.
Skip it only if you need a finished product the same day or you’re unwilling to wear slightly dirty clothes for a hands-on clay session. Otherwise, this is one of the cleaner “do something meaningful” classes you can fit into a trip, with a strong chance of ending up with something you’ll actually keep.
FAQ
How long is the onigawara workshop?
The experience lasts 2 hours. You can check starting times based on availability when you reserve.
What does the price include, and what costs extra?
The listed price is $90 per person. On the day, only the shipping fee is charged separately. After firing, the tile is sent to your home, and shipping is not included in the workshop price.
What will I make during the class?
You’ll make a small, handmade onigawara tile with a demon face design inspired by traditional kawara roof tiles.
How long does it take for the tile to change color and arrive?
After firing, the tile changes to the traditional silver color after 1–2 months and then arrives afterward by shipping.
What should I wear?
Because the experience uses soil, wear clothes you don’t mind getting dirty.
Is the class wheelchair accessible, and is it a small group?
Yes, the experience is wheelchair accessible. It’s also a small group with a limit of 5 participants. The host or greeter supports English and Japanese.