REVIEW · KYOTO
Guided Photoshoot of Fushimi Inari Shrine and Secret Bamboo Grove
Book on Viator →Operated by A Professional Guided Photo Shoot in Beautiful Kyoto! · Bookable on Viator
Red torii and secret bamboo in one hour. This Fushimi Inari photo shoot with photographer Hugh turns a famous, crowded Kyoto landmark into a guided route with real photographic variety. I love the two-backdrop plan: shrine entrance scenes with fox statues, then a calmer bamboo grove and hidden areas, then the iconic red torii gates. I also like the practical payoff—50+ professionally edited photos for solo (60+ for couples), delivered to you via Google Drive just 1–3 days later.
The main consideration is pace. With about a one-hour shoot and multiple locations on foot, you’ll get the best results if you arrive ready to move, pick your outfits, and follow Hugh’s pose guidance quickly.
In This Review
- Key Highlights
- Fushimi Inari and bamboo in one photo plan
- Meet Hugh at the Fushimi-Inari Stations, then get moving
- Shrine entrance photos: fox statues, reds, and gold details
- The quieter bamboo grove and hidden torii angles
- Through the torii tunnel: pacing for iconic Kyoto shots
- Poses, candid moments, and the props you can request
- How many photos you get, editing turnaround, and the RAW option
- Price in context: what $98.81 buys you in Kyoto
- Best for solo portraits, couples, families, and surprise announcements
- Who might want a DIY day instead
- Should you book this Fushimi Inari photo shoot?
- FAQ
- How long is the Fushimi Inari and bamboo photoshoot?
- Where do we meet for the tour?
- Is this a private photoshoot?
- What locations are included during the shoot?
- How many photos do I receive, and what format?
- When do I get the edited photos?
- Are props included?
- Can I buy RAW image files?
- What if the weather is bad?
Key Highlights
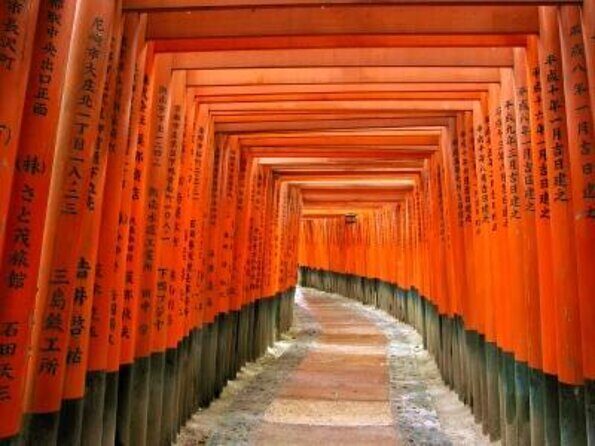
- One-hour, three-scene structure: shrine entrance, bamboo/hidden areas, then the torii gate route
- Private booking: only your group, with extra attention on posing and natural candid moments
- Pro photo volume: 50+ edited JPGs solo, 70+ for couples/groups (and often a few extras)
- Thoughtful crowd management: he guides you to quieter spots and can adjust timing when possible
- Fun props you can request: vintage Japanese fans and umbrellas for added texture in photos
Fushimi Inari and bamboo in one photo plan
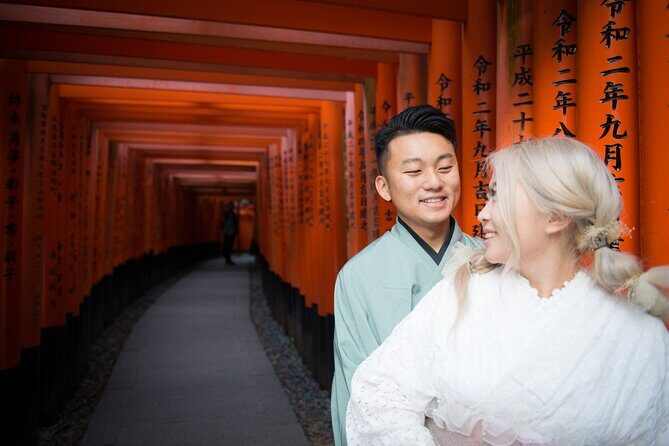
Kyoto’s Fushimi Inari Shrine is iconic for a reason: the red torii gates and temple architecture create strong photo lines from almost every angle. But the same popularity that makes it beautiful also makes it tricky if you’re trying to get portraits where your face, not other people, is the focus.
That’s why I like this tour concept so much: it doesn’t treat your visit as one long walk through the same scenery. Instead, you get a focused photo loop that combines three different moods in about an hour—bright shrine details near the entrance, a quieter bamboo grove feel, and then the famous torii tunnel look.
And the bamboo isn’t just a side stop. You’re guided to a “secret” bamboo grove and a hidden area with lanterns, bamboo, and red torii backdrops. It’s the kind of contrast that makes the final gallery look like you did more than one location in Kyoto.
You can also read our reviews of more guided tours in Kyoto
Meet Hugh at the Fushimi-Inari Stations, then get moving
You meet at your choice of JR or Keihan Fushimi Inari Stations, and the session ends back at the meeting point. That matters because it keeps the day simple: you’re not stuck coordinating private transport or figuring out how to link train stops to a photo route.
Once you meet, Hugh leads the whole thing. He’s not just a camera hand. He guides poses, gets you into good angles, and also captures natural candid moments as you move through the shrine. You’re also given brief history and information along the way, enough to add meaning without turning your photoshoot into a lecture.
The tour uses a mobile ticket, and confirmation is received within 48 hours of booking (subject to availability). It’s a straightforward setup, but do plan to arrive on time so you can maximize the one-hour window.
Shrine entrance photos: fox statues, reds, and gold details
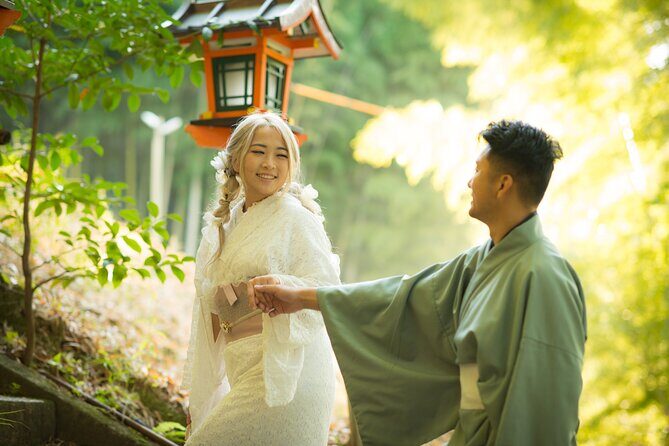
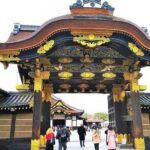
Your route begins at the main shrine area. This is where the shrine’s visual identity is strongest: fox statues, red shrine structures, and the mix of reds and gold tones that make Fushimi Inari instantly recognizable.
In this phase, you’ll be guided to capture shots that work for different styles. Think portraits where your face is framed by the architecture, plus scenes that include the shrine details around you. Hugh also helps you with poses so you look comfortable and natural rather than stiff, which is often the danger when you’re trying to self-shoot at a landmark this busy.
One smart point: this entrance area gives you your “hero” Kyoto look early, before you push deeper into the gates and foot traffic rises. If you care about getting at least a few photos that feel classic, this structure helps.
Potential drawback here: if you’re hoping for a very slow, sightseeing-only stroll, this part moves with purpose. The goal is photos, not wandering.
The quieter bamboo grove and hidden torii angles
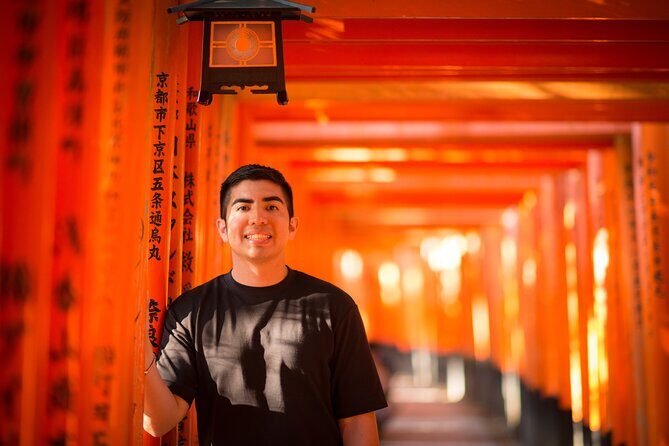
After the shrine entrance shots, you head to the bamboo grove stop and a hidden area. This is where the photos start to look less like a postcard and more like a story.
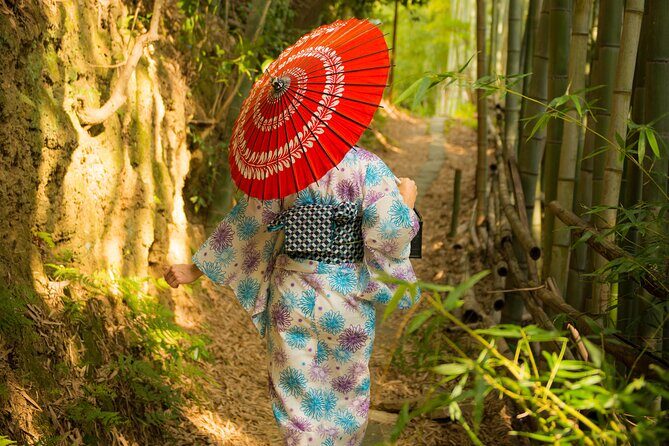
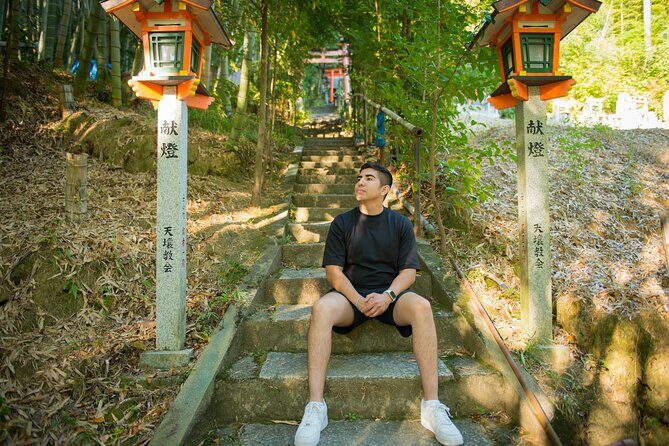
Bamboo creates a vertical rhythm that’s hard to fake with editing later. Hugh gets you into positions that use the bamboo lines, plus lanterns and red torii gates as background accents. The result is a gallery that feels calm and atmospheric, not just red torii after red torii.
This stop also helps break up repetition. If you’ve ever done a long visit to Fushimi Inari, you know how easy it is to lose track of angles. The bamboo and hidden areas give you distinct visual chapters, which is exactly what you want for a set of portraits.
Bonus: bamboo also tends to make crowd distribution feel less intense. You’ll still be in Kyoto, but the vibe is much more about quiet framing than constant hustle.
Through the torii tunnel: pacing for iconic Kyoto shots
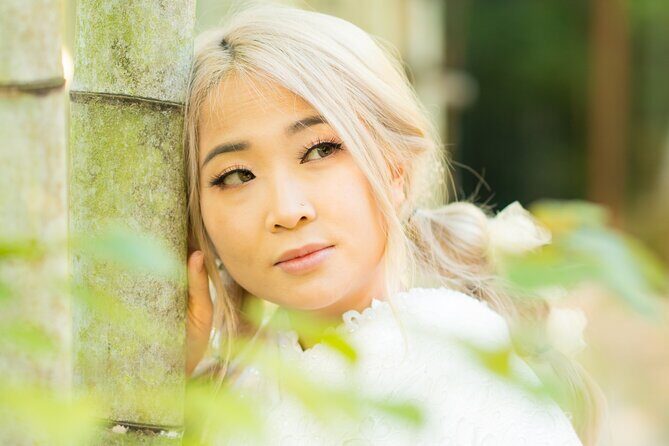
Then you move into the famous red torii gate area. This is the part most people come for, and it can also be the part where self-guided photos get frustrating—people ahead, people beside you, and limited ways to keep your shot clean.
Hugh’s job is to solve that. He guides you through the torii route while capturing both posed photos and candid moments. He also knows how to ask people for space politely, and he’s able to do it in Japanese. That detail matters more than it sounds. It’s one thing to hope a stranger moves; it’s another to get real breathing room so your photos don’t look like a crowd documentary.
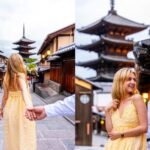
You’ll likely take your best “walkthrough” shots here—images where the torii gates create leading lines and your outfit pops against the reds. If you’re traveling with family, couples, or a honeymoon group, this is the section where you can get photos that actually look like you were inside the shrine’s myth.
You can also read our reviews of more photography tours in Kyoto

Poses, candid moments, and the props you can request
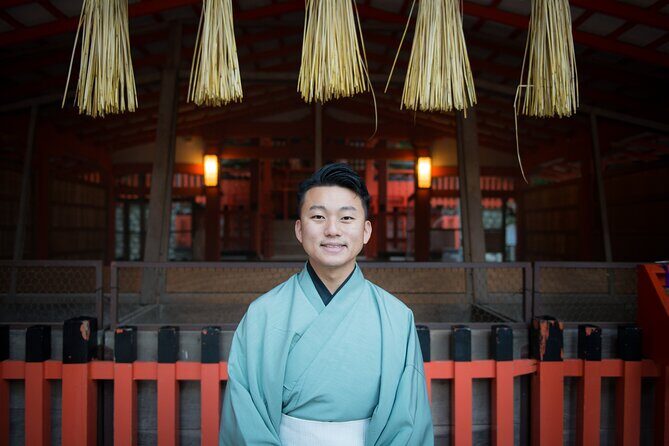
One of the easiest ways to get great photos in Kyoto is to look like you’re doing something, not just posing. Hugh’s approach includes guided poses plus natural candid moments, so you get a mix of composed portraits and more relaxed shots.
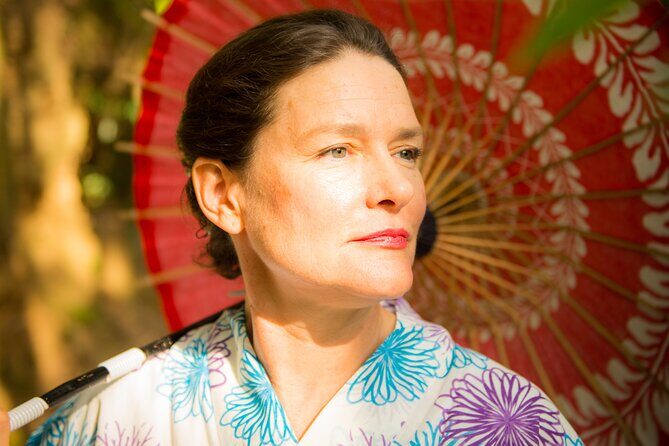
He also brings props you can use upon request: vintage Japanese fans & umbrellas. These aren’t random extras. They add movement and texture, which helps especially when you’re standing still near shrine structures. Umbrellas can also help if the light is harsh or if you want a softer, framed look.
If you’re thinking of using a specific moment—like a honeymoon, a pregnancy announcement, or family photos—this is where having an experienced guide pays off. In practice, it means he’ll help you translate your idea into something that looks good on camera without requiring you to know the technical side of posing.
A small reality check: with a one-hour duration, you’ll want to decide your priorities early. If you want both portrait shots and a few “special moment” images, tell Hugh right away so he can pace the route.
How many photos you get, editing turnaround, and the RAW option
This is a photoshoot, so the deliverables matter as much as the scenery.
For solo shoots, you get 50+ professionally edited photos. For couples (and groups), it’s 70+ professionally edited and taken shots. The session also includes professionally edited JPGs sent via Google Drive 1–3 days later—fast enough that you’re still excited about your trip when the gallery arrives.
Editing is included. That’s a big value point because shrine lighting can be unpredictable: bright reds in shade, mixed sunlight, and crowds. Professional editing helps your skin tones, cleans up distractions, and keeps the shrine colors looking intentional rather than flat.
Want more control? RAW files are available for an extra 5,000 yen. That option is best if you’re planning to print large images, do deeper color work, or want maximum flexibility beyond the edited JPGs.
Price in context: what $98.81 buys you in Kyoto
The price is $98.81 per person, and the duration is about one hour. On the surface, that can sound like a splurge—until you compare it to what you’d otherwise do.
If you hire a photographer yourself, you usually pay for a full service: planning, shoot time, editing, and delivery. Here, you’re basically buying all of that for one focused loop, with the added benefit that Hugh knows where to position you for better photos in the time you have.
Also, you’re not just paying for the shutter click. You’re paying for:
- the ability to guide you through poses and composition,
- the work of editing and selecting the best images,
- the crowd-awareness needed to get clean portraits at a landmark like Fushimi Inari.
And the value shifts in your favor if you travel in a couple or family because the total photo count is higher and the private setup means everyone gets attention rather than sharing a single best angle.
Best for solo portraits, couples, families, and surprise announcements
This is a good fit if you want Kyoto memories that actually look like you were part of the place, not just standing near it.
Solo travelers will enjoy having guidance that doesn’t leave you stuck aiming a phone at yourself. Couples get a full portrait-focused route that uses both the shrine colors and the bamboo contrast. Families can benefit because Hugh helps manage poses so kids (and parents) aren’t left wondering what to do next.
If you have a reason to mark a moment—like a honeymoon photo set or a pregnancy announcement—this experience can work well. The key is that you’re not improvising. Hugh communicates well and can help shape your idea into something that looks natural in the environment.
One more practical advantage: you’re in a private group setting, so you don’t need to wait your turn for photo space. That’s a big deal at Fushimi Inari.
Who might want a DIY day instead
You might skip this if your priority is slow sightseeing, not photos. Even though you’ll get some brief information, the session is designed around taking pictures in a tight time window.
You might also consider DIY if you’re traveling with very flexible plans and you’re happy taking your own photos through crowds. But if you care about clean, edited results—especially with the shrine gates as your backdrop—this is one of the easier ways to get the final images you actually want.
Also, if you’re planning to wear a kimono, note that kimono rental is not included. You’ll need to handle clothing separately, then show up ready for photos.
Should you book this Fushimi Inari photo shoot?
Book it if you want a smart, guided way to get high-quality portraits in Kyoto’s most iconic red torii setting—plus a bamboo grove stop that gives your photos real variety. The combination of private attention, fast delivery, and professional editing makes it feel like a tidy investment, not just an hourly walk with a camera.
Skip it if you’re happy with phone photos and don’t want to manage pacing and poses. If that’s you, you can still enjoy the shrine on your own—but you’ll probably spend more time fighting crowds and resetting angles.
If you do book, my best advice is simple: arrive on time, decide your top priorities (couple portraits, family photos, or a special announcement), and ask for the fan or umbrella props if your style fits. That way you’ll leave with a gallery that looks like Kyoto—not like you tried to photograph Kyoto.
FAQ
How long is the Fushimi Inari and bamboo photoshoot?
It’s about 1 hour (approx.).
Where do we meet for the tour?
You meet at your choice of JR or Keihan Fushimi Inari Stations. The start location is listed as Fushimi-Inari Station.
Is this a private photoshoot?
Yes. It’s private, so only your group participates.
What locations are included during the shoot?
You’ll visit the main shrine area of Fushimi Inari, then a secret bamboo grove and a hidden area, and you’ll also shoot through the famous red torii gates.
How many photos do I receive, and what format?
For solo shoots you receive 50 or more best professionally edited photos in JPEG. For couples or groups, you receive 70 of the best professionally edited and taken shots (listed as 70+).
When do I get the edited photos?
After the shoot, images are edited and sent via Google Drive 1–3 days later.
Are props included?
You can use beautiful vintage Japanese fans & umbrellas upon request.
Can I buy RAW image files?
Yes. RAW files are available for an extra 5,000 yen.
What if the weather is bad?
This experience requires good weather. If it’s canceled due to poor weather, you’ll be offered a different date or a full refund.