REVIEW · KYOTO
Kyoto: Japanese Hair Accessories & Brooch Workshop
Book on GetYourGuide →Operated by Limited Liability Company Coko · Bookable on GetYourGuide
Kyoto is small craft heaven in 90 minutes. You’ll make a one-of-a-kind accessory you can wear as either a hair ornament or brooch, using classic materials like washi and mizuhiki, then enjoy tea and sweets at the end. I particularly love the freedom to pick your colors and pieces, and the calm, patient pace with instructors like Mikiko-san and Ayumi-san. The only drawback to note is that this is a hands-on workshop with no hotel pickup, so you’ll want to plan an easy walk or short transit trip near Nijo Castle.
You’ll also spend time getting your outfit and creation photo-ready while wearing a traditional haori jacket (included). It’s family-friendly, which makes it a solid choice if you want something cultural without the long, exhausting touring. If you’re the type who wants pure sightseeing time, this is more about making than wandering.
In This Review
- Key highlights to look for
- Making Kyoto feel personal with washi, mizuhiki, and a haori
- What you’ll create: a reversible hair accessory and brooch
- The 90-minute flow, step by step
- 1) Start by choosing your colors and materials
- 2) Get into the haori and settle in
- 3) Craft with expert guidance, not guesswork
- 4) Take a photo session with your creation and outfit
- 5) Tea and sweets while you wrap up
- 6) Receive your certificate and handmade souvenir
- Location: central Kyoto near Nijo Castle and easy connections
- Price and value: why $80 can feel fair here
- Who this workshop suits best (and who might not)
- Great for
- Might be less ideal for
- Practical tips to make your accessory look its best
- A realistic expectation: guided crafting, not a high-pressure class
- Should you book this Kyoto Japanese hair accessory and brooch workshop?
- FAQ
- What do I make in the Kyoto hair accessories and brooch workshop?
- How long is the workshop?
- Where is the workshop located?
- What’s included in the price?
- What language is instruction offered in?
- What should I bring, and are children welcome?
Key highlights to look for
- Two-way accessory design: wear it as a hair accessory or as a brooch
- Traditional materials: washi paper, mizuhiki cords, origami, and artificial Japanese flowers
- Haori jacket rental: you craft in a classic look, not just see one
- Included tea and sweets: a real pause after you finish your piece
- Keepsakes: certificate of completion plus a handmade souvenir
- English/Japanese instruction: helpful if your Japanese is basic
Making Kyoto feel personal with washi, mizuhiki, and a haori
Kyoto can feel like a checklist if you only do temples and streets. This workshop flips that. Instead of watching tradition from the outside, you practice it with your own hands, choosing what goes where. You leave with something you actually made, not just a photo of someone else’s perfect idea.
The best part is the flexibility. The accessory you create works as a hair ornament or a brooch, so it isn’t stuck in one use-case. If you like styling, you’ll enjoy trying it on with different outfits. If you’re more practical, you’ll still get a lasting souvenir that you can keep and display.
And yes, you get dressed for it. Wearing a haori jacket during the session makes everything feel more grounded in Japanese clothing culture. It’s also a fun way to look the part without shopping or renting a full kimono-style outfit.
A few more Kyoto tours and experiences worth a look


What you’ll create: a reversible hair accessory and brooch
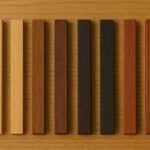
Your project is a wearable piece made with traditional Japanese craft elements. You choose from a variety of colors and materials, and the workshop supports you as you assemble the design.
You’ll work with materials such as:
- washi paper
- mizuhiki cords
- origami elements
- artificial Japanese flowers
The workshop is designed so you can steer your own final look. That means your finished piece won’t look like a mass-produced version of the same template. Even if you start with the same basic idea as someone next to you, your color choices and arrangement give you a distinct result.
If you like crafts where you can control the aesthetic but still have guidance, you’re going to enjoy this. If you’re expecting advanced sculpture-level detail, the format is more friendly and accessible than technical. It’s hands-on, but it’s also about creative confidence.
The 90-minute flow, step by step
This is a focused class. Ninety minutes sounds short until you realize it’s enough time to plan, build, finish, and actually enjoy the moment without rushing.
1) Start by choosing your colors and materials
Right away, you’ll be selecting options for your accessory. This is where the workshop becomes personal fast. Don’t wait until the last few minutes to decide. The color plan you choose at the start affects how everything balances.
If you’re unsure, look for contrast. Darker tones often read well against lighter hair styles and accessories. Softer pastel combinations can feel very Kyoto-seasonal, especially if you like a gentle, understated look.
2) Get into the haori and settle in
You’ll rent and wear a haori jacket during the workshop. This isn’t just costume. It sets the mood, and it makes the crafting feel like part of the culture, not a random activity slot.
Wear comfortable clothes you can move in. You won’t be doing anything strenuous, but you will be seated and leaning in during assembly.




3) Craft with expert guidance, not guesswork
The workshop provides professional instruction in English and Japanese. Instructors in the past have been notably kind and patient, including Mikiko-san and Ayumi-san. That matters because paper and cord crafts can be fiddly. You’ll want someone who can correct small steps without making you feel rushed.
You’ll likely get help on:
- how to handle washi paper pieces
- how to use mizuhiki cords as part of the design
- how to combine origami and flower elements so it all holds together visually
This is also the moment where your piece starts to look like something real. Early on, it can feel like you’re just placing parts. Then it clicks. That’s when you begin to see your own design choices taking shape.
4) Take a photo session with your creation and outfit
After you finish, you’ll have time for a photo session with your accessory and your haori look. This matters more than you might think, because it helps you capture the final scale and colors as they look on you, not just on the table.
Bring your camera if you want crisp close-ups. A smartphone works fine too, but if you care about detail shots, bring the camera you’re most comfortable using.
5) Tea and sweets while you wrap up
The workshop includes Japanese tea with sweets. This is a calm landing after the making. It’s also a nice chance to slow down and enjoy what you made instead of immediately moving on.
In a city full of fast-paced sightseeing, this kind of break is good for your brain. It helps your day feel less like “see, see, see” and more like “experience.”
6) Receive your certificate and handmade souvenir
You also get a certificate of completion. That’s a small thing, but it makes the workshop feel like a meaningful moment rather than just a purchase.
There’s also a handmade souvenir included, separate from the accessory you make. So you end up with more than one take-home item, which improves the value.
Location: central Kyoto near Nijo Castle and easy connections
The workshop is located near Nijo Castle in central Kyoto. That’s a smart base because you can pair this with other classic neighborhoods without spending half your day in transit.
From here, you can connect easily to areas like Gion, Arashiyama, Kawaramachi, and Karasuma. You don’t need a complicated plan. If you want a gentle day, do the workshop first, then roam. If you want a structured day, fit it between sightseeing stops.
The biggest practical point: there’s no hotel transfer included. Plan to get there on your own. Since it’s a short walk from Nijo Castle, it’s usually straightforward if you’re already in the central Kyoto area.
Price and value: why $80 can feel fair here
$80 per person for a 90-minute workshop is not cheap if you compare it to a quick souvenir purchase. But it’s a fair price when you look at what’s included.
You’re paying for:
- guided instruction in English and Japanese
- traditional crafting materials (not just a small kit)
- a haori jacket rental
- a certificate and a handmade souvenir
- tea and sweets
- time that results in something wearable
The value comes from the combination. Plenty of activities offer instruction, but fewer include the outfit rental and extra take-home items. The tea and sweets also make the class feel complete, like a real experience rather than a timed product assembly.
If you’re someone who spends money on memories, this tends to land well. Your accessory becomes part of your future outfit styling, not just a one-time travel purchase.
Who this workshop suits best (and who might not)
This fits many travel styles.
Great for
- Solo travelers who want a calm, structured cultural activity with a personal result
- Couples who want something different from another temple photo day
- Groups that want a shared activity with everyone leaving with their own piece
- Families with children, since there’s a kid-friendly version available
Might be less ideal for
If you only want outdoor sightseeing all day, you may find this too indoor and craft-focused. Also, it’s less suitable if you strongly prefer very fast activities. This class is paced and reflective by design.
Practical tips to make your accessory look its best
A few small choices can make a big difference.
- Bring a camera so you can capture the final look with your haori.
- Wear comfortable clothes you can sit in comfortably.
- Think about color before you start assembling. Your first choices set the tone.
- If you want a piece that works as both hair ornament and brooch, aim for a design you’d realistically want pinned or styled.
And here’s a practical mindset trick: treat it like a design session, not a test. If your first version doesn’t look perfect, that’s normal. The guidance is there to help you shape a finished piece you’ll actually be proud to wear.
A realistic expectation: guided crafting, not a high-pressure class
The tone of this workshop seems to be calm and encouraging. Instructors like Mikiko-san and Ayumi-san have been praised for kindness and patience, and that’s exactly what you want for paper-and-cord crafts.
You’re not expected to arrive knowing Japanese techniques. You’re expected to show up curious and ready to make choices. The craft materials are traditional, but the experience is built to welcome beginners.
That’s also why it works well for both adults and kids. The activity keeps moving forward, but it doesn’t feel like you’re being thrown into the deep end.
Should you book this Kyoto Japanese hair accessory and brooch workshop?
Book it if you want Kyoto in a more hands-on, personal way. You’ll get a wearable souvenir made with classic materials, plus the extras that make the session feel complete: a haori jacket, tea and sweets, a certificate, and an additional handmade souvenir.
Skip it if your schedule is packed with outdoor sightseeing and you don’t want any indoor time. Also skip if you dislike crafts or you know you’ll feel anxious making things by hand.
If you’re deciding between another quick photo stop and a meaningful take-home memory, this is the stronger choice.
FAQ
What do I make in the Kyoto hair accessories and brooch workshop?
You’ll create a unique accessory using traditional Japanese materials, and it can be worn as either a hair ornament or a brooch.
How long is the workshop?
The workshop runs for 90 minutes.
Where is the workshop located?
It’s in central Kyoto near Nijo Castle.
What’s included in the price?
The package includes the 90-minute workshop, crafting materials, a traditional haori jacket rental, a certificate of completion, a handmade souvenir, and Japanese tea with sweets.
What language is instruction offered in?
The instructor provides instruction in English and Japanese.
What should I bring, and are children welcome?
Bring a camera and wear comfortable clothes. Children are welcome, and there is a kid-friendly version of the workshop available. You can also cancel up to 24 hours in advance for a full refund.