REVIEW · KYOTO
Roketsu dyeing experience: M course Roketsu Dyeing Experience
Book on Viator →Operated by 京ローケツ やまもと染工 · Bookable on Viator
Kyoto has plenty of sights. This one is hands-on.
Roketsu dyeing is a traditional wax-resist technique where you actually make the design and dye it, not just watch. The cool part here is the full process, including 100% bucket dyeing, plus you can base it on ready patterns or your own sketch.
I especially like two things: first, the studio experience feels calm and practical, like you can slow down for a while. Second, you’ll leave with a wearable or hangable piece you designed yourself—true take-home craftsmanship in about 90–120 minutes.
The only real catch is language. English support can be limited, so you’ll do best if you’re comfortable with a hands-on class and don’t need lots of detailed instruction in perfect English.
In This Review
- Key things to know before you go
- Bucket Dyeing in a Real Kyoto Workshop (Not a Watch-and-Leave Class)
- Roketsu73: Getting There and Settling In
- Choose Your Fabric Project: T-Shirts, Tote Bags, Banners, and More
- Stencils or Freehand: Making It Yours with Designs and Sketches
- Wax-Resist Painting: The Step Where Your Hands Control the Result
- The Bucket Dyeing Moment: Watching Color Lock In
- Finishing and Taking It Home: Your Kyoto-Made Keepsake
- Price and Value: What $25.77 Buys You in the Real World
- Language and Pace: How to Make This Work Smoothly for You
- Who Should Book This (and who might want a different activity)
- Quick Practical Guide: What to Wear and What to Expect
- Final Thoughts: Should You Book Roketsu Dyeing?
- FAQ
- How long does the Roketsu dyeing experience take?
- What can I dye during the workshop?
- Can I bring my own sketch for an original design?
- Do I need to be good at drawing to enjoy this?
- Is there much English during the class?
- What if it’s canceled due to weather or I need to cancel?
Key things to know before you go
- 100% bucket dyeing: you get the real dye stage, not a shortened demo.
- Stencil options plus freehand: pick from lots of patterns or use your own sketch for a more personal result.
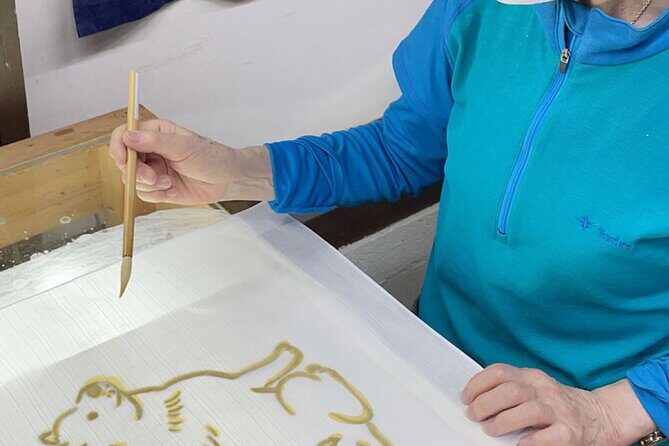
- Wax-resist painting: you’ll paint melted wax to create the resist areas before the dye bath.
- Same-day take-home: your finished item can be ready to bring with you that day.
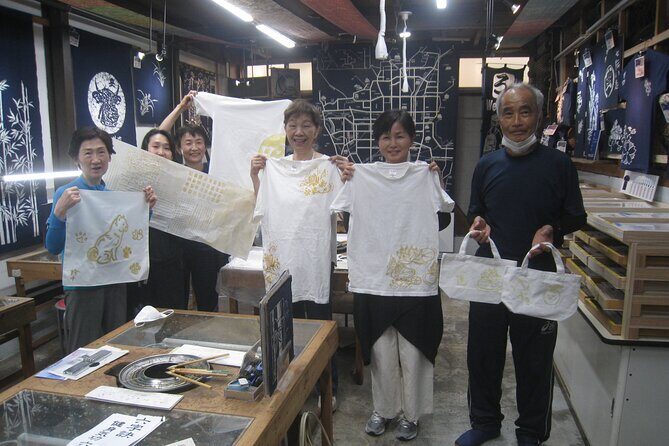
- Small, focused group feel: the workshop is capped at 30 people.
- Family-run guidance: you may work with the owner and support from Yoko, who gets praised for patience and warmth.
Bucket Dyeing in a Real Kyoto Workshop (Not a Watch-and-Leave Class)
Roketsu dyeing is one of those crafts that makes you rethink what a souvenir can be. Instead of buying something made elsewhere, you create a piece that’s genuinely yours—your lines, your choices, your timing with the wax.
The practical magic of Roketsu is the wax-resist step. Wax blocks the dye where you paint it. So your design shows up because you control where the wax goes. Then the fabric goes through bucket dyeing, which helps create that dyed-on fabric look you expect from serious Japanese textile work.
You can also read our reviews of more tours and experiences in Kyoto.

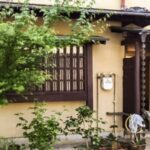
Roketsu73: Getting There and Settling In
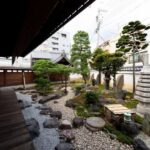
This experience starts at Roketsu73 Nishikyōgoku Umazukachō, Ukyo Ward, Kyoto and ends back at the same meeting point. It’s in the Kyoto area outside the most crowded tourist strips, which is part of the point. You trade crowds and constant walking for a workshop setting where you can breathe.
It’s also set up for real visitors. The tour lists near public transportation, and the ticket is a mobile ticket, so you don’t need to chase paper confirmations. And if you’re traveling with a service animal, it’s allowed.
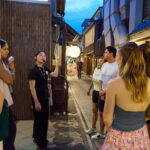
When you arrive, expect a straightforward welcome and a clear shift into making. Most people do fine even without Japanese language skills because the craft is visual and step-by-step.
Choose Your Fabric Project: T-Shirts, Tote Bags, Banners, and More
Right away, you’ll choose what you want to dye. The workshop supports common souvenir formats like a t-shirt, tote bag, and decorative banner. Some sessions also mention wall hanging projects, so you might have options depending on what’s available that day.
This matters more than it sounds. The size and fabric shape affect how your design reads once dyed. If you want your details to pop, you’ll generally want a design that fits the space you’re working on.
If you have no idea what to pick, go with what you’ll actually use back home. A t-shirt gives you wearable pride. A tote bag or hanging works if you want something you can display without thinking about washing schedules.
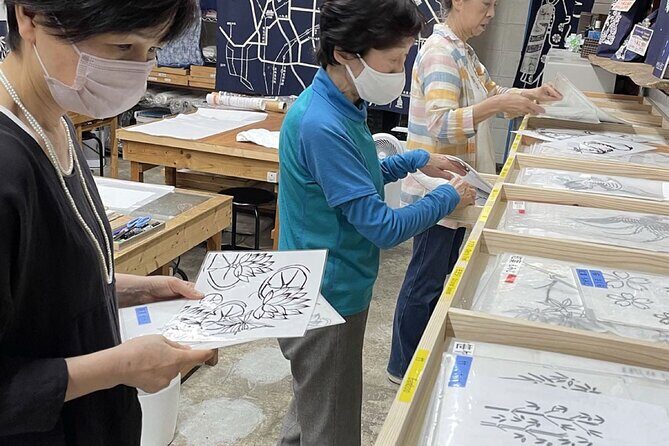
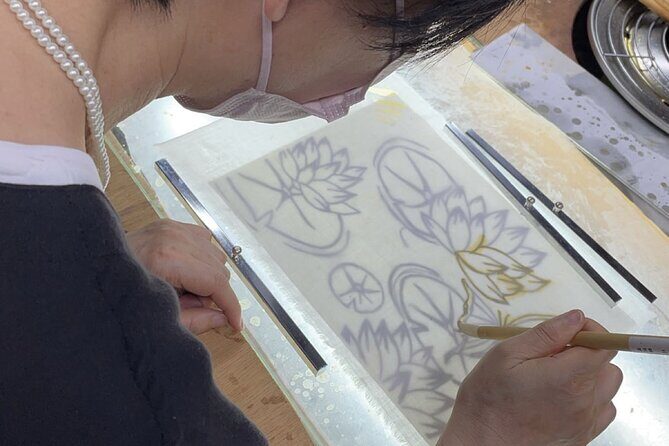
Stencils or Freehand: Making It Yours with Designs and Sketches
Here’s the big creative choice: you can select from dozens of patterns (there are many stencils), or you can draw your own idea. The class description specifically notes you can bring a sketch, and that original works can be produced from it.
This is one of the reasons the workshop gets strong praise. You’re not pushed into doing something you can’t do. You’re given tools—patterns—and you can still bring your own personality to the outcome.
A practical tip: if you bring a sketch, keep it bold. Fine lines are harder to translate into wax painting, especially if you’re learning the rhythm for the first time. Big shapes usually give you the most satisfying finished contrast.
And if you’re unsure about drawing at all, stencils are there to save you. You can still be the artist without reinventing art school.
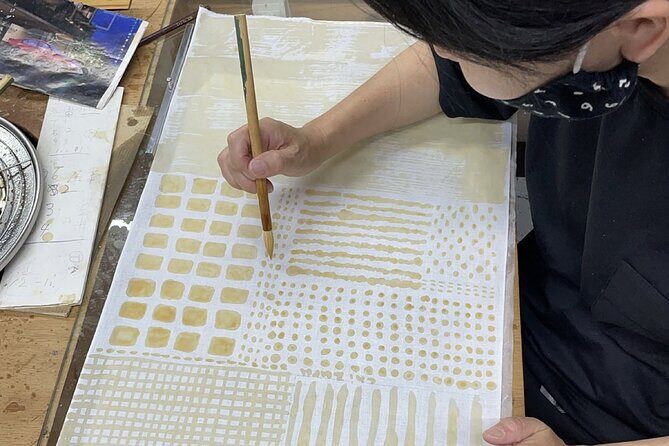
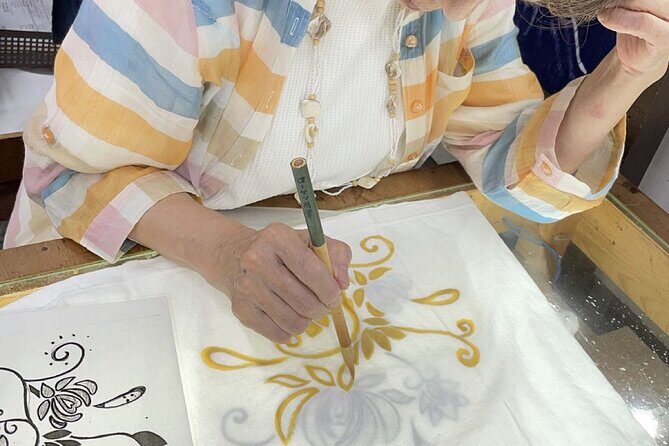
Wax-Resist Painting: The Step Where Your Hands Control the Result
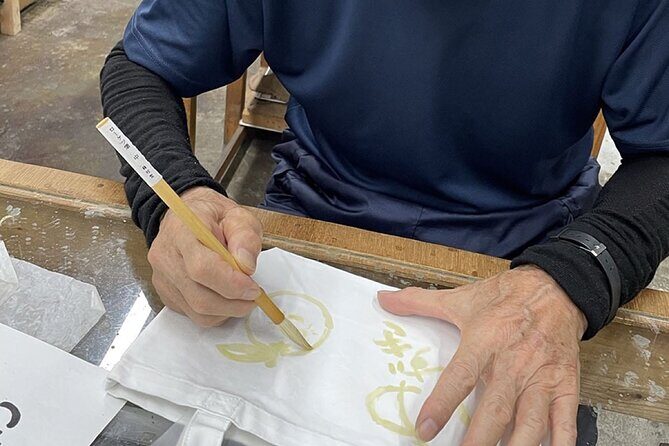
Once your project and design are set, you’ll learn how the wax-resist process works. Several details from the process are consistent across descriptions: you get guided steps, you may practice on a small piece of cloth, and then you begin painting melted wax onto your chosen fabric.
This stage is where most beginners relax into confidence. It’s not about artistic talent. It’s about following the technique and making deliberate marks. The instructors tend to take their time and show you how to aim for the best result.
If you’re worried about doing it wrong, don’t. The workshop format is designed for visitors with mixed experience levels. The environment also feels patient rather than rushed, which makes a big difference when language is limited. You can watch, try, and correct.


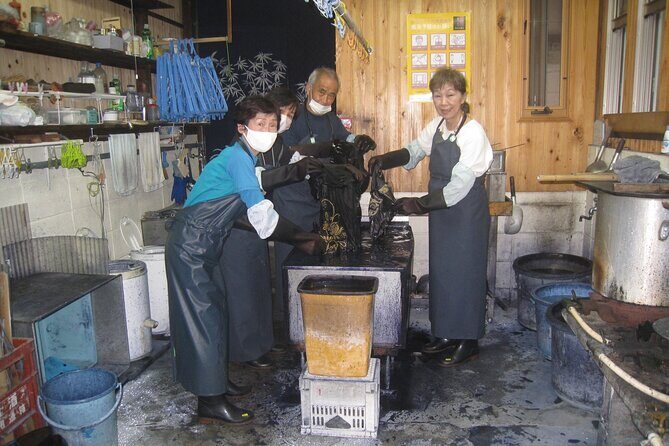
The Bucket Dyeing Moment: Watching Color Lock In
Then comes the signature part: the dye stage. The experience description emphasizes that you’ll get 100% bucket dyeing. In plain terms, your fabric goes through a dye bath after the wax has set in the resist pattern.
This is the part you can’t speed up. Good dye results depend on timing and consistency. You’re not just getting a souvenir—you’re witnessing how the wax-resist actually creates the final pattern through the dye process.
This is also why the craft feels more authentic than a quick “paint and go” workshop. Dyeing has a science-y side: the fabric needs to absorb color where the wax isn’t blocking it. When it works, your design looks crisp and intentional, not like random coloring.
Finishing and Taking It Home: Your Kyoto-Made Keepsake
The overall journey is about 90–120 minutes, and the finished work can be taken home on the day. So you’re not stuck with a “later pickup” plan or waiting for shipping.
That same-day takeaway is huge value. You get a completed piece you can pack immediately, and it also helps you feel grounded during the trip. After hours of sightseeing, it’s a nice reset to sit down, make something, and leave with proof you spent your time well.
When you finish, you’ll have a final piece you helped create, whether it’s a t-shirt, tote, banner, or another format. It’s the kind of souvenir that actually starts conversations back home, because people can see it’s not factory-made.
Price and Value: What $25.77 Buys You in the Real World
At $25.77 per person, this is priced like an affordable creative activity—but the value is more than the number. You’re paying for a real craft process: design work, wax-resist practice, the dye stage, and guidance from the people running the studio.
In Kyoto, many activities are expensive because they involve transportation logistics and museum-style interpretation. Here, the value is concentrated in the hands-on making. You’re also supporting a small, family-run workshop, which adds to the sense that your money goes toward keeping a traditional process alive.
And because you can take your piece home the same day, you’re not paying for a “promise.” You’re paying for a finished item you can use or display.
Language and Pace: How to Make This Work Smoothly for You
English may be limited. That’s the one point you should plan for. The good news is the craft is visual and guided. You’ll follow steps with hands, not just words.
You can also lean on the fact that the studio team includes warm helpers. People mention the owner and support from Yoko, and the recurring theme is patience: you won’t feel shoved through like a factory line.
Still, to have the smoothest experience, come with one of these mindsets:
- You’re here to make something, not to get a lecture.
- You’re okay asking for clarification with gestures and simple words.
- You can wait for the next step without needing a constant stream of explanation.
Who Should Book This (and who might want a different activity)
This workshop is a strong fit if you:
- want a break from walking and big-group sightseeing
- like arts and crafts, even if you’re not “good at art”
- want a personal Kyoto souvenir you can actually take home
- enjoy calm, hands-on settings
It also works well for families. The class description says most travelers can participate, and people have done it as a family group with teens and younger kids. If your group has mixed ages, a studio workshop can be easier than a long cultural lecture.
You might want a different activity if:
- you need lots of detailed English explanations
- you hate waiting for materials and dye timing
- you only want passive sightseeing with zero mess or crafting involved
Quick Practical Guide: What to Wear and What to Expect
The process involves wax-resist dyeing, so you should assume you’ll be working around materials that can be messy. Wear something comfortable that you don’t mind getting a little dye or wax exposure risk on.
Keep your expectations realistic about timing. The class may suggest around 1.5–2 hours, but your exact duration can stretch if you choose more intricate designs or take your time with drawing. The workshop environment seems set up so you’re not rushed, which is a blessing for first-timers.
Final Thoughts: Should You Book Roketsu Dyeing?
Yes, you should book it if you want a real Kyoto craft where you do the work. For the price, you get something that feels personal and grounded: you design, paint wax, and see your colors develop through bucket dyeing, then take it home the same day.
If you’re language-sensitive, go in with the right expectations: the studio will teach through process and hands-on help. If you’re flexible, curious, and okay with learning by doing, this is the kind of activity that makes a trip feel more meaningful.
FAQ
How long does the Roketsu dyeing experience take?
It takes about 90–120 minutes in total, with the tour duration listed as approximately 2 hours.
What can I dye during the workshop?
You can dye items like t-shirts, tote bags, decorative banners, and possibly wall hanging, depending on what’s available for selection.
Can I bring my own sketch for an original design?
Yes. If you have your own sketch, you can create original works based on it.
Do I need to be good at drawing to enjoy this?
No. The workshop is hands-on and guidance is provided, so you can use stencils or get help while you paint and make your design.
Is there much English during the class?
English may be limited, but the process is taught hands-on. You can still understand what to do through demonstrations and step-by-step help.
What if it’s canceled due to weather or I need to cancel?
The experience requires good weather. If it’s canceled due to poor weather, you’ll be offered a different date or a full refund. You can also cancel for a full refund up to 24 hours before the start time.
![[1 Group Only] Osaka Street Food Tour for Family - What you eat on this tour (and what you’ll likely add)](https://images.thejapantraveler.com/wp-content/uploads/1-group-only-osaka-street-food-tour-for-family.jpg)