REVIEW · KYOTO
Japanese Traditional Sweets ”Nerikiri” making
Book on GetYourGuide →Operated by B.B.Advisors Inc. AN KYOTO · Bookable on GetYourGuide
You’ll plate edible art in under an hour. This Nerikiri workshop near Gojo Station in Kyoto uses white/red bean paste from Kyoto’s long-established shops, and you shape two seasonal sweets yourself. I love that you’re not just watching instructions happen; you make the sweets and then get to eat them on the spot. One thing to consider: the class is run in Japanese, and English support is only provided as much as possible, so you may rely on visuals and gentle guidance.
With a tight 65-minute schedule, it’s a good reset if you’ve been walking all day. The building has no elevator, so you’ll need stairs to reach the venues. If you’re okay with that, this is a fun, relaxing way to slow down and learn a very Japanese skill with edible results.
In This Review
- Key highlights to look for
- Nerikiri in Kyoto style: what you’re really making
- Getting to Gojo: a simple meeting point that saves time
- Your 65-minute workflow: from explanation to finished plate
- Flower-shaped Nerikiri: where the technique clicks
- Kinton Nerikiri: your second design and the big payoff
- Kyoto bean paste and why eating on the spot feels different
- Price and value: what $11 buys you in real terms
- Language and pace: how to enjoy it even if your Japanese is limited
- When this Nerikiri workshop is a great fit
- Who might want a different class
- Should you book this Nerikiri workshop?
- FAQ
- Where is the Nerikiri workshop meeting point?
- How long is the experience?
- What will I make during the class?
- What is included in the price?
- Are there extra items I can pay for?
- What language is used in the workshop?
- What are the operating hours?
- Is there wheelchair access?
- What is the cancellation policy?
Key highlights to look for
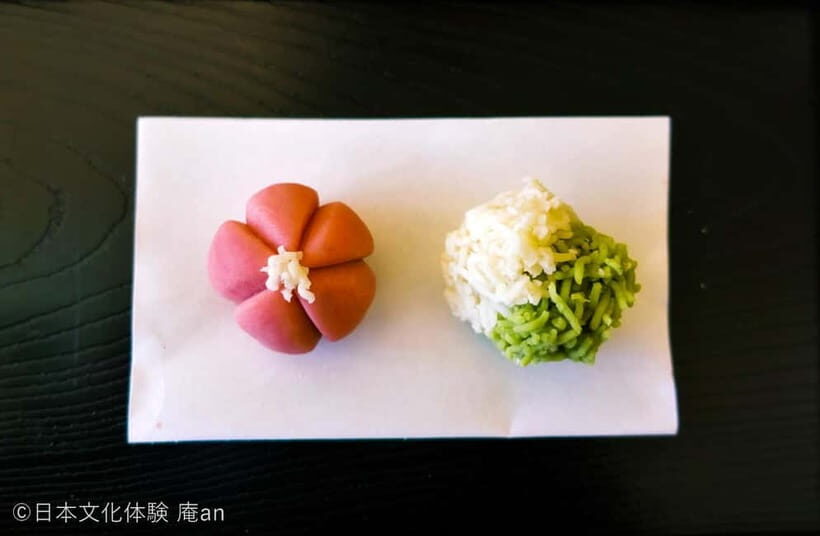
- Kyoto bean paste you can actually taste: white/red bean paste is sourced from long-established Kyoto shops
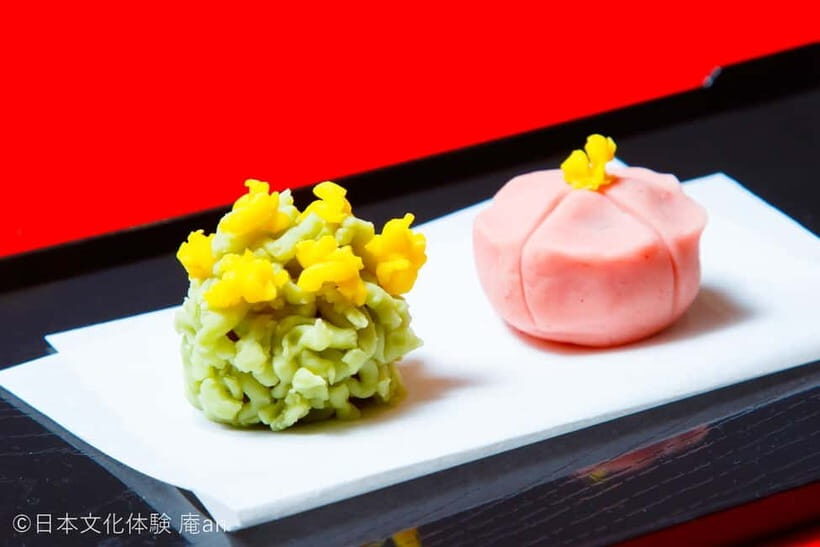
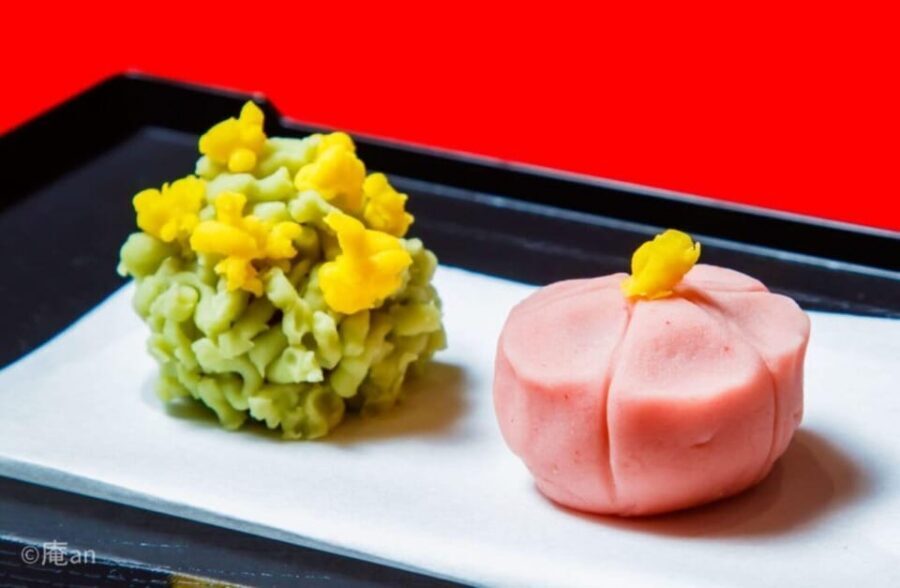
- Two seasonal sweets: one flower-shaped Nerikiri plus a second called Kinton Nerikiri
- Hands-on, beginner-friendly steps: you go from explanation to shaping to a finished plate
- Photo time right after shaping: you’ll capture the look of your sweets before eating
- On-the-spot tasting: you can eat the sweets you make during the session
Nerikiri in Kyoto style: what you’re really making
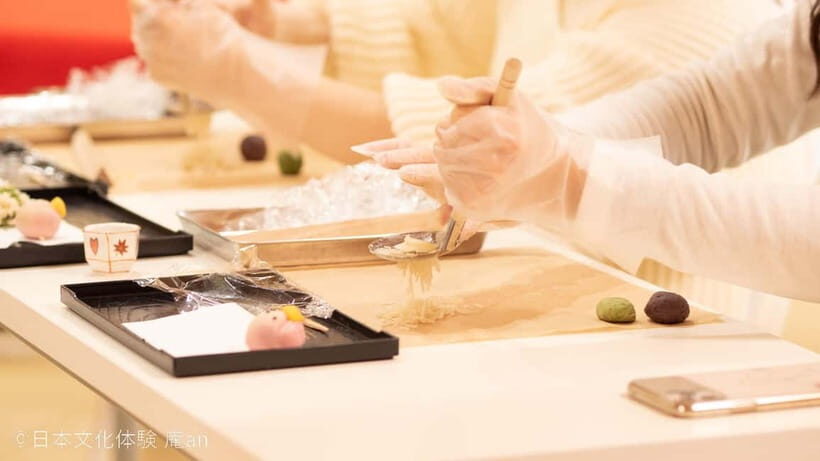
Nerikiri are the kind of Japanese sweets that look like little works of art. They’re made by shaping sweet bean paste into seasonal designs, often with a soft, pliable texture that takes shaping well. In this class, you’re not making a simple dumpling-style sweet; you’re making something that’s meant to be viewed as much as eaten.
What makes this workshop feel grounded is the ingredient choice. You work with white/red bean paste produced by Kyoto’s long-established shops. That detail matters because bean paste flavor is the foundation of Nerikiri. If the paste is good, the finished sweet tastes better even when your shaping isn’t perfect.
The other thing I like is how the class is structured around seasonal form. You’ll make two sweets that match the season, which is a smart way to learn the “why” behind the shapes instead of just copying steps. It turns the process into a small creative project tied to the calendar.
A few more Kyoto tours and experiences worth a look

Getting to Gojo: a simple meeting point that saves time
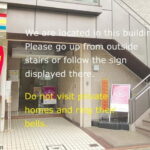
This experience is easy to reach on foot from Kyoto’s Subway Karasuma Line. You’ll meet about a 1-minute walk from Exit 1 of Gojo Station. The store entrance faces Gojo-dori, so you should be able to spot it without going on a scavenger hunt.
One practical point: the building has no elevator. You’ll need stairs to reach each venue. The provider says wheelchair accessible, but since there’s no elevator, you’ll want to think about how you’ll handle stair access on your own or with staff support.
If your Kyoto day has you hopping between neighborhoods, this location is a big plus. Gojo is central enough that it can plug into a lot of itineraries without major transit penalties.
Your 65-minute workflow: from explanation to finished plate
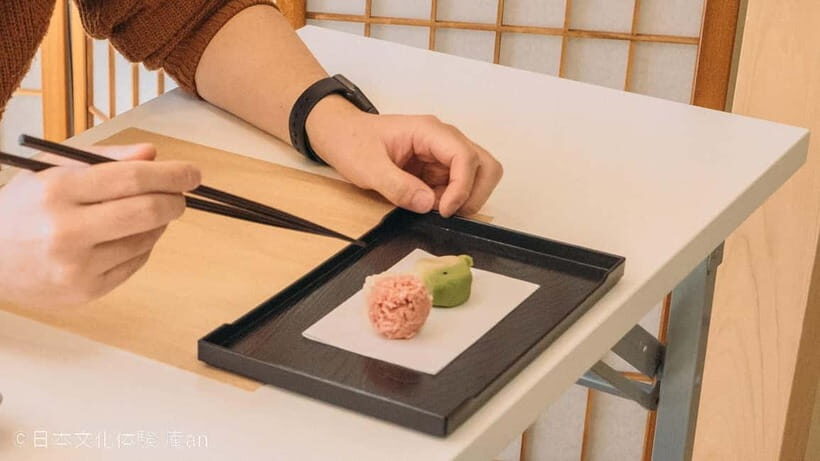
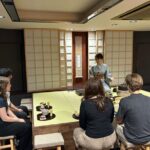
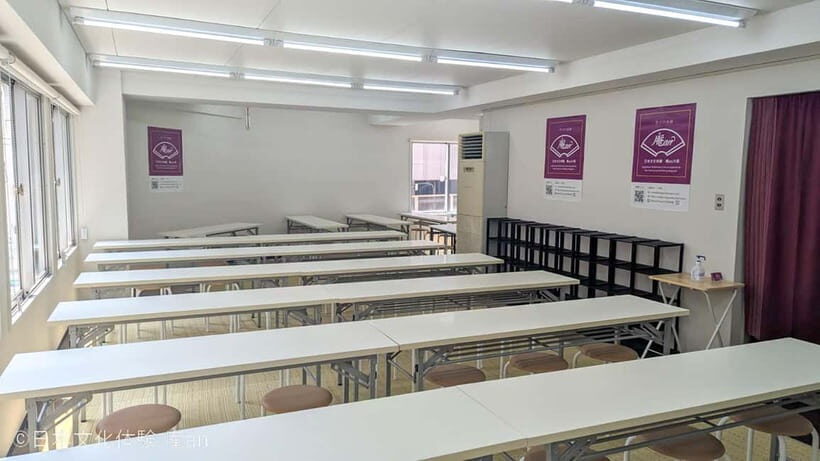
The session runs 65 minutes, and it’s paced to keep you from feeling rushed while still moving along. You start with a short introduction to Japanese traditional sweets, then jump into shaping.
Here’s the flow you can expect:
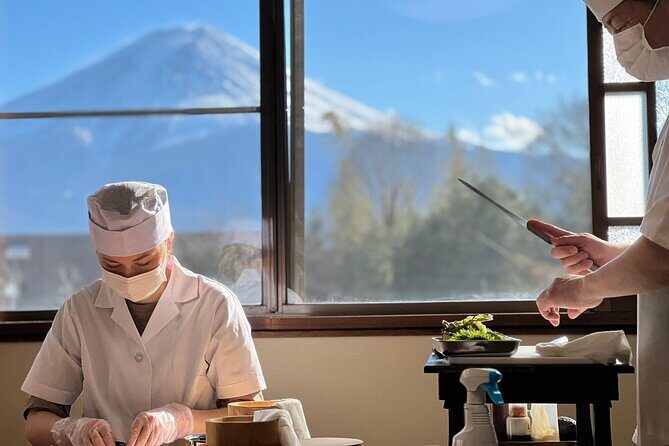
At the beginning, there’s an explanation session. This is where you learn what Nerikiri is, what the shaping process is trying to achieve, and what you’ll do with your materials. For Japanese-language learners, the key is to watch the instructor’s hands closely. Even when you can’t catch every word, you can usually follow the technique.
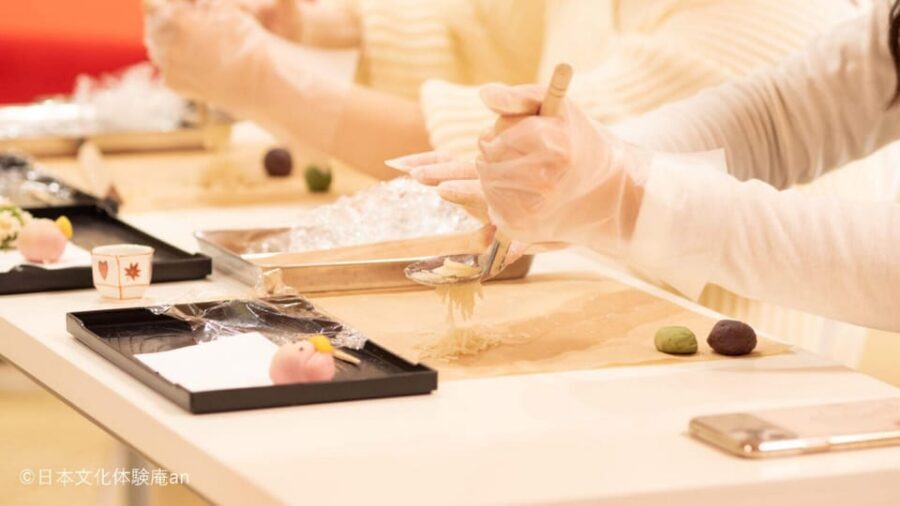
Next comes flower-shaped Nerikiri making. This portion is ideal if you’re nervous about starting. Flowers are forgiving designs in many arts-and-crafts traditions: you focus on petals and contours, then refine the shape until it looks right from multiple angles.
Then you move into Kinton Nerikiri making. You’ll switch from the first design style to a second, so the session doesn’t feel like repeating the same steps. The change of form also helps you understand how flexible the paste is—how you can create different textures and silhouettes while staying within the same sweet-making method.
Around the end, you’ll have picture time. That matters more than you’d think. A lot of food workshops have no “pause” for photos, so people rush through the best moment. Here, they build in time for your plate to be presented and captured before you eat.
Finally, you’ll get eating time. You can eat the sweets on the spot, which means you’re tasting while the sweet is still in the exact condition it was finished in.
Flower-shaped Nerikiri: where the technique clicks
The flower-shaped Nerikiri part is your skill warm-up. It’s designed to teach you how to handle the paste—how to press, fold, and shape without tearing or losing that smooth look. Since you’re making something seasonal, you’re also learning how to aim for a finished appearance, not just a blob.
For me, this stage is where you learn the rhythm. You don’t need advanced art skills. What you do need is patience with small adjustments: a slightly sharper edge, a gentler curve, better alignment of the “petal” parts. If you go in expecting perfection, you might feel frustrated. If you go in expecting gradual improvement, you’ll get the hang of it fast.
Also, pay attention to how you place the finished sweets on the plate. Nerikiri are visual sweets. Small changes in spacing and angle make a big difference in how your final work looks in photos.
Kinton Nerikiri: your second design and the big payoff
After the flower design, the workshop shifts to Kinton Nerikiri. Even if you’re not sure what to expect from the name, you’ll quickly understand that this is the chance to show a different style of shaping. It keeps the class from feeling like a one-note craft.
This is also where you get the “I made this” feeling more strongly. By the time you start the second sweet, you’ve already learned how to work with the paste and how to get it to hold its form. That means your second attempt usually looks better than your first—not because you suddenly become an expert, but because your hands remember what your brain learned.
One underrated benefit: making two sweets gives you a better sense of how flexible the technique is. You end up with a mini set you can actually compare—different forms, same core ingredient, and a clear sense of seasonal design.


Kyoto bean paste and why eating on the spot feels different
The workshop’s ingredient promise is specific: you use white/red bean paste produced by long-established Kyoto shops. That’s more than a marketing detail. In sweets like this, bean paste flavor and texture are the main event.
Eating on the spot changes your experience in two ways. First, you taste what you just made while it’s fresh in your mind. Second, the sweet you finish is the sweet you eat—no waiting, no transport risk, no mystery about how it will change.
If you want to take any home, there is an option for a take-out box for 100 JPY. But the core value here is that you don’t have to. You get a full in-class tasting, and you can focus on making and enjoying rather than packing.
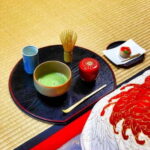
If you’d like to pair your sweets, there’s also tatedashi matcha for 500 JPY. It’s an add-on, not part of the main workshop fee, but it can make the tasting feel more complete.
Price and value: what $11 buys you in real terms
The price is listed at $11 per person, and you should judge value based on what’s included, not just the headline number. In this session, you’re paying for:
- A hands-on set of the Nerikiri making experience
- The time and instruction to shape two seasonal sweets
- The chance to eat the sweets you make on site
In other words, you’re not paying for a quick demo or a single snack. You’re paying for two finished products plus the learning time that gets you there.
Then there are optional extras:
- Take-out box: 100 JPY
- Completion certificate: 300 JPY
- Tatedashi matcha: 500 JPY
Those add-ons can be nice, but they’re not required for the workshop to feel complete. If you want the best value, I’d treat the matcha and certificate as optional “nice-to-have” items rather than something you budget for automatically.
Language and pace: how to enjoy it even if your Japanese is limited
This is a Japanese-language workshop, and English translation is provided as much as possible. That’s helpful, but it also means you shouldn’t assume perfect English coverage. The good news is that food crafting is visual. If you watch what the instructor does, you’ll usually be able to follow along even when some words don’t land.
A practical mindset helps: focus on the steps, not the explanations. You’re shaping paste, so your results come from your hands and the instructor’s demonstrations. If you’re traveling with a group, you’ll likely find it easy to “sync” with the class atmosphere even when you’re not catching every instruction word for word.
Also note a key rule: those who do not participate in the experience won’t be allowed to enter. So plan to actually join in, even if you think you’ll be a spectator. This is built around active making.
When this Nerikiri workshop is a great fit
This class works especially well if you want a short, calming activity in Kyoto that doesn’t require long lessons or fancy tools. It’s also a strong choice for most ages because the shaping is structured and you’re given clear steps to follow.
If you’re the kind of traveler who likes “learn a skill, then consume the result,” you’ll probably love this. Many food experiences end with watching or eating something made by someone else. Here, you make and eat what you shape.
It’s also a good pick if you’re traveling solo. The session is short, the work is focused, and the end result is something you can photograph and share.
Who might want a different class
If you’re expecting detailed English step-by-step coaching, you might find this experience just a bit limited in that area. The instructor is Japanese, and translation is only “as much as possible,” so you may not get constant, granular guidance in English.
Also, if you can’t handle stairs well, the workshop does require stair access because there’s no elevator. The venue is labeled wheelchair accessible, but you should factor in stair movement when choosing this activity.
Finally, if you’re hoping for a very long tasting tour or a broader food lecture, this is intentionally short. The focus is Nerikiri making, not a deep multi-course meal.
Should you book this Nerikiri workshop?
Yes, I think you should book it if you want a compact Kyoto experience with hands-on crafting, Kyoto bean paste, and a finish that includes eating what you make. It’s also a smart choice when you want something relaxing that still feels meaningful.
Skip it only if you know you need very detailed English instruction throughout, or if stair access would be a deal-breaker for you. If those aren’t issues, this is exactly the kind of class that turns a busy travel day into something calm, creative, and delicious.
FAQ
Where is the Nerikiri workshop meeting point?
You meet about a 1-minute walk from Exit 1 of the Subway Karasuma Line Gojo Station. The store entrance faces Gojo-dori.
How long is the experience?
The experience lasts 65 minutes, with the workshop ending and then including eating time.
What will I make during the class?
You will make two Japanese traditional sweets called Nerikiri, designed to match the season.
What is included in the price?
A set of the Nerikiri making experience is included.
Are there extra items I can pay for?
Yes. A take-out box costs 100 JPY, an experience completion certificate costs 300 JPY, and tatedashi matcha costs 500 JPY.
What language is used in the workshop?
The workshop language is Japanese, and English translation is provided as much as possible.
What are the operating hours?
The experience operates from 10:00 to 17:00. Reservations received after 17:00 are processed next day.
Is there wheelchair access?
The activity is listed as wheelchair accessible, but there is no elevator in the building, and you will need to take stairs to reach each venue.
What is the cancellation policy?
You can cancel up to 24 hours in advance for a full refund.
![[Miyako Island / Half Day] Pumpkin Limestone Cave & Sea Kayaking - Canoeing first: what to expect on the sea part](https://images.thejapantraveler.com/wp-content/uploads/miyako-island-half-day-pumpkin-limestone-cave-sea-kayaking.jpg)