REVIEW · KYOTO
Kyoto: Calligraphy class at Buddhist temple in city center
Book on GetYourGuide →Operated by LAMBDA CUBE LLC · Bookable on GetYourGuide
A red lantern leads you to calm craft time. This Kyoto calligraphy class at Seigan-ji mixes real temple atmosphere with hands-on instruction, and you end up taking home your own shikishi artwork. I like that the class is structured step by step, and I also like that the teacher and translators (like Jose and Saskia) keep things friendly and clear. The main drawback is the tatami seating: most people sit on the floor, and it can be tough on legs if you are not used to it.
You’ll spend about 70 minutes learning Japanese-style brush control under the guidance of a calligraphy teacher (often referred to as Imai Sensei) while a translator helps you understand the strokes and the meaning behind your chosen character. You’ll practice basic lines first, then build up to the word or kanji you select, finishing with a completed piece plus a small personalized souvenir. The result is a souvenir that feels personal, not copied.
In This Review
- Key highlights you’ll actually care about
- A temple workshop that feels personal, not performative
- Finding Seigan-ji: the red lantern meeting point in Shinkyogoku
- Tatami seating: the traditional room feel (and the leg factor)
- Choosing your character: plan for something that looks good
- The 70-minute flow: tool setup, basics, then your final shikishi
- What you take home: shikishi calligraphy plus a character key-chain
- Language support: how translators keep the lesson from getting stuck
- Price and value: why $55 makes sense for real materials and coaching
- Who should book (and who should think twice)
- A practical packing checklist for a better final stroke
- Should you book this Kyoto calligraphy session?
- FAQ
- How long is the calligraphy class?
- What do I get to take home?
- Do I need to bring a kanji or word in advance?
- Where do we meet in Kyoto?
- Is food or drinks included?
- Will I sit on tatami flooring?
- What languages are available?
Key highlights you’ll actually care about

- Temple setting in central Kyoto: calligraphy inside a working Buddhist temple setting, not a classroom.
- Small group (max 6): enough attention that you can correct your stroke shape as you go.
- You choose the kanji/word: you’re not just tracing someone else’s art.
- Washitsu + tatami time: you get the full traditional room feel, with zabuton floor cushions.
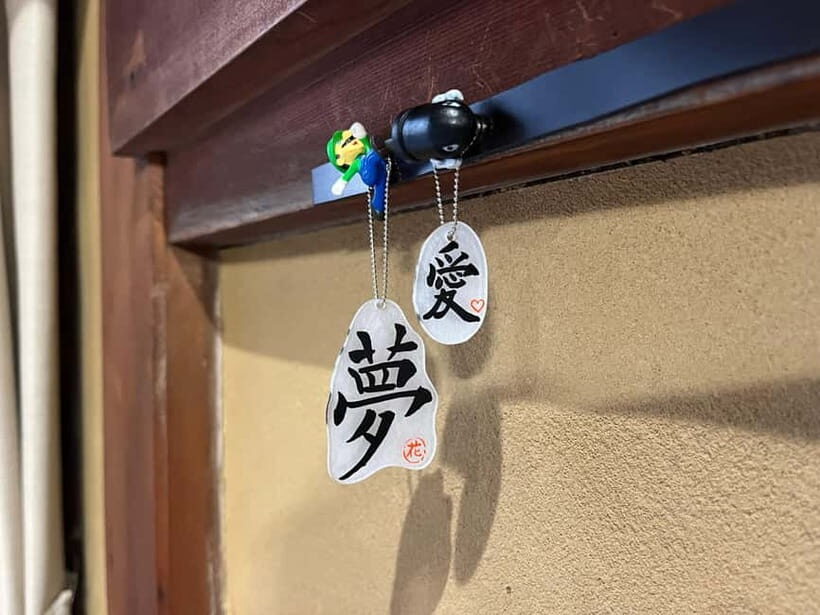
- Take-home omiyage: your shikishi artwork plus a key-chain made with your chosen character.
- Guided pacing: you practice enough to improve, but not so long that your arm is wrecked.
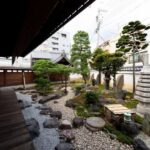
A temple workshop that feels personal, not performative

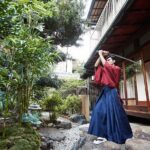
Japanese calligraphy, or shodo, is not just a craft here. It’s tied to language learning, especially around kanji, where kids practice both the shape and the logic of strokes. In this class, that cultural backbone is part of the lesson, but the tone stays practical: you learn how the brush behaves and how to make strokes look intentional.
I like the way the temple atmosphere adds gravity without turning the session rigid. You write with concentration around you, and the Great Buddha setting brings the day’s rhythm down a notch. The whole experience lands as calm and respectful, but still fun, which matters because calligraphy needs patience.
The setting also changes the stakes in a good way. When you write in a real temple room, your finished piece feels more like a keepsake from Kyoto, not a quick tourist stop.
You can also read our reviews of more city tours in Kyoto

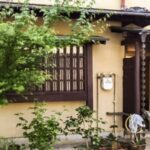
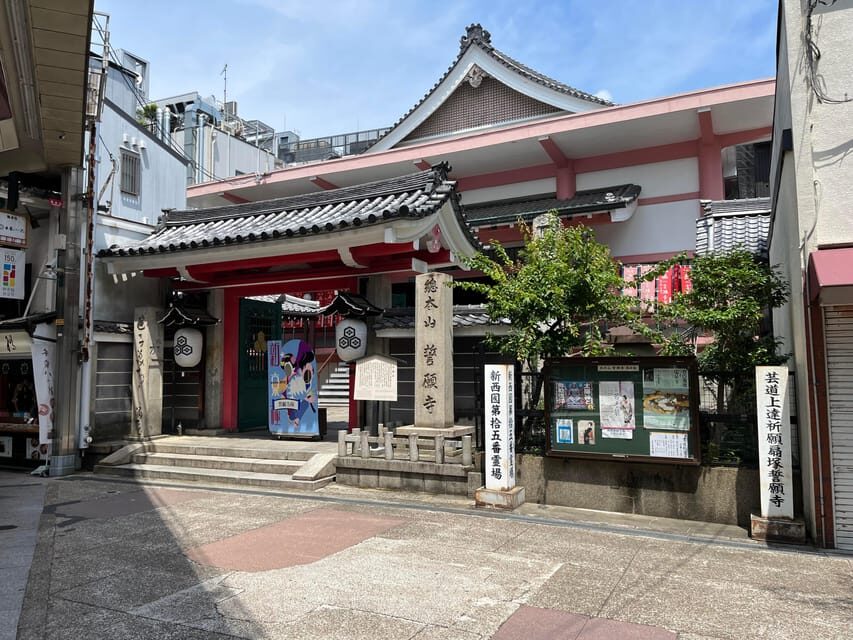
Finding Seigan-ji: the red lantern meeting point in Shinkyogoku

The start is easy once you know what to look for. Meet in front of Seigan-ji Temple in the Shinkyogoku shopping street, and find the person holding a red lantern on a stick under the roofed street.
Two important details keep the whole thing smooth. First, do not go up the stairs to enter the temple. Second, don’t ask monks or staff to confirm you’re in the right place—just wait at the front and look for the lantern holder.
This is one of those small logistics points that can save you stress. If you arrive a few minutes early, you’ll have time to orient yourself and settle in before the group is called.
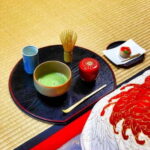
Tatami seating: the traditional room feel (and the leg factor)

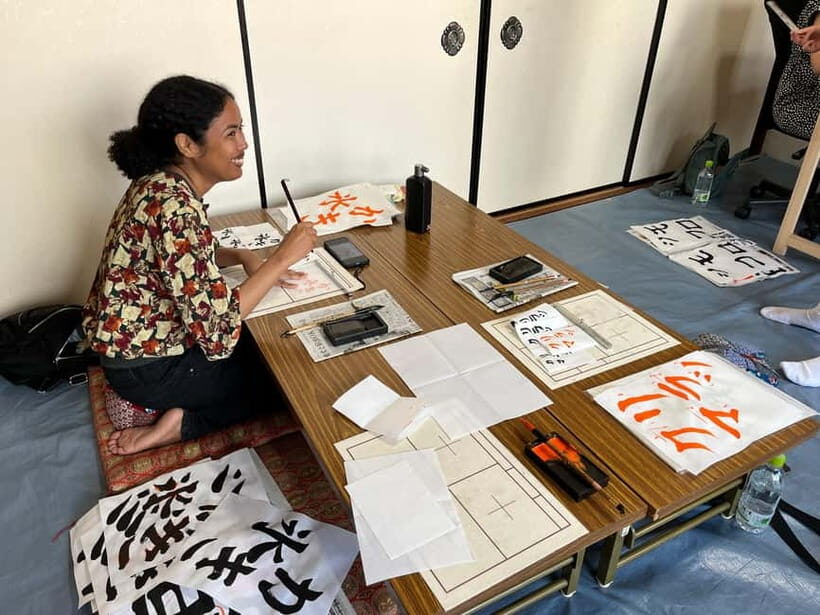
The workshop happens in a washitsu (traditional room) with tatami flooring. Most seating is on the floor with zabuton (floor cushions), and there are only limited desks available. That’s a lovely cultural detail, but it’s also the real comfort variable in the whole experience.
If you know you struggle with floor sitting, plan ahead. A few people manage fine for a 70-minute session, but others feel it more quickly than they expect. Socks are the safest move since bare feet are not allowed, and you’ll likely do better if you choose clothing that doesn’t bind your knees.
Also note the atmosphere: it is not a silent retreat. It tends to be quiet because everyone is writing, but you’ll still hear normal workshop communication as the teacher and translators guide you through strokes.
Choosing your character: plan for something that looks good
Your success starts before the brush even touches paper. You’re asked to think of a word or kanji you’d like to write, and the class provides examples you can choose from. I recommend bringing a couple backup ideas, because deciding on the spot can cost time when you only have 70 minutes.
A smart choice is not about being “famous.” It’s about choosing something you feel comfortable committing to. One reason many classes feel frustrating is when people pick a complex character and then run out of practice time. Here, that risk is real because the lesson includes practicing basic lines first and then building the final character.
There’s also a practical caution that helps your final piece. If you practice too much, your arm can get tired and the stroke quality drops. The class structure is designed to guide you to enough repetition for control, without overdoing it.
If you are left-handed, you may find it slightly harder at first. The good news is that the class environment stays supportive, and you’ll still be coached as you go, including guidance that helps you adjust your technique.
The 70-minute flow: tool setup, basics, then your final shikishi

The class runs in a clear sequence, so you never feel lost. You’ll go from introductions to tool explanations, then into practice before finishing with your own completed artwork.
Here’s how the session typically moves:
- Meet the teacher and translators: you’ll have a guide on hand to explain in your language, while the calligraphy teacher demonstrates strokes.
- Choose your kanji/word: you commit to one character or word so you can focus on stroke accuracy.
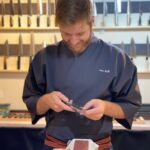
- Learn the tools: you’ll use traditional calligraphy materials, including washi, brush, ink, and tools such as bunchi and shitakami.
- Practice basic lines: you start with fundamentals first so your final character looks balanced.
- Practice your chosen kanji/word: you build it stroke by stroke with correction along the way.
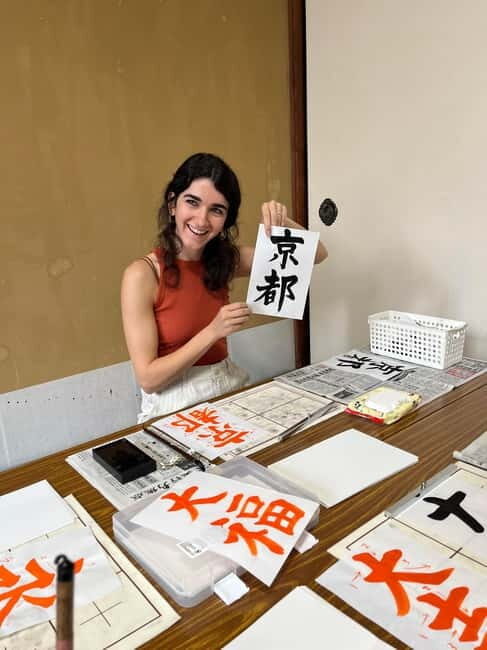
- Complete the artwork: you transfer your best version to shikishi, a special square cardboard backing.
- Take home your piece: you leave with your calligraphy souvenir ready for display.
What I find valuable is the pacing. Calligraphy isn’t just about copying a form. It’s about stroke direction, pressure, and timing, and the lesson breaks those components into manageable pieces.
The teacher demonstrates, then helps you improve during practice. In past sessions, translators have supported instructions in multiple languages, and people often highlight the fact that the coaching feels step-by-step rather than like a lecture or a one-time demo.
A few more Kyoto tours and experiences worth a look

What you take home: shikishi calligraphy plus a character key-chain
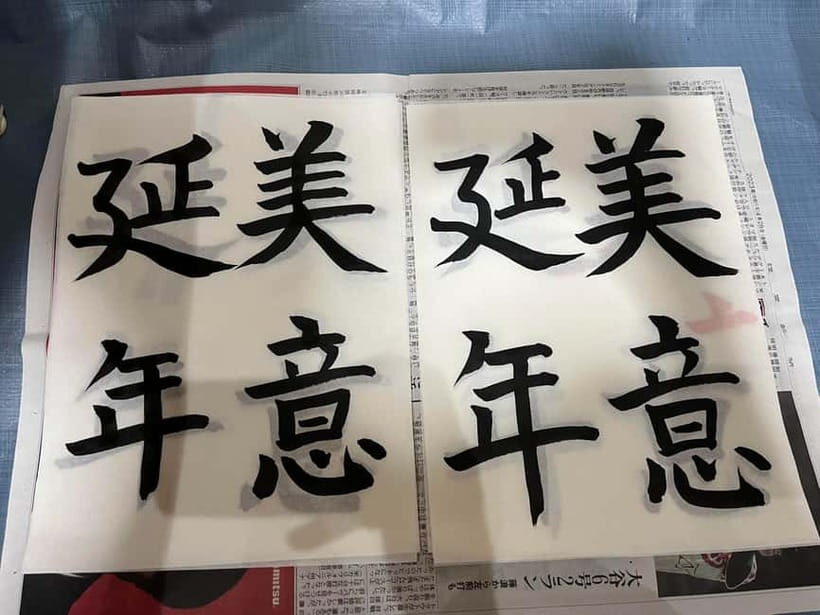
The souvenir is the whole point of booking this. You finish with a completed shikishi artwork using your chosen kanji or word, which makes it easy to frame or display at home. It’s one of those gifts that feels real because you made it with your own brush control.
On top of the artwork, you also receive a personalized key-chain featuring your chosen character. That’s a small add-on, but it’s the kind of detail that helps the day feel special long after you leave Kyoto.
If you like keepsakes that you can actually use, this hits both sides. Your shikishi artwork gives you something display-worthy, while the key-chain gives you a practical reminder you can carry.
Language support: how translators keep the lesson from getting stuck
This is not a “figure it out” class. The teacher may speak Japanese, but you’ll be supported by a translator. The instructor side can include English, Spanish, Japanese, or Dutch support, and you’ll see that reflected in how the lesson is explained.
In several guided sessions, Jose has been mentioned as a helpful guide, often pairing with Saskia to make the experience smooth. People also note that the translator helps with explanations, instructions, and even helps them feel comfortable asking questions or clarifying meaning.
That matters because calligraphy is precise. If you miss the difference between stroke types or how to hold the brush for pressure, your results won’t match your effort. With translation support, you can focus on technique instead of guessing.
Price and value: why $55 makes sense for real materials and coaching
At $55 per person for 70 minutes, the price is reasonable when you count what’s included. You get traditional materials, guided practice, and your finished piece—plus that extra key-chain souvenir.
It’s also a good value compared to paid craft-style activities where you might only watch a demonstration. Here, you do the work. You practice basic strokes, then your specific character, and you leave with something you can keep.
The small group size (limited to 6 participants) is part of the value too. With fewer people, corrections are more likely to reach you while your brushwork is still in progress. That’s how the class goes from fun to genuinely satisfying.
Who should book (and who should think twice)
This workshop is best for people who want a calm, hands-on cultural activity in central Kyoto. It’s a good match for couples, solo travelers, and families with kids old enough to follow instructions and sit comfortably on tatami.
A key age note: it is not suitable for children under certain ages, including children under 5 years. It also isn’t suited to babies, and it lists that it is not suitable for people who are visually impaired.
If you use a wheelchair, the workshop is listed as wheelchair accessible. Since the room is mostly tatami seating, you should expect some practical adjustments for comfort.
If you are hoping for a silent meditation experience, manage your expectations. It tends to be quiet because everyone is focused, but it’s still an interactive class with guidance and explanation.
A practical packing checklist for a better final stroke
You can make the whole workshop feel easier by arriving prepared. Think ahead about your character, and bring a couple options so you don’t freeze when you see the sample choices.
Also:
- Wear comfortable clothes that let you sit on the floor without twisting.
- Choose socks since bare feet are not allowed.
- Expect some arm fatigue. The lesson is paced well, but calligraphy uses muscles you might not use daily.
- Don’t plan to eat right before. Food isn’t included, and drinks aren’t served, though vending machines are available outside.
When you show up relaxed, you write better. It’s that simple.
Should you book this Kyoto calligraphy session?
Book it if you want a Kyoto souvenir that comes from real practice. You’ll get a temple setting in the city center, guided instruction from a dedicated calligraphy teacher, and a finished shikishi artwork with a personalized key-chain. It’s also a strong choice if you like structured activities where you start with basics and end with a finished product.
Skip it or plan carefully if floor seating will be a deal-breaker for you. Since most participants sit on tatami with zabuton, comfort is a real factor.
One last smart tip: decide your character before you go, even if you might switch to a different one offered in class. That small step makes the whole 70 minutes feel smoother. And with options like reserve now and pay later, you can fit it into your Kyoto schedule without too much pressure.
FAQ
How long is the calligraphy class?
The workshop lasts about 70 minutes.
What do I get to take home?
You take home your finished calligraphy piece on shikishi, and you also receive a personalized key-chain made with your chosen character.
Do I need to bring a kanji or word in advance?
You do better if you think of a word or kanji you want to write before the class. There are also examples you can pick from during the workshop.
Where do we meet in Kyoto?
Meet in front of Seigan-ji Temple in the Shinkyogoku shopping street. Look for the person holding a red lantern on a stick under the roofed street. Do not go up the stairs to enter the temple.
Is food or drinks included?
No. Food and drinks are not included, and you can buy drinks in vending machines outside the temple.
Will I sit on tatami flooring?
Yes. The workshop is in a washitsu with tatami flooring. Most seating is on the floor with zabuton, and desks are available but limited.
What languages are available?
The workshop provides instruction support in English, Spanish, Japanese, and Dutch.