REVIEW · KYOTO
Ramen Broth Class by Michelin Guide Shop & Custom Chopsticks
Book on GetYourGuide →Operated by Musoshin Fit inc. · Bookable on GetYourGuide
A ramen class that leaves you with dinner and souvenirs.
This Ramen Broth Class in Kyoto’s Gion teaches you how to build the flavor base that makes ramen taste like it came from a serious shop. You also get hands-on, custom keepsakes along the way, including engraved chopsticks and a tenugui you’ll wear during cooking.
I love the way this class turns a skill you can use later into a full “chef for a moment” experience. The custom chopsticks engraved with your name feel personal, and the Musoshin tenugui souvenir adds real daily-life value back home. The other big win: you don’t just watch. You make the broth and then eat the ramen you helped create.
One drawback to plan around: it’s not suitable for wheelchair users, and children under 10 are asked not to participate. If you’re traveling with anyone who needs mobility support or is young, you’ll want to pick something else.
In This Review
- Key things that make this class worth your time
- Kyoto’s Gion ramen broth workshop: why it feels practical
- Your take-home keepsakes: engraved chopsticks + the tenugui chef look
- How the class runs in 90 minutes (and where the real cooking happens)
- Step 1: Set up, name engraving, and chef costume
- Step 2: The broth process (about 40 minutes)
- Step 3: Noodles and toppings
- Step 4: Eat what you made
- The broth lesson: what you’re really learning to recreate at home
- Noodles and chashu: the two styles you’ll taste and remember
- Fresh noodles from the Musoshin factory
- Two chashu options (including a special one)
- Dietary options: gluten-free, vegetarian, vegan choices
- Price and value: is $58 worth it?
- Who this suits best (and who should skip it)
- What to bring and how to be comfortable in the kitchen
- Quick tip: make your chef-mode souvenirs last
- Should you book this ramen broth class in Kyoto’s Gion?
- FAQ
- What is the duration of the ramen broth class?
- Where does the class take place?
- What is the price per person?
- What will I make during the class?
- What souvenirs are included?
- Are there dietary options like vegan or gluten-free?
- Will I eat what I make?
- What should I bring with me?
- Is this class suitable for young children?
- Is the class accessible for wheelchair users?
Key things that make this class worth your time
- Name-engraved chopsticks made with a special machine, packed as a traditional souvenir
- Musoshin tenugui (head towel) + apron setup that turns you into chef-mode fast
- A hands-on ramen method built around a broth that takes about 40 minutes
- Fresh homemade noodles made at a nearby Musoshin noodle factory
- Two chashu styles, including pork belly and a pork cartilage chashu only available here
- Gluten-free, vegetarian, and vegan options offered for more than just toppings
Kyoto’s Gion ramen broth workshop: why it feels practical
Kyoto’s Gion can be all lanterns and photo stops. This class keeps the focus on something useful: the broth. In most ramen shops, the magic starts before the noodles hit the bowl. Here, they teach you how to create that flavor foundation in a way you can realistically repeat at home.
You also get structure that makes it easy to follow, even if you’re not a “cook at home” person. First you set your identity for the day—your name becomes part of your take-home items. Then you move into the kitchen steps in a clear order: wash up, cook the broth, then cook noodles and assemble.
And yes, it’s fun. The effects-themed photo spot and the chef costume touch are not just filler. They help you relax, pay attention, and enjoy the process without turning it into a stiff lecture.
You can also read our reviews of more guided tours in Kyoto


Your take-home keepsakes: engraved chopsticks + the tenugui chef look
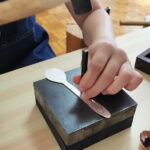
This is one of those experiences where the souvenir is tied directly to what you do. You begin by sharing your name. They engrave it onto a pair of chopsticks using a special machine, then present them to you in a traditional Japanese box with extra color added. It’s a small detail, but it’s also a big memory trigger. Every time you reach for those chopsticks, you’ll remember the steps you learned.
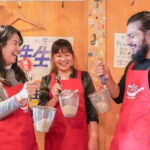
Then you get outfitted like you mean it: you receive a Musoshin tenugui and wrap it around your head, put on a Musoshin apron, and move into cooking mode. This matters more than you’d think. When you’re wearing the gear, you’re not just “participating.” You’re acting like part of the team. The class feels less like a demo, more like a guided workshop.
If you like travel souvenirs that don’t end up as dust collectors, this is a smart choice. You’re taking home items you can actually use—chopsticks for meals and a tenugui for everyday Japanese-inspired life.
How the class runs in 90 minutes (and where the real cooking happens)
The total time is 90 minutes, but the rhythm is built around two key phases: broth and noodles/assembly. Knowing that helps you decide if the pace will suit you.
Step 1: Set up, name engraving, and chef costume
Before any cooking, you handle the custom items. They ask for your name, engrave it onto your chopsticks, and prepare everything so it’s ready when you finish cooking. After that, you wash your hands thoroughly and get your tenugui and apron on. It’s a quick transformation that keeps the experience light and focused.
Step 2: The broth process (about 40 minutes)
A professional chef teaches you how to make the ramen broth. The important thing here is that you’re not learning a vague concept. You’re learning a specific workflow—how ingredients and timing come together so the broth tastes like ramen.
Even better, the broth isn’t treated like a magic trick. They explain it in a way that you can reproduce later. That’s the difference between a cool photo moment and something you’ll actually use.
A few more Kyoto tours and experiences worth a look
Step 3: Noodles and toppings
Once the broth is ready, you cook the noodles. They’re fresh, homemade noodles, made at a nearby Musoshin noodle factory. That detail matters because ramen at home often fails when people use the wrong noodles or dried substitutes. Here, the noodles are freshly made and part of what makes the bowl taste right.
Then comes assembly: toppings are handmade by the chefs and sourced from a nearby Musoshin Gion restaurant. You’ll add your toppings and complete the bowl.
Step 4: Eat what you made
This class ends with you enjoying the ramen you helped create. That’s a huge quality check. You learn, you taste, and you understand what the steps were actually doing to the flavor.
The broth lesson: what you’re really learning to recreate at home
Broth is where ramen either tastes right—or tastes like “hot soup.” This class focuses on giving you a ramen broth method you can repeat, not just a one-time result.
You’re taught by a chef, and the emphasis is on simplicity plus flavor. The broth takes about 40 minutes, so the teaching is tuned to a home-cook timeline: long enough to develop taste, short enough to feel achievable.
Here’s what you should watch for during instruction if you want to succeed later at home:
- Pay attention to timing and when seasoning happens
- Notice how the chef describes the goal flavor, so you know what you’re aiming to reproduce
- Ask how they expect you to adjust if you don’t have exact ingredients
This approach lines up with how people describe the experience afterward: they come away feeling capable of making ramen from scratch, not just collecting a recipe card and hoping.
Noodles and chashu: the two styles you’ll taste and remember
Ramen is broth, yes. But it’s also texture and balance. The noodles and chashu do the heavy lifting.
Fresh noodles from the Musoshin factory
The class uses fresh noodles—homemade noodles crafted at a nearby Musoshin noodle factory. That matters because texture is half the “ramen shop” feel. At home, noodles can be the hardest part to nail. Here, you learn the broth part while experiencing the noodle part at full quality.
Two chashu options (including a special one)
You’ll have two types of chashu:
- Pork belly chashu, prepared carefully over one full day
- Tender pork cartilage chashu, pressure-cooked for two hours and seasoned with a special sauce, and offered here only
That cartilage chashu detail is memorable because it’s not the default ramen topping you see everywhere. It gives you a broader sense of what chashu can be beyond pork belly and what different methods do to tenderness.
Then you finish with toppings: a seasoned soft-boiled egg, bamboo shoots, and green onions. These are the finishing notes that make the bowl feel complete, not improvised.
Dietary options: gluten-free, vegetarian, vegan choices
A big practical reason to consider this class is that dietary needs are taken seriously. They offer options for gluten-free, vegetarian, and vegan guests.
The key point for your decision: it’s not limited to swapping just one garnish. The class indicates those options can include the broth and toppings. That’s what makes it feel fair. You’re not being “accommodated” with a sad version of the dish.
If you’re traveling with someone with dietary restrictions, this is one of the fewer ramen-focused activities that seems built with real alternatives in mind.
Price and value: is $58 worth it?
At $58 per person for 90 minutes, this is not a budget snack. But you’re paying for three things at once:
- A hands-on broth cooking experience with instruction from a chef
- High-quality components in a ramen-shop style workflow (fresh noodles and handmade toppings)
- Custom, usable keepsakes: engraved chopsticks and a tenugui souvenir
If you’ve done cooking classes before, you know what normally costs money: instructor time, ingredients, and time to make something you can actually eat. This class stacks those with personalized items that feel tied to the experience, not printed after the fact.
Also, remember the “transfer value” of the skill. If you really take the broth method seriously and try it at home, the cost becomes less about the meal you eat today and more about the meals you can recreate later.
Who this suits best (and who should skip it)
This works especially well if you:
- Want a Kyoto activity that’s not just sightseeing
- Like food experiences with clear steps you can reuse
- Care about souvenirs that connect to a real moment
- Travel as a couple or small group and want something interactive
It may not fit if:
- You need wheelchair accessibility (it’s not suitable)
- You’re traveling with children under 10 (not recommended)
- You want a purely observational food tour with zero hands-on cooking (this is hands-on by design)
What to bring and how to be comfortable in the kitchen
Bring a camera and wear comfortable clothes. That sounds simple, but in cooking classes it’s the difference between enjoying yourself and feeling stiff or awkward while you chop, pour, and follow instructions.
The meeting point can vary depending on the option booked, so check your specific confirmation details. Plan to arrive a bit early so you can settle in, especially because the name engraving and costume setup happen early.
Also, the instruction is in English and Japanese, so you can follow along even if your Japanese is limited.
Quick tip: make your chef-mode souvenirs last
When you take home engraved chopsticks and the tenugui, you’ll get the best use if you treat them as part of your meal routine. Use the chopsticks for at-home ramen nights. Keep the tenugui somewhere visible if you like using it for cooking, tea time, or organizing.
It’s a small strategy, but it turns the day from a one-time memory into an ongoing ritual.
Should you book this ramen broth class in Kyoto’s Gion?
I’d book it if you want an authentic ramen skill with a strong “take-home” connection. The broth-focused teaching is the core. The custom chopsticks and tenugui make it more memorable than a standard cooking class. And the fact that vegan, vegetarian, and gluten-free options are available makes it a smarter pick for mixed dietary groups.
Skip it if accessibility is a concern, if children under 10 are in your party, or if you only want casual tasting with no cooking.
Overall, this is one of those Kyoto experiences that gives you something you can use—broth knowledge—and something you can keep—engraved chopsticks—without feeling like a theme park version of ramen.
FAQ
What is the duration of the ramen broth class?
The experience lasts about 90 minutes.
Where does the class take place?
It’s in the Kyoto’s Gion district area.
What is the price per person?
The price is $58 per person.
What will I make during the class?
You’ll learn how to make authentic ramen broth, then cook noodles and assemble a bowl to eat.
What souvenirs are included?
You’ll take home the tenugui you use during cooking and chopsticks engraved with your name.
Are there dietary options like vegan or gluten-free?
Yes. The class offers options for gluten-free, vegetarian, and vegan guests.
Will I eat what I make?
Yes. The class includes eating the ramen you make.
What should I bring with me?
Bring a camera and wear comfortable clothes.
Is this class suitable for young children?
Children under 10 years old are asked not to participate.
Is the class accessible for wheelchair users?
No, it’s not suitable for wheelchair users.