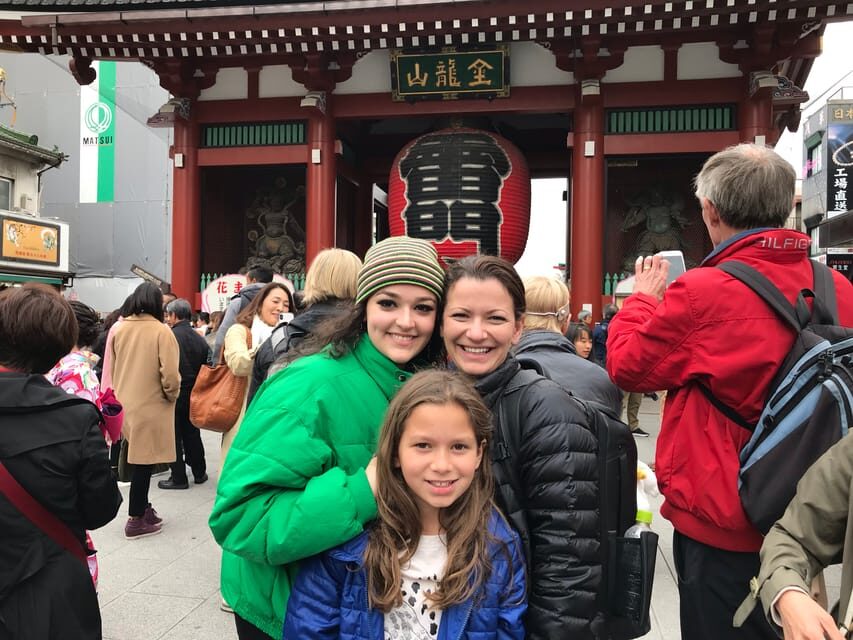
REVIEW · TOKYO
Tokyo: 3-Hour Bike or E-Bike City Highlights Tour
Book on GetYourGuide →Operated by Tokyo Rental Bicycle · Bookable on GetYourGuide
Tokyo clicks faster when you’re riding. This 3-hour bike tour strings together Tokyo’s big-name landmarks and smaller street scenes, with a guide helping you connect the dots as you go. You’ll get English-speaking local guidance plus high-quality bikes (Bianchi cross bikes or e-bikes), so the whole outing feels smooth and safe.
Two things I really like about this tour: the route hits both classic Tokyo and modern icons, and the pace is built for real sightseeing without you needing to plan every stop. I also like that you’re not locked into one kind of rider—if legs are not your thing, the e-bike option is specifically there for you.
One thing to consider: this is still a street bike experience. If you’re nervous around cars or you’ve never ridden in a city, you’ll want the e-bike and you should expect some road riding and quick transitions between sidewalk and street.
In This Review
- Key things you’ll remember from this Tokyo bike tour
- Why this Tokyo bike route works in just 3 hours
- Start at the Commodore Perry statue and get rolling quickly
- Zojo-ji to Tokyo Station: traditional landmarks early, photo stops on purpose
- Chidorigafuchi and Akasaka: park break time plus palace-area street scenes
- The surprise guided stop: where your guide adds Tokyo flavor
- Aoyama to Shibuya Crossing: cathedral streets, Cat Street culture, and big-city energy
- Bianchi cross bikes vs e-bikes: choose based on your comfort, not your pride
- Safety and traffic: what to expect, and how to feel confident
- Price and value: is $45 fair for a 3-hour Tokyo orientation?
- Practical tips to make your ride smoother
- Who this tour is best for (and who should pass)
- Should you book this Tokyo highlights bike or e-bike tour?
- FAQ
- Where does the tour meet?
- How long is the Tokyo bike highlights tour?
- What kind of bikes are included?
- Are helmets included?
- Is there an e-bike option?
- What’s included in the price?
- What should I bring and avoid?
Key things you’ll remember from this Tokyo bike tour

- Bianchi cross bikes and e-bikes keep the ride comfortable for 3 hours
- English-speaking guides make each stop feel purposeful, not random
- A tight route covering temple sites, parks, palace areas, and Shibuya
- Photo stops built into the flow, so you still get plenty of momentum
- Safety and insurance included, which matters when you’re weaving through Tokyo streets
- A mix of famous and lesser-seen spots, including a surprise guided stop
Why this Tokyo bike route works in just 3 hours
Tokyo is huge. Even with great transit, it’s hard to cover the highlights fast without burning your day hopping between stations. This tour uses time like a pro: short rides between stops, quick photo moments, and guided segments that add context without slowing you down.
You also get a different way to “read” the city. On foot, you miss the rhythm of neighborhoods. By bike, you feel how Tokyo changes from temple grounds to government-center streets to shopping and neon zones—all in one morning or afternoon window.
And yes, you’ll likely cover serious ground. One rider estimated around 15 km, and the mix of parks, gates, station-area streets, and Shibuya makes it feel like a real orientation tour rather than a “drive-by.”
You can also read our reviews of more cycling tours in Tokyo


Start at the Commodore Perry statue and get rolling quickly
Your meetup is by the Statue of Commodore Perry, about a 3-minute walk from Daimon Station (A6 exit). That’s a handy location because it’s not buried inside a maze of smaller streets, and you can reach it without complicated transfers.
From there, you’ll mount up and start moving through central Tokyo right away. The tour includes a mini pouch on the bike for essentials like your phone and wallet, which is a small detail that makes a big difference—less juggling, more actually enjoying the ride.
If you’re the type who likes to plan, this is also good news: you don’t need to figure out routing on the fly. The guide keeps the group together and sets expectations for each stop.
Zojo-ji to Tokyo Station: traditional landmarks early, photo stops on purpose

The tour begins with a first landmark photo at the Statue of Commodore Perry, then you head into the temple-heavy portion of the ride.
Next up is Zojo-ji Temple. You’ll get a photo stop plus about a 15-minute visit with a guided component. This is a smart opener because it shifts your mental gear early. Instead of jumping straight to skyscrapers, you start with a traditional Tokyo setting while everyone’s still fresh.
Then it’s on to Hibiya Park for a short 3-minute visit. Small time here, but that’s intentional: parks are a breather in the middle of an active day. Even a quick stop helps reset your legs and your attention span.
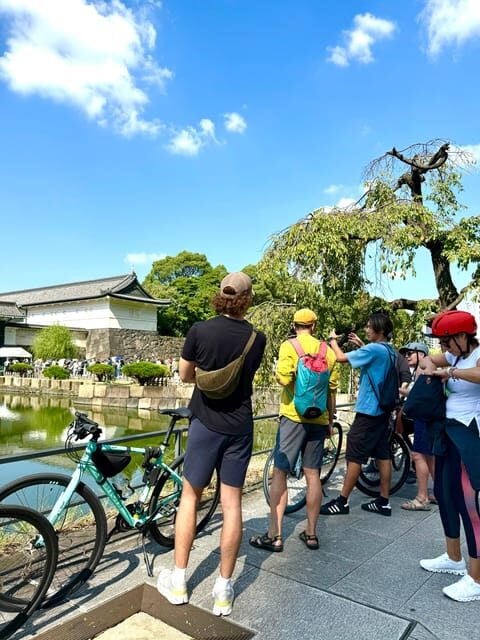
You’ll then ride toward Tokyo Imperial Palace for another photo stop and about 15 minutes of guided time. This is the big “Tokyo center” feel on the route, and the guide’s stories are the part that turns the architecture and grounds into something you can remember.
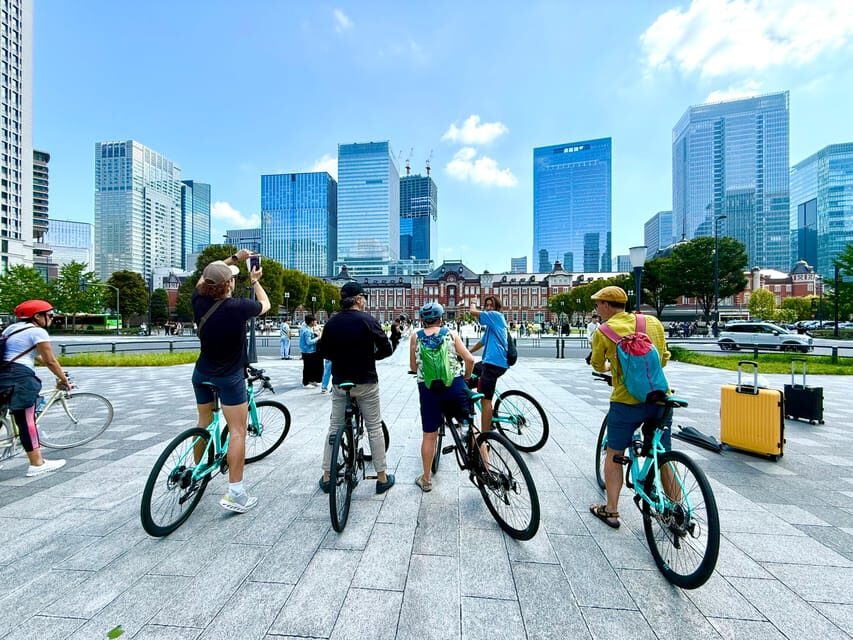
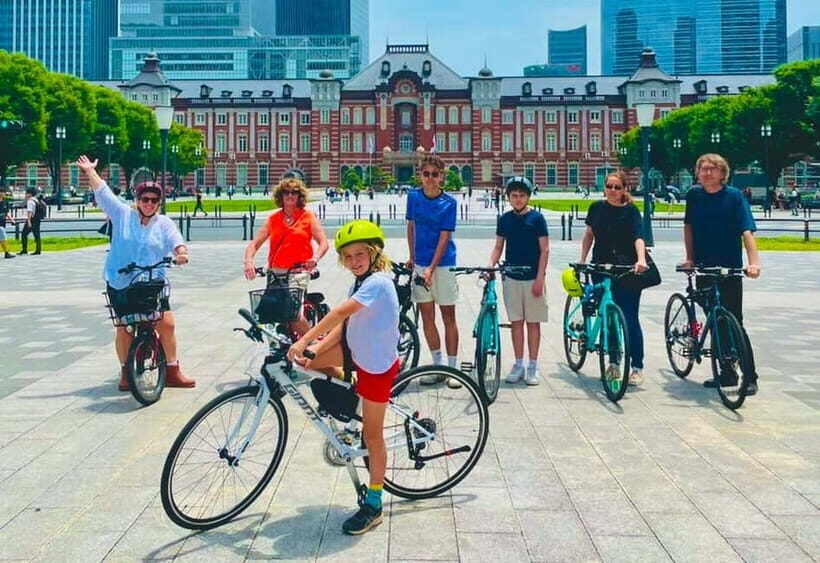
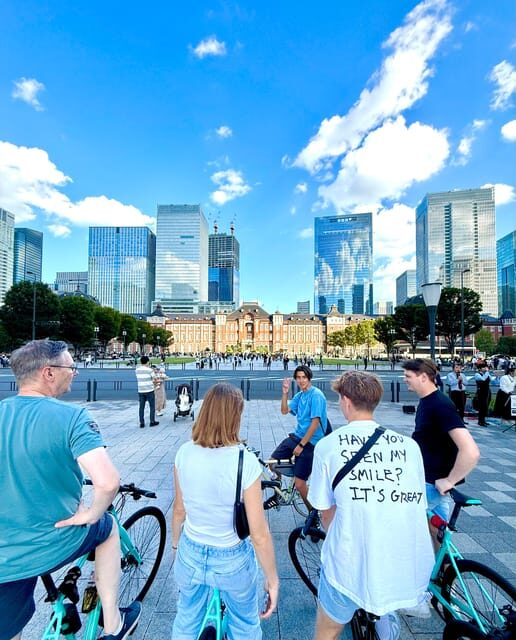
After that comes the Tokyo Station area: a 10-minute stop that’s mostly for photos and seeing the station precinct up close. It’s a classic “Tokyo postcard” moment, but it also helps you visually map where key districts connect.
A short hop follows with Ōte-mon Gate for a 5-minute photo stop and visit. That quick stop matters because it breaks up the longer riding segments and gives you a clear sense of progress.
Chidorigafuchi and Akasaka: park break time plus palace-area street scenes
You’ll reach Chidorigafuchi next, with break time plus a 5-minute photo stop/visit. The break is underrated. On a 3-hour tour, you want little pauses that prevent the “I’m fine…until I’m not” feeling.
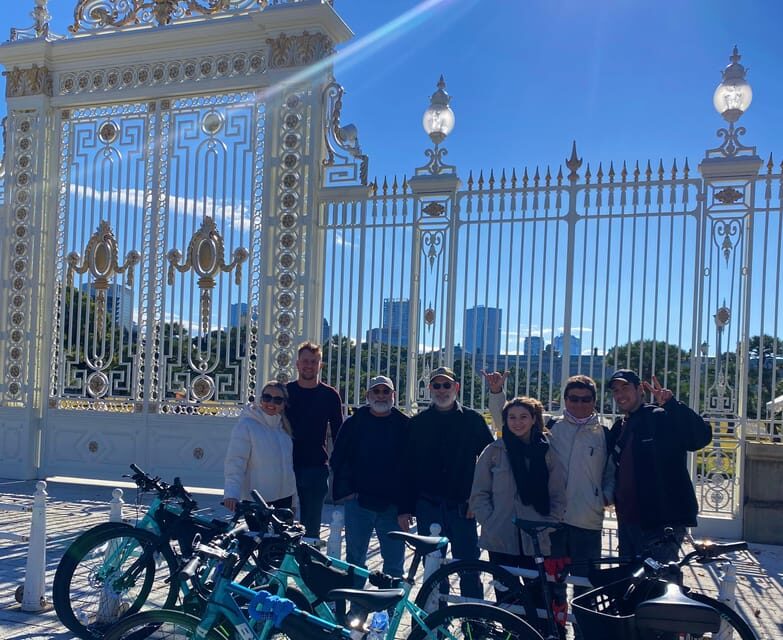
Then you head into the palace-area neighborhood vibe with State Guest House Akasaka Palace for a 10-minute photo stop. This is more about seeing the setting than a long walkthrough. You get a snapshot without turning the day into a paperwork-and-lines mission.
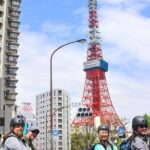
Right after that is New National Stadium for another 10-minute photo stop. Even if you’re not a sports person, this gives your Tokyo map another layer: modern Tokyo landmarks appear as you ride, not only when you stop.
The surprise guided stop: where your guide adds Tokyo flavor
Midway through the route you’ll hit a hidden-in-plain-sight style stop described as a “hidden gem” on the route timing, with about 15 minutes of guided touring. Since it’s guided, the value is not just the place name—it’s why the guide chooses it and what you’re meant to notice.
This kind of stop is where the tour often feels most personal. A guide can point out the small details you would miss alone, especially in a city where every block can look “important” if you don’t know what to look for.
If you’re the sort of traveler who likes photos but also likes meaning, this is the part you’ll feel most grateful you paid for.
You can also read our reviews of more city tours in Tokyo


Aoyama to Shibuya Crossing: cathedral streets, Cat Street culture, and big-city energy
From the surprise stop, the route shifts into Aoyama and shopping culture.
You’ll see Aoyama St. Grace Cathedral for a short 3-minute photo stop and sightseeing. It’s a quick hit, but it gives you a change of scenery and a different architectural mood than the earlier temple-and-palace areas.
Then there’s Cat Street for about 5 minutes of visiting. This is a classic “walk-and-look” style moment on a bike tour—useful if you want the sense of neighborhood life rather than only landmark monuments.
Next is Shibuya Crossing with about 10 minutes that includes a guided component. This is the big moment most people want. Riding through the area gives you scale—how fast everything moves, how different lanes and pedestrian flows work, and how Shibuya feels like a system, not just a photo spot.
Finally, you’ll stop at Tower Records Shibuya for about 3 minutes of sightseeing, and then the tour finishes at the Bell of Peace.
This closing sequence is a good one for souvenirs and emotions. You end in a place that feels distinctly Tokyo-era—music-culture adjacent—then cap it with a calm finishing point.
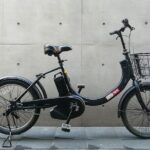
Bianchi cross bikes vs e-bikes: choose based on your comfort, not your pride
You’ll ride either high-quality cross bikes (Bianchi, with other models mentioned such as Fuji) or an e-bike depending on what you select. The bike quality matters. A stable, well-fitted bike makes the ride easier and helps you focus on the sights, not on fighting your equipment.
Here’s how I’d choose:
- If you cycle often and you’re comfortable riding in cities, the regular bike may feel totally manageable for a 3-hour route.
- If you don’t ride much, or if hills and stamina are a concern, take the e-bike. The tour explicitly recommends it if you’re not used to cycling or you don’t have much stamina.
Several riders also mention the e-bikes making the ride effortless on tougher stretches. That aligns with the basic logic: you still get movement and freedom, but you’re less likely to turn the tour into a leg workout.
Also, keep expectations realistic. One rider noted an issue with gears slipping on one bike. That’s not a dealbreaker story, but it’s a reminder to check your bike controls right at the start so you can ride confidently.
Safety and traffic: what to expect, and how to feel confident

This tour includes bike insurance, and the guide handles the group rhythm. Most riders report feeling safe, and some specifically mention that traffic was light during their ride. That said, you shouldn’t assume Tokyo streets are always calm.
If you’re riding a standard bike, you might encounter the kind of environment where cars and scooters are close, and where the line between sidewalk and road feels different than in your home city. One rider even said it felt a bit stressful when they understood the road expectations.
My practical advice: don’t “tough it out” just to prove a point. Choose the e-bike if you’re even slightly unsure. And when the guide cues the group, follow that guidance closely—especially near crossings and any areas where the road layout changes.
Price and value: is $45 fair for a 3-hour Tokyo orientation?
At $45 per person for 3 hours, the value is mostly in what’s included: a local English-speaking guide, a high-quality bike, and bike insurance. You’re also provided a small storage pouch for your essentials. In Tokyo, guided time plus reliable equipment can easily cost more than the headline price if you’re trying to assemble it yourself.
You do have a couple of add-ons to budget for:
- Helmets are not included and cost ¥1,000 per unit, paid with cash on site.
- A child seat costs ¥3,000 per unit (and the tour is not suitable for kids under 12 anyway).
So the “value equation” is pretty solid if you want a structured route and you’d rather pay than spend half your trip figuring out logistics.
Also, you save time by not dealing with the stress of planning every turn. Even if you later explore solo, this tour helps you know where things are in relation to each other.
Practical tips to make your ride smoother
A few simple things will help you enjoy the whole 3-hour session without feeling rushed.
Bring:
- Comfortable shoes (you’ll be getting on and off and walking briefly)
- Water
- Comfortable clothes
Expect:
- A mix of photo stops and guided moments, so you won’t spend the entire time pedaling in one long line.
- No smoking and no alcohol or drugs during the activity, and please don’t litter.
One smart, very real tip from recent experience: if rain is possible, consider a poncho. A rider recommended buying one at a Family Mart if the weather turns.
And one more bonus pattern you might like: some riders mention a quick snack stop around convenience-store territory (like 7-Eleven), plus guide recommendations. That’s not guaranteed as a “thing you must get,” but it’s a nice example of how guides keep the group comfortable.
Who this tour is best for (and who should pass)
This works well for:
- First-time visitors who want a fast, guided orientation across classic and modern Tokyo
- People who want a mix of landmarks plus some smaller street-level scenes
- Groups who prefer a small-group vibe; the tour offers private or small groups
You should think twice or choose the e-bike option if:
- You’re not confident riding in traffic
- You want minimal effort for stamina reasons
- You have back issues or any mobility concerns
And it’s not suitable for:
- Children under 12
- Pregnant women
- People with back problems
- People who can’t ride a bike
Should you book this Tokyo highlights bike or e-bike tour?
I’d book it if you want the smartest way to spend a limited number of hours in Tokyo. This tour gives you structure, equipment, and human context—the guide’s stories are a big part of the point, not just the ride.
Skip it if you hate the idea of cycling on city streets or you’re looking for a slow, deep museum-style experience. This is fast-moving sightseeing by bike. When that fits your travel style, it’s excellent.
If you’re coming early in your trip, even better. You’ll use the route as a mental map for the rest of your Tokyo days.
FAQ
Where does the tour meet?
You meet your guide around the Statue of Commodore Perry, about a 3-minute walk from Daimon Station (A6 exit).
How long is the Tokyo bike highlights tour?
It lasts about 3 hours.
What kind of bikes are included?
You’ll ride a high-quality cross bike (Bianchi, and Fuji models are mentioned) or an e-bike, depending on the option you choose.
Are helmets included?
No. Helmets are available on site for an extra fee of ¥1,000 per unit (cash).
Is there an e-bike option?
Yes. Choose the e-bike option if you’re not comfortable riding long distances or you don’t have much stamina.
What’s included in the price?
A friendly English-speaking guide, your bike (bike or e-bike), local stories and insights, a mini pouch on the bike for small items, and bike insurance.
What should I bring and avoid?
Bring comfortable shoes, water, and comfortable clothes. Smoking, alcohol/drugs, and littering are not allowed.